How to Build Scalable Document Signing by Integrating BoldSign with .NET Aspire
 Pavle Davitkovic
TL;DR: You can run a document signing service as part of a .NET (Microsoft’s developer platform) Aspire app. A Blazor page calls a small API service, and that service sends a PDF for signing through our eSignature API. Aspire starts both projects, links them and shows them on one dashboard.
Your team is building an app with a web frontend and a backend service. Contracts need to go out for signature from that app, and each part has to find the other in every environment.
This guide covers what .NET Aspire does, then builds a working sample. A button in a Blazor app sends a document, and the signer gets an email to sign it.
What is .NET Aspire?
.NET Aspire is a set of Microsoft tools for building distributed apps in .NET. A distributed app has parts that run on different servers and talk over a network.
Think of a stage manager in a theatre. The actors, lights and sound each do their own job, and the stage manager makes sure they start in the right order. Aspire does that job for the services in your app.
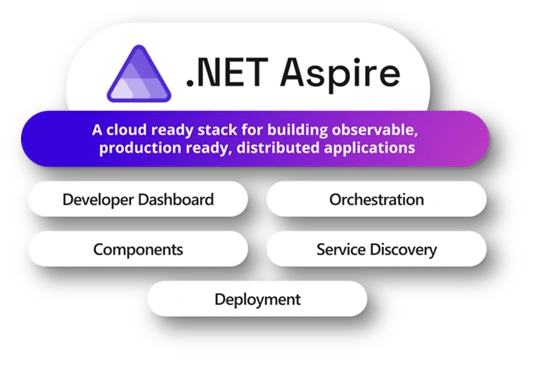
Aspire helps in three areas: orchestration, integrations and tooling. The next three parts explain each one.
What does orchestration do in .NET Aspire?
Orchestration starts the parts of your app and connects them. Aspire runs your services the same way on your laptop and in the cloud.
With orchestration, your app can do the following:
- Run several services together, both locally and in the cloud.
- Let services find each other through service discovery.
- Connect microservices without large code changes.
- Send telemetry to OpenTelemetry so you can watch and scale each service.
Microsoft’s orchestration overview has the full details.
Which integrations does .NET Aspire include?
Integrations connect your app to the services it depends on. Aspire offers ready-made libraries and settings for common ones.
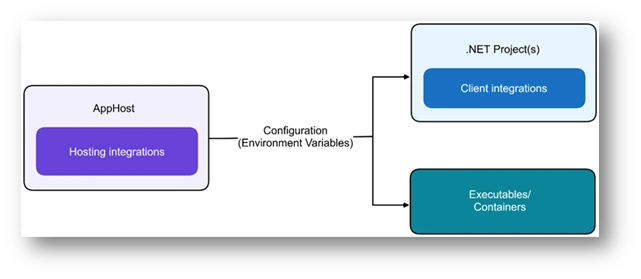
Aspire has integrations for:
- Structured Query Language (SQL) databases such as SQL Server.
- Message queues such as RabbitMQ.
- Container tools such as Docker or Podman.
- Health checks, observability and dependency injection (DI) patterns.
The integrations overview lists them all.
What tooling comes with .NET Aspire?
Aspire works with Visual Studio and the .NET command-line interface (CLI). Both offer project templates with common parts already wired up.
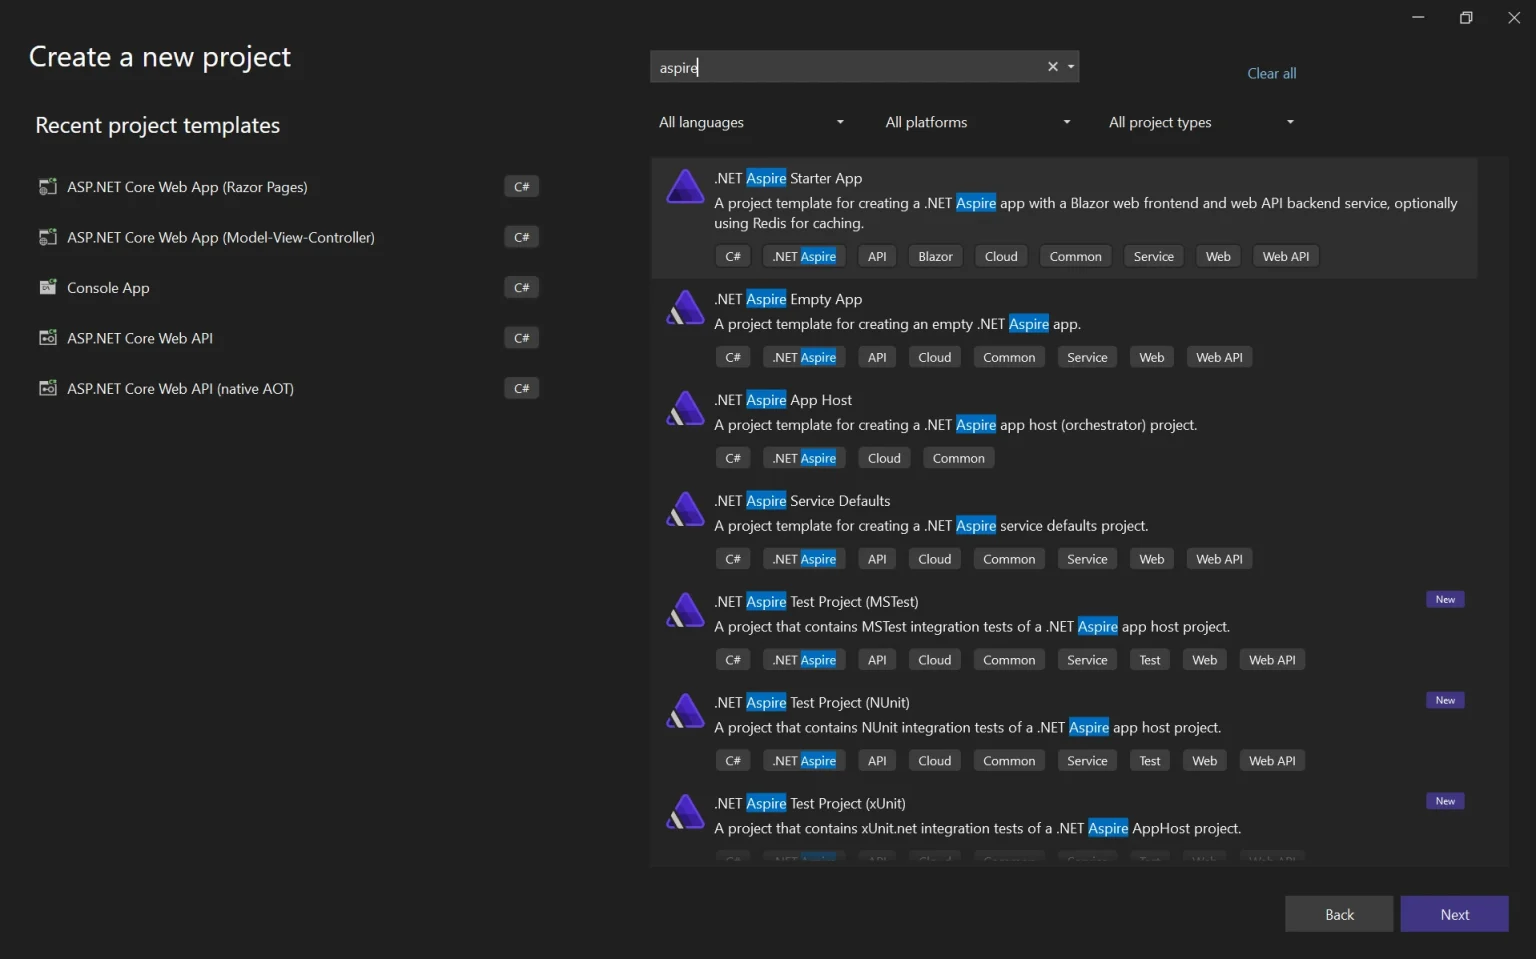
The tooling includes:
- Project templates for apps, APIs and services, from empty setups to full starter apps.
- CLI commands such as
dotnet new aspireto create and manage projects. - Visual Studio support for adding Aspire parts through menus.
- Support for running projects inside Docker or Podman containers.
See the tooling overview for every template.
What do you need before you start?
You need the .NET software, an editor, a container runtime and a BoldSign account. The sample in this guide was built with .NET 8.
- The .NET 8 software
- The editor Visual Studio 2022 or Rider
- Either Docker or Podman as the container runtime
- A free API sandbox account to send test documents
The sample has a Blazor web app as the frontend and a minimal API as the backend. Aspire adds a host project and a shared settings project.
Which .NET Aspire template should you pick?
Pick the Starter Application when you begin from scratch. It already contains a frontend, an API service and the Aspire projects.
Other templates suit other cases:
- .NET Aspire App Host: adds orchestration to an app you already run.
- .NET Aspire Service Defaults: shares settings across projects.
- .NET Aspire Empty App: starts with only the Aspire projects.
Microsoft’s tooling overview explains each template. This guide uses the Starter Application and explains the code along the way.
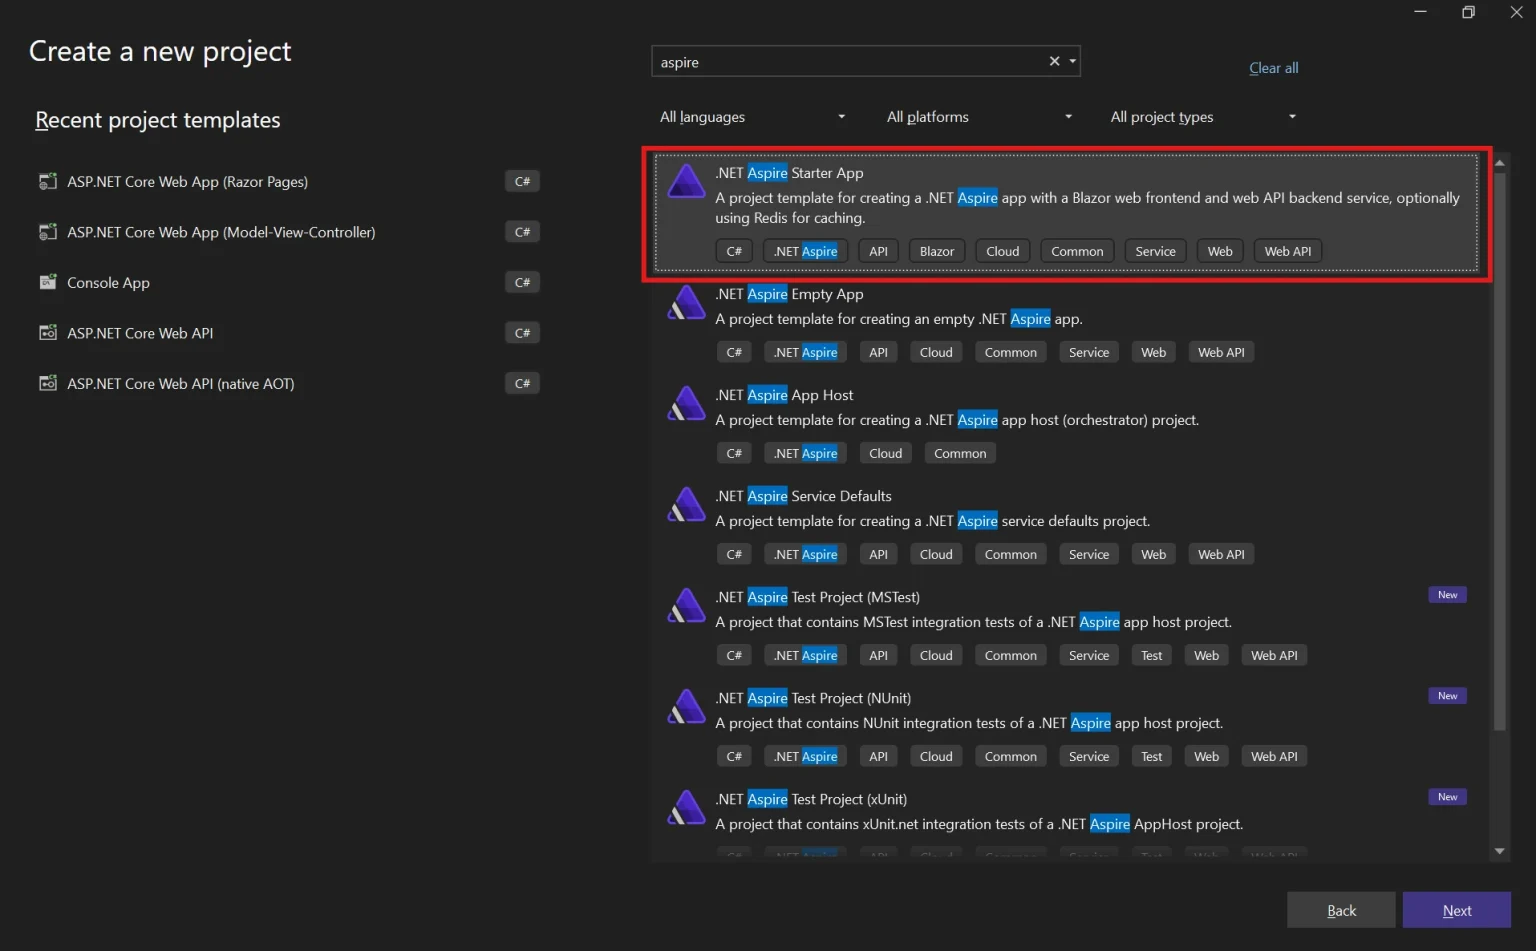
How do you create a .NET Aspire starter app?
Create it from the Starter App template in Visual Studio 2022. Rider works too, with the same template.
- Open Visual Studio and select .NET Aspire Starter App.
- Name the project and choose where to store it.
- Choose the target framework and keep Configure for HTTPS selected, for Hypertext Transfer Protocol Secure (HTTPS).
- Leave caching and testing off for now.
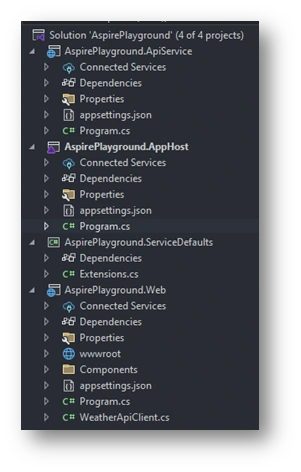
After setup, the solution holds four projects:
- ApiService: the minimal API project.
- AppHost: the orchestrator that connects and configures the other projects.
- ServiceDefaults: a shared project for settings that every project reuses.
- Web: the Blazor app project.
How does the AppHost connect the projects?
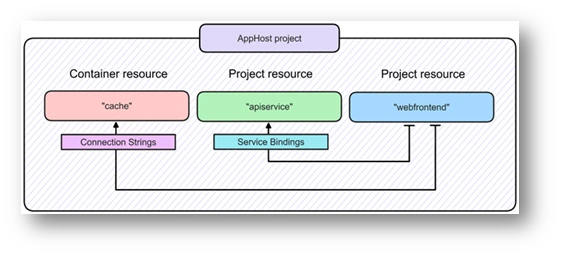
The Program.cs file in the AppHost project adds each project and links them. The web frontend gets a reference to the API service and waits for it to start.
var builder = DistributedApplication.CreateBuilder(args);
var apiService = builder.AddProject<Projects.AspireApp1_ApiService>("apiservice");
builder.AddProject<Projects.AspireApp1_Web>("webfrontend")
    .WithExternalHttpEndpoints()
    .WithReference(apiService)
    .WaitFor(apiService);
builder.Build().Run();
Three Aspire terms come up in the rest of this guide:
- App model: the set of resources that make up a distributed app.
- Resource: one part of the app, such as a project, container or executable.
- Reference: a link between resources, set with the
WithReferencemethod.
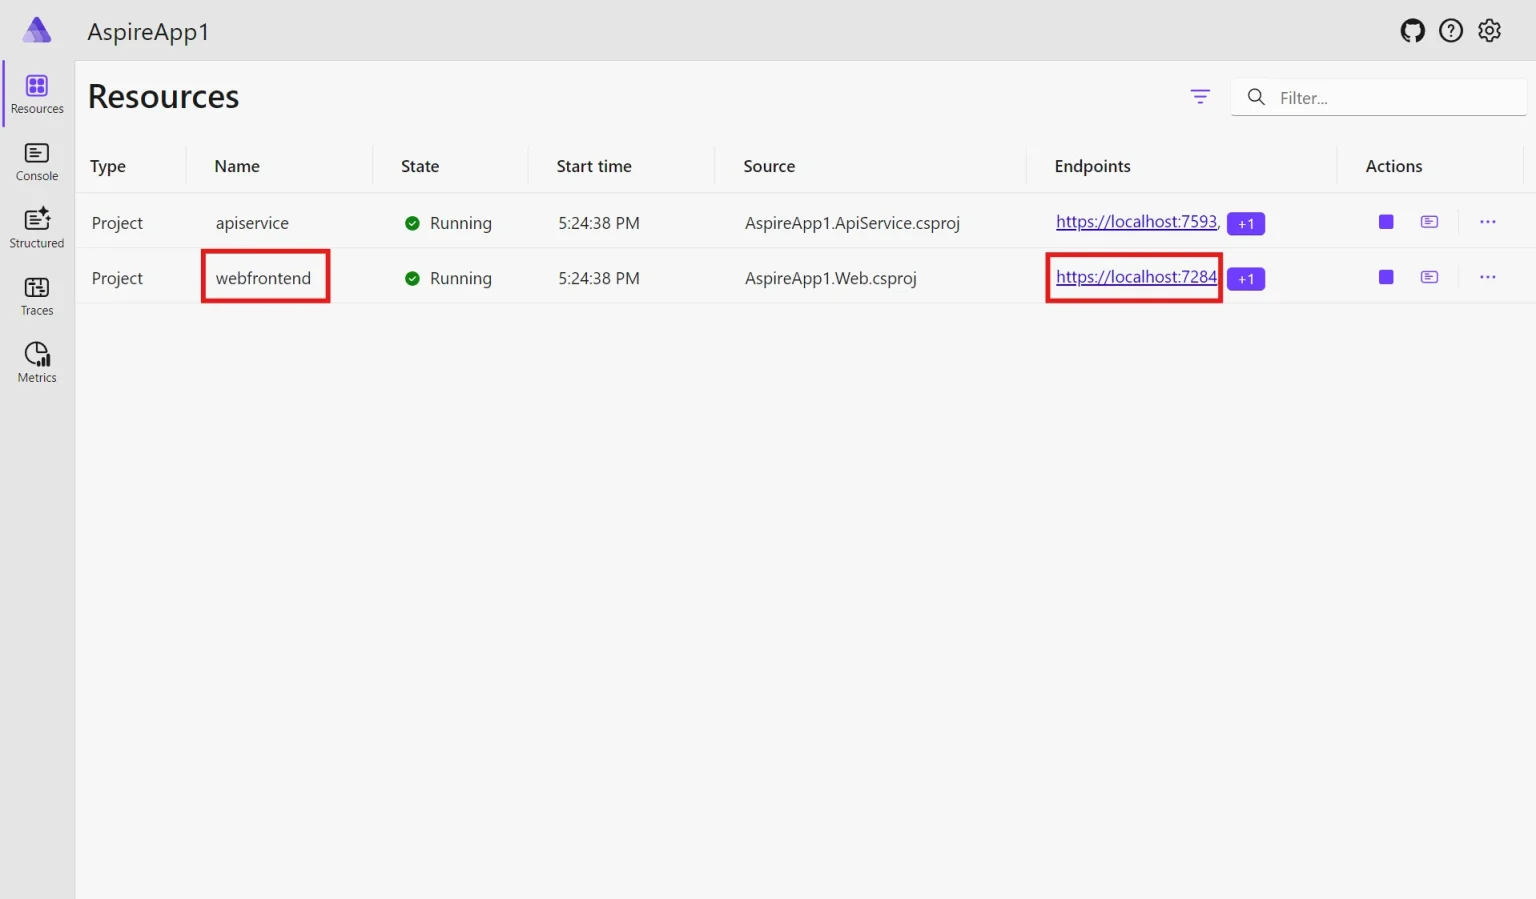
Run the app now. You should see a dashboard like this one.
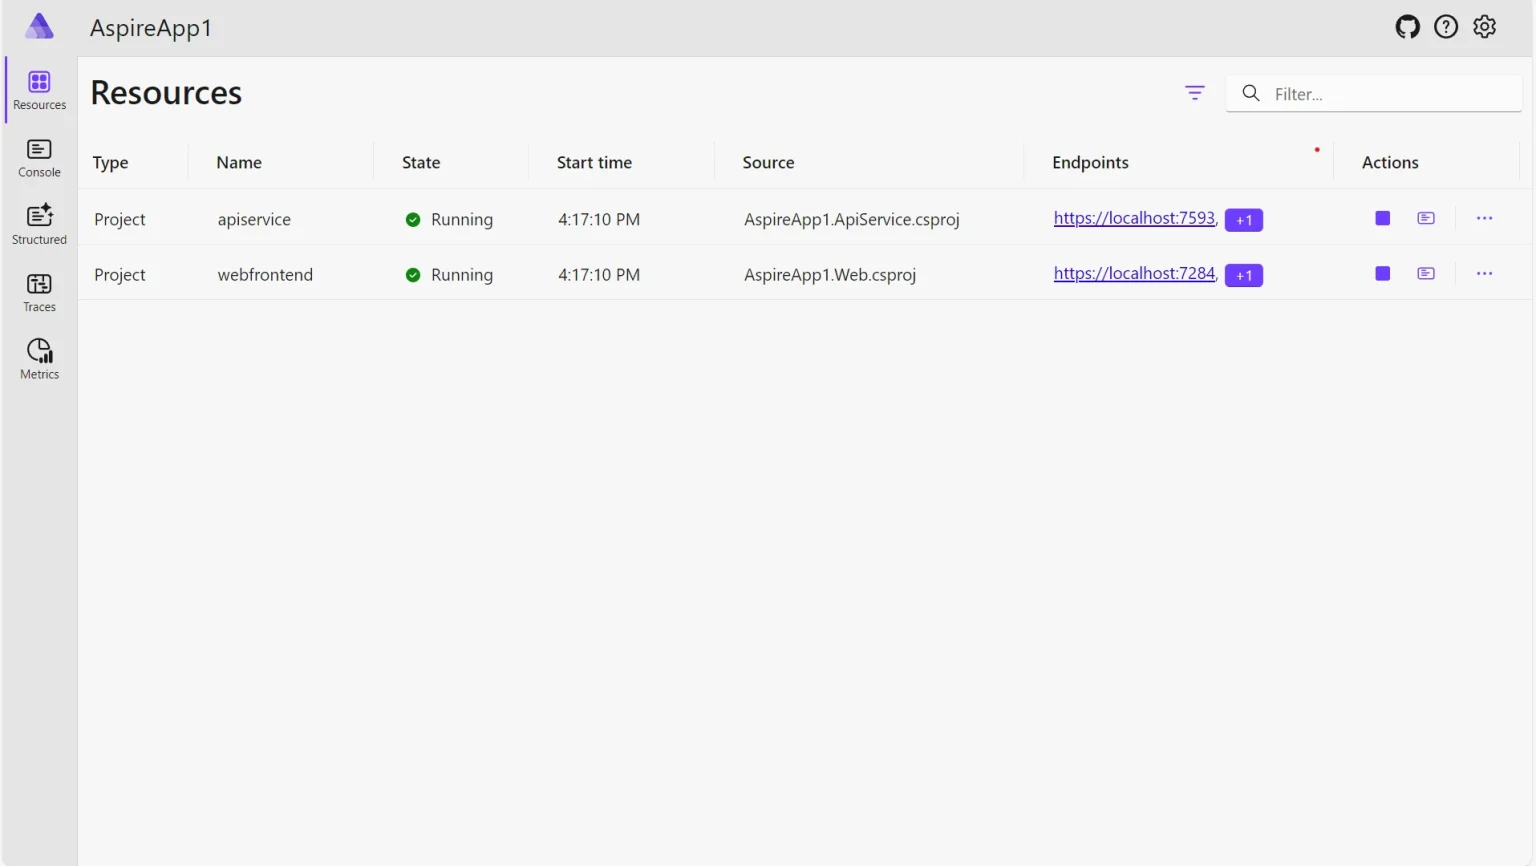
The dashboard overview explains each panel. Your first Aspire app is running, so the next step is signing.
How does the BoldSign API fit into the app?
The API service sends documents for signing through our eSignature API. The signer then gets an email and signs in the browser.
We’re an eSignature platform from Syncfusion. Our software development kit (SDK) lets developers add signing to their own apps.
Picture a company that hires remote staff in many countries. Each new hire signs a contract and a policy acknowledgment. Posting paper takes days, so the app sends each one from code instead.
How do you get a BoldSign API key?
Generate the key in the BoldSign web app. Your API service sends it with each request to prove who is calling.
- Sign in to your free API sandbox account.
- Open the API menu and select API Key.
- Select Generate API Key.
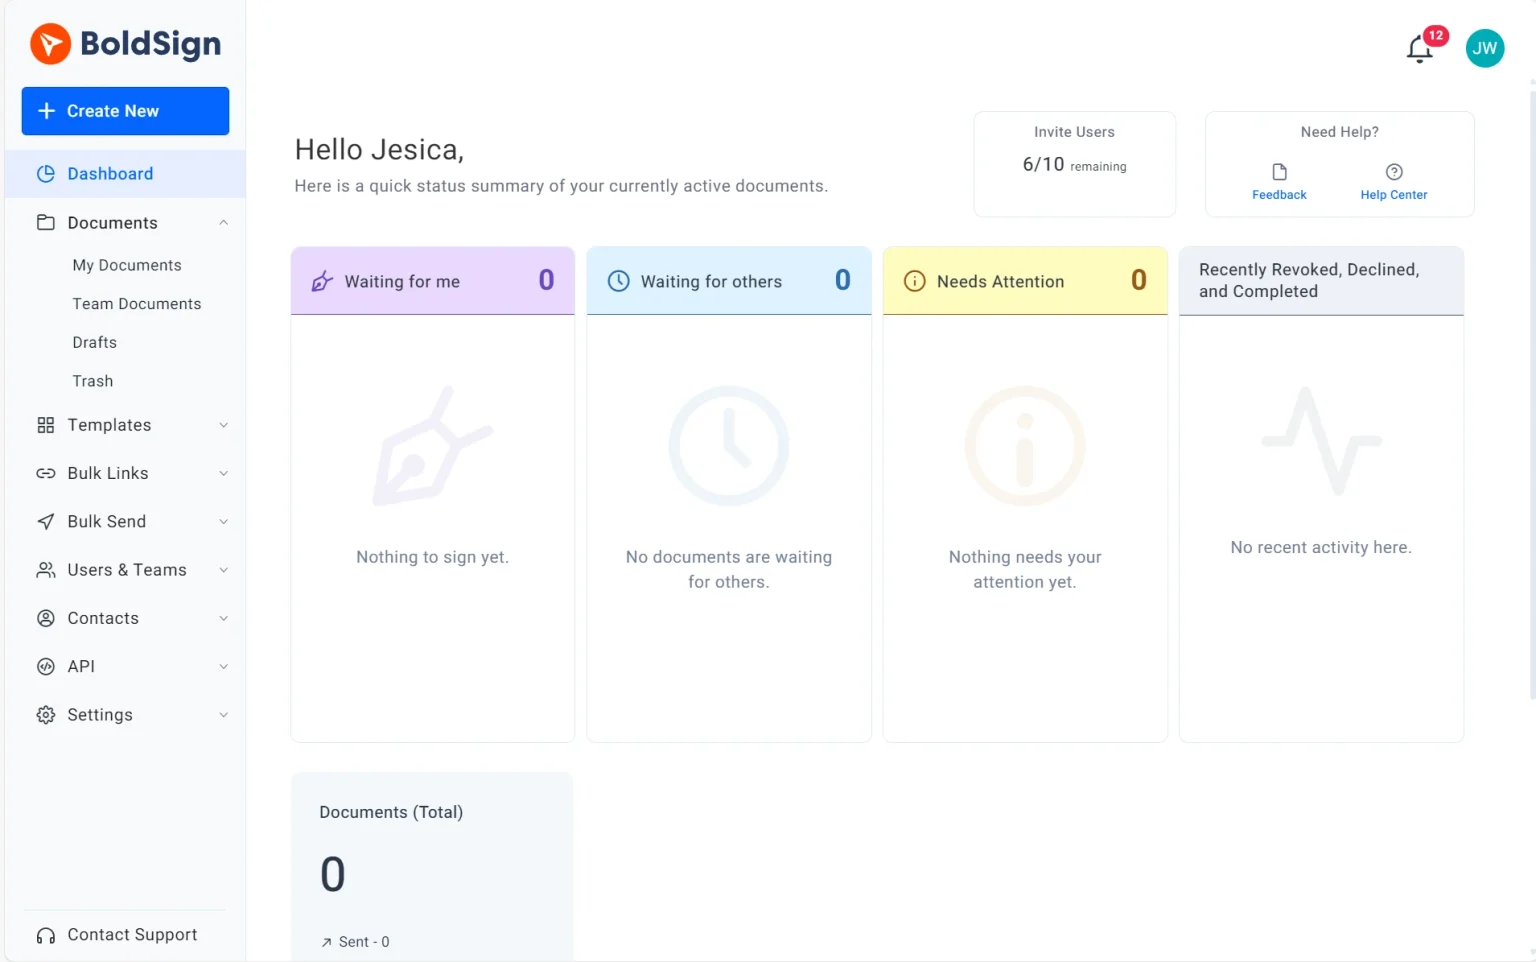
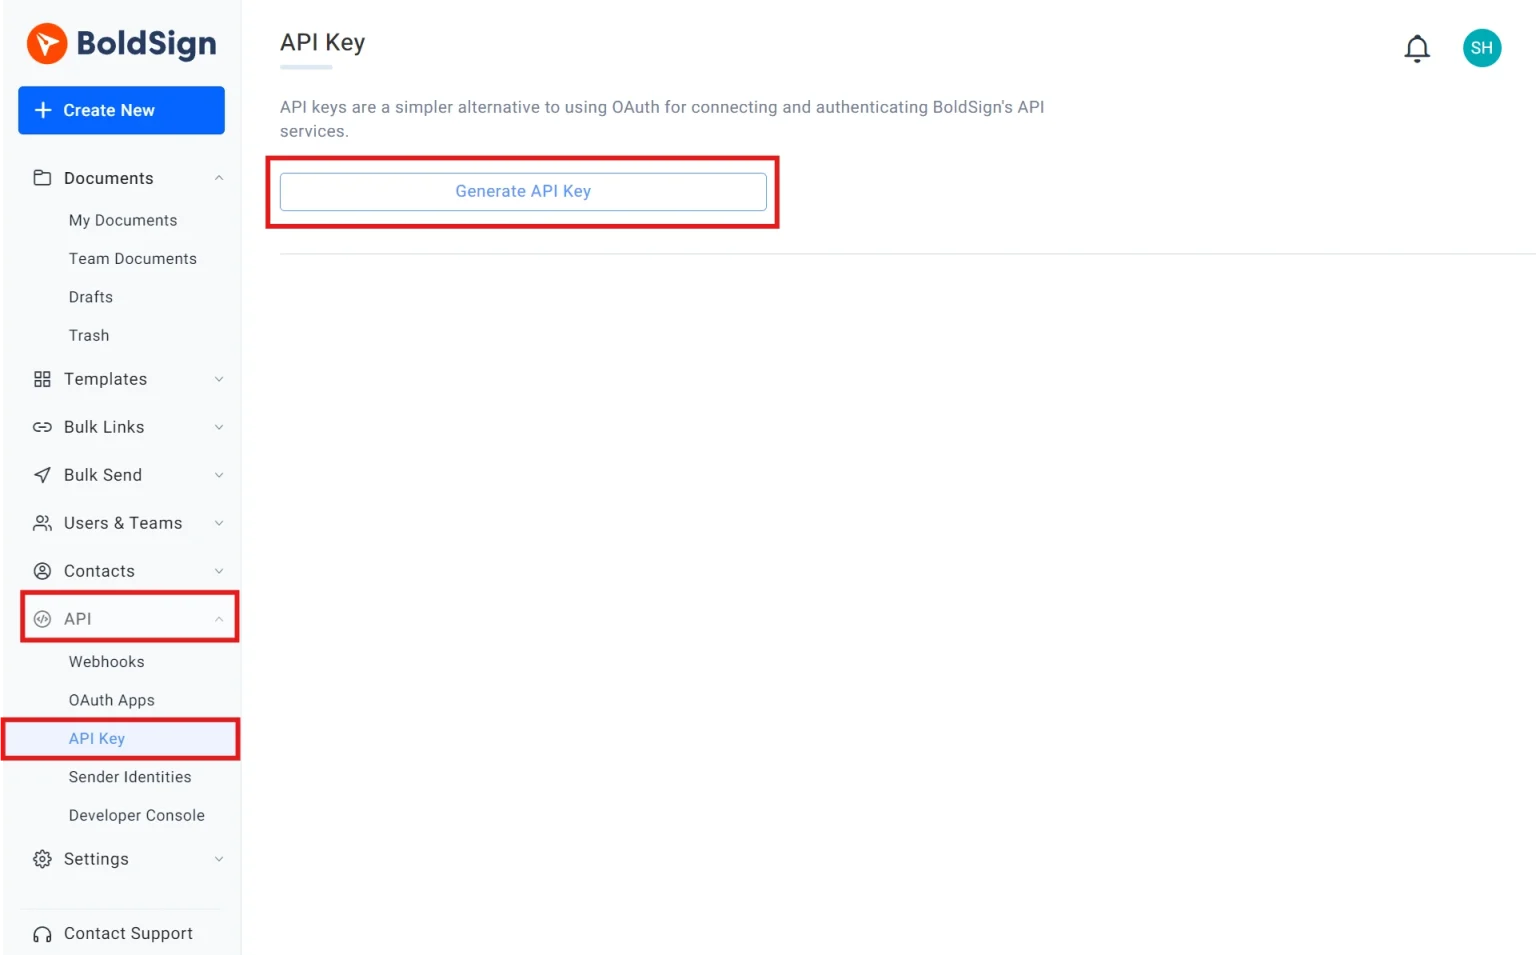
In the dialog, name the key and turn on Token Validity to set an expiry date. Then select Generate Token and copy the key somewhere safe.

You can keep up to four keys at a time, as our API key guide explains.
How do you set up the Blazor frontend?
The frontend has one page with a button. The button calls the API service and shows the ID of the sent document.
- Open the Web project.
- In the Components folder, open Layout, then NavMenu.razor.
- Remove every navigation item except Home.
<div class="top-row ps-3 navbar navbar-dark">
<div class="container-fluid">
<a class="navbar-brand" href="">AspireApp1</a>
</div>
</div>
<input type="checkbox" title="Navigation menu" class="navbar-toggler" />
<div class="nav-scrollable" onclick="document.querySelector('.navbar-toggler').click()">
<nav class="nav flex-column">
<div class="nav-item px-3">
<NavLink class="nav-link" href="" Match="NavLinkMatch.All">
<span class="bi bi-house-door-fill" aria-hidden="true"></span> Home
</NavLink>
</div>
</nav>
</div>
Next, open Pages, then Home.razor, and add this code.
@page "/"
@rendermode InteractiveServer
<PageTitle>Home</PageTitle>
<button class="btn btn-primary" @onclick="SendDocument">Send document</button>
<p>@DocumentText</p>
@code {
    private string DocumentText = string.Empty;
    [Inject]
    private BoldSignApiClient Client { get; set; }
    private async Task SendDocument()
    {
        CancellationToken cancellationToken = new();
        string documentId = await Client.GetDocumentId(cancellationToken);
        DocumentText = $"Document with Id: {documentId} Sent";
    }
}
Then remove every page in that folder except Home and Error.
How do you add the signing endpoint to the API service?
Replace the sample endpoint in the API service with one that sends a document. Install the BoldSign.Api NuGet package first.
- Open
Program.csin the ApiService project. - Remove the sample weather endpoint and its code.
- Install the BoldSign.Api NuGet package.

Now add the new endpoint.
app.MapGet("/sign-document", async () =>
{
    ApiClient client = new("https://api.boldsign.com", "Your_API_Key");
    DocumentClient documentClient = new(client);
    DocumentFilePath documentFilePath = new()
    {
        ContentType = "application/pdf",
        FilePath = "Your File Path"
    };
    FormField signatureField = new(
        id : "signature",
        isRequired: true,
        type: FieldType.Signature,
        pageNumber: 1,
        bounds: new Rectangle(550, 900, 150, 50));
    List<FormField> formFields = [signatureField];
    DocumentSigner signer = new()
    {
        EmailAddress = "alex@example.com",
        Name = "Alex",
        FormFields = formFields
    };
    SendForSign sendForSign = new()
    {
        Message = "Please sign this document",
        Title = "Freelance Contract",
        Signers = [signer],
        Files = [documentFilePath]
    };
    var response = await documentClient.SendDocumentAsync(sendForSign);
    return response.DocumentId;
});
What does the endpoint code do?
The endpoint builds a signing request and sends it. Put your own API key and file path in place of the two placeholders.
ApiClientholds the API address and your API key.DocumentClientsends the request.DocumentFilePathpoints to the PDF to sign.FormFieldplaces a signature box on page 1.DocumentSignernames the signer, andSendForSignreturns the document ID.
How do you connect the frontend to the endpoint?
Add a small client class to the web project and register it. The Home page button then calls it.
In the web project, remove WeatherApiClient and add BoldSignApiClient.
public class BoldSignApiClient(HttpClient httpClient)
{
    public async Task<string> GetDocumentId(CancellationToken cancellationToken)
    {
        var result = await httpClient.GetStringAsync("/sign-document", cancellationToken);
        return result ?? string.Empty;
    }
}
Then register the client in the DI container in the web project’s Program.cs.
builder.Services.AddHttpClient<BoldSignApiClient>(client =>
{
    // This URL uses "https+http://" to indicate HTTPS is preferred over HTTP.
    // Learn more about service discovery scheme resolution at https://aka.ms/dotnet/sdschemes.
    client.BaseAddress = new("https+http://apiservice");
});
The apiservice name matches the name in the AppHost, so service discovery finds the right address. The Home page code calls the client when someone selects the button.
private string DocumentText = string.Empty;
[Inject]
private BoldSignApiClient Client { get; set; }
private async Task SendDocument()
{
    CancellationToken cancellationToken = new();
    string documentId = await Client.GetDocumentId(cancellationToken);
    DocumentText = $"Document with Id: {documentId} Sent";
}
How do you test the signing flow?
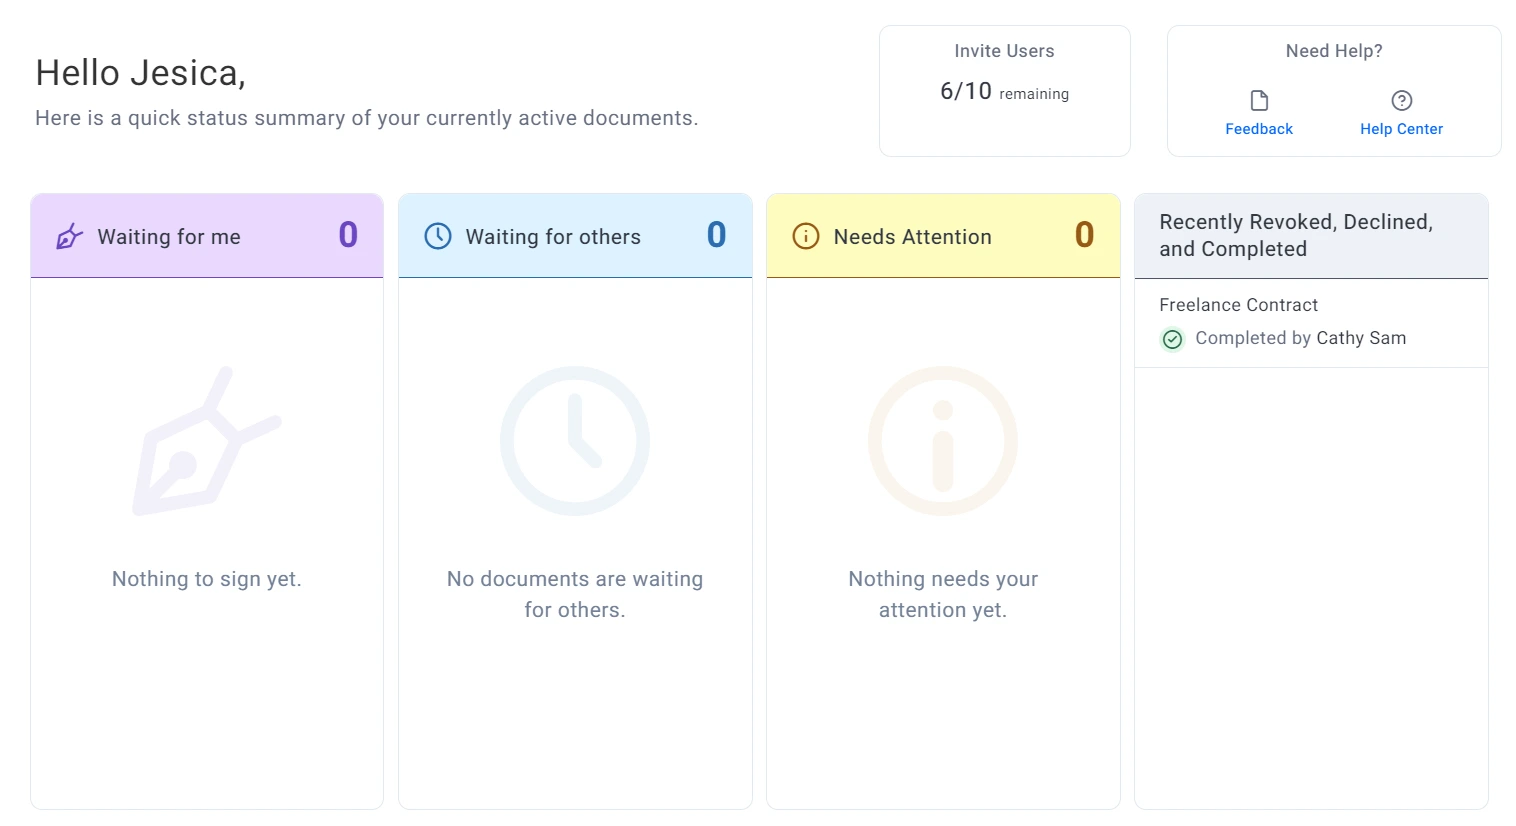
Run the app, select the button and sign the email that arrives. The finished document then shows on your BoldSign dashboard.
- Run the app and find the webfrontend project on the Aspire dashboard.
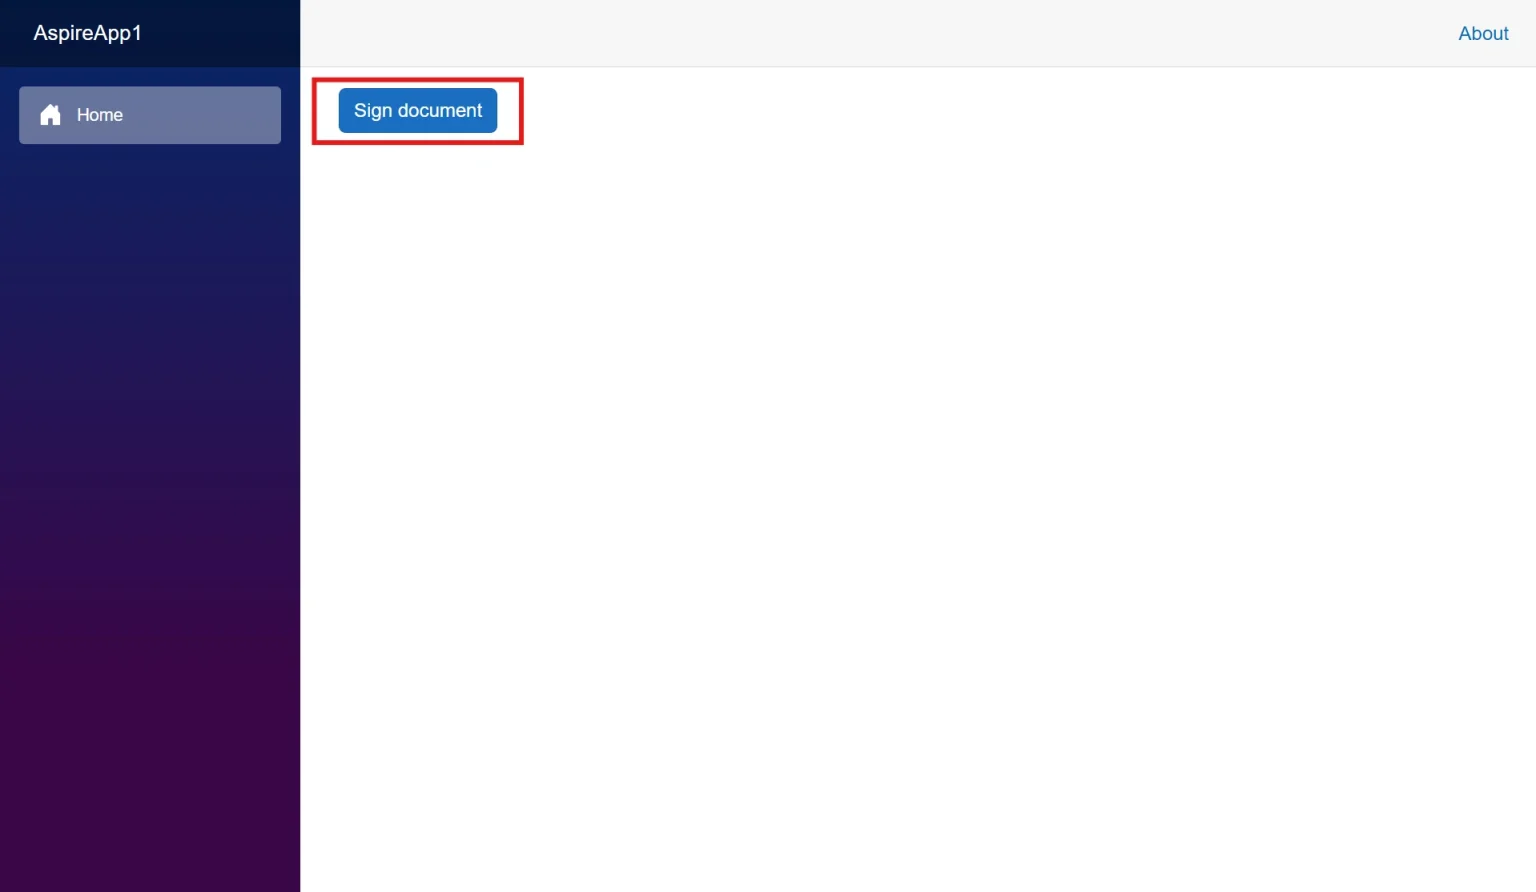
- Open the app and select Send document.
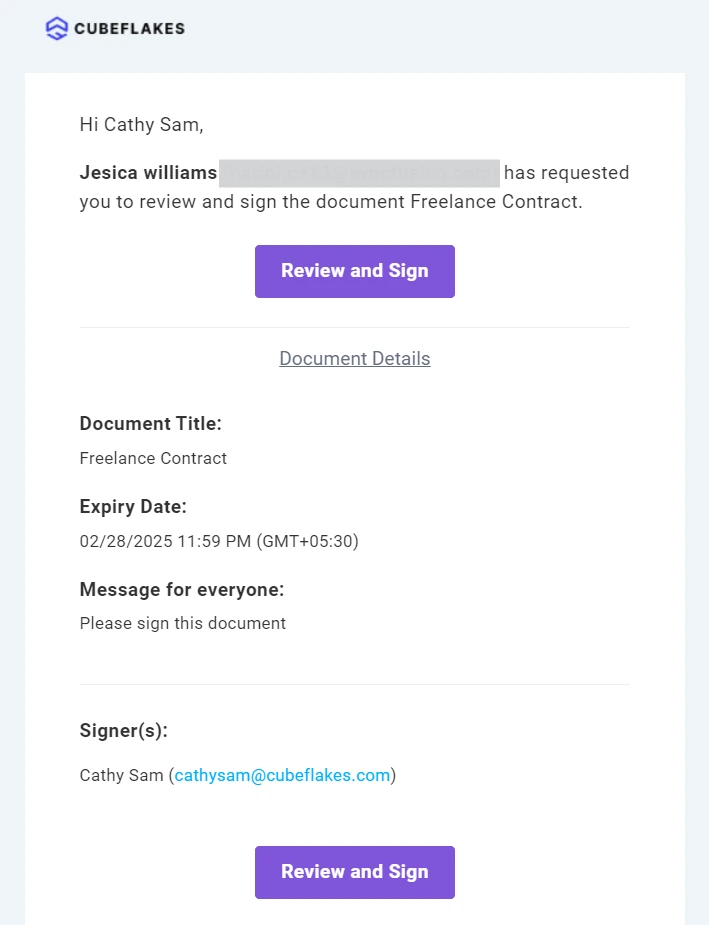
- Open the signing email sent to the address in the endpoint code.
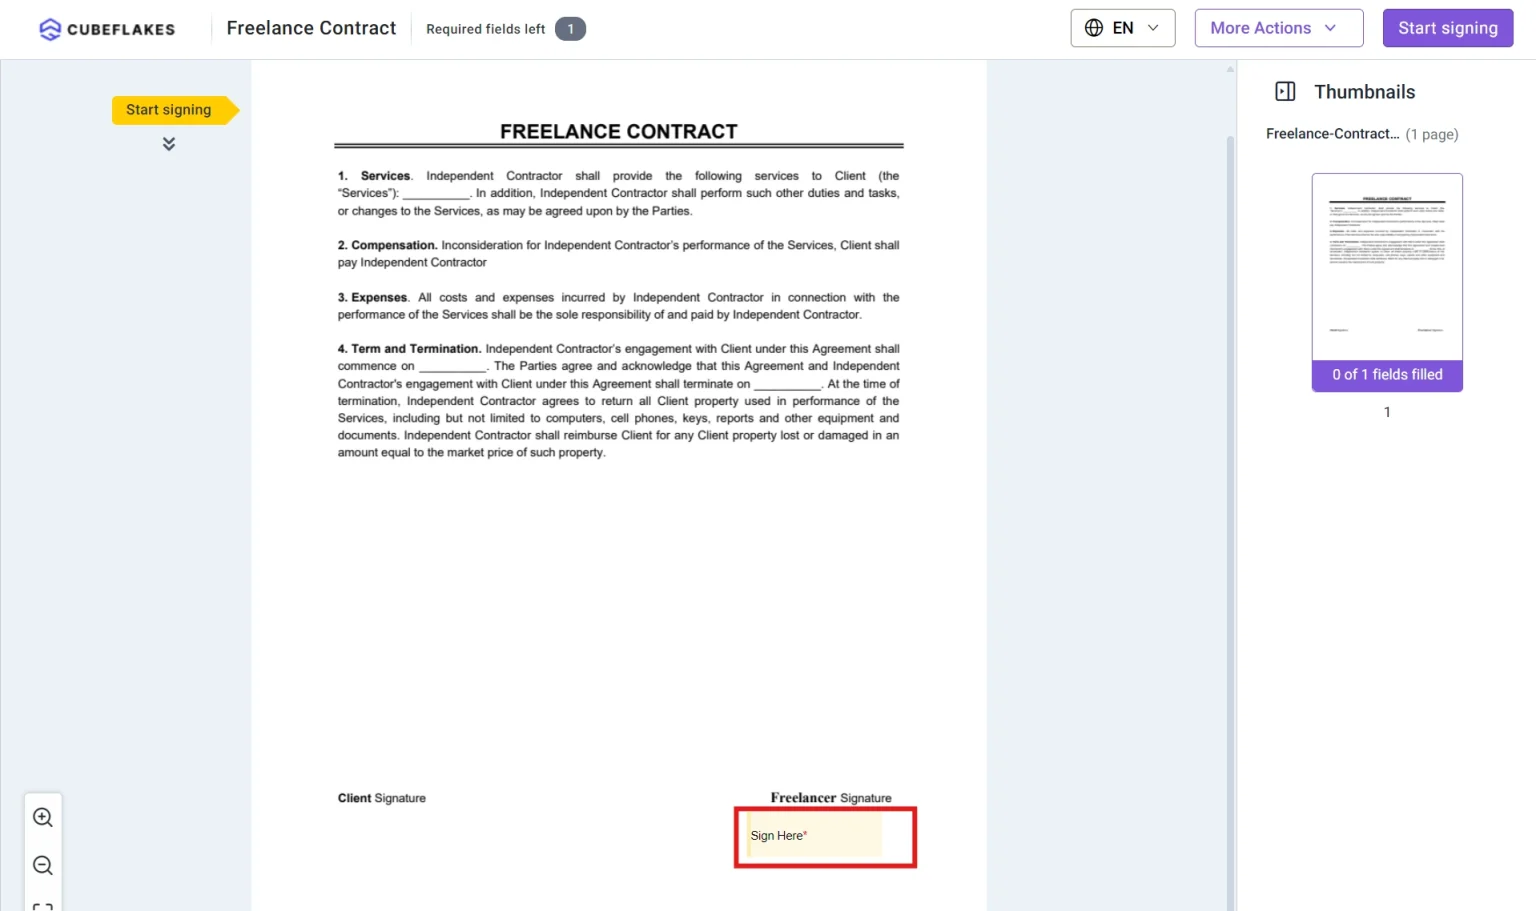
- Follow its link, add your signature in the signature box and finish.
Check the BoldSign dashboard last. The document should show as completed.
Why build document signing with .NET Aspire?
Aspire keeps the frontend, the API service and their links in one place. You can add more services later without rewriting how they connect.
Your API key stays in the API service, away from the browser. As volume grows, you scale the API service on its own while we handle sending and signing.
Which BoldSign API plan do you need, and what does it cost?
Live API requests need the Enterprise API plan, from $30 a month with 40 envelopes, as listed on the BoldSign pricing page in November 2026. Each extra envelope costs $0.75, and prices are in USD.
The plan also covers webhooks and embedded signing. To build and test first, use the free sandbox. It needs no credit card, and its documents carry a test watermark and are deleted after 14 days.
Where do you go next with your .NET Aspire app?
Send a test document from the sandbox first, then add webhooks so your app knows when each document is signed.
- Create a free API sandbox account and send your first document.
- Book a demo to talk through your integration with our team.
- Read how to embed eSignature workflows in a .NET app.
Frequently asked questions
What is .NET Aspire used for?
Developers use .NET Aspire to build apps made of several services that run together. It starts the services, connects them and shows their status on one dashboard.
Do I need .NET Aspire to use the BoldSign API?
No. Any .NET app can call our API through the BoldSign.Api package. Aspire only helps you run the frontend and the API service as one app.
Which NuGet package do I install for the BoldSign API in C#?
Install BoldSign.Api from NuGet. It gives you an ApiClient for your API key and a DocumentClient that sends documents for signing.
Where do I find my BoldSign API key?
Open the API menu in the BoldSign web app, select API Key, then select Generate API Key. You can keep up to four keys at a time.
Can I test the BoldSign API for free?
Yes. Our free API sandbox needs no credit card. Its documents carry a test watermark and are deleted after 14 days.
Why does the Blazor app call the API service instead of BoldSign directly?
Your API key stays on the server that way, out of the browser. The frontend asks the API service for a document, and the service talks to us.
How does the web project find the API service in .NET Aspire?
Service discovery resolves the name apiservice to the right address. The AppHost links the two projects with WithReference, so the web project needs no fixed URL.
How do I check that the document was signed?
Open the BoldSign dashboard and look for the document under completed documents. In a live app, webhooks can tell your code the moment a signer finishes.

Pavle Davitkovic
Pavle Davitkovic is a software engineer with over 5 years of experience. He has developed various types of applications, from web to mobile. Pavle has a passion for books and martial arts.
More posts by Pavle Davitkovic