Add eSignatures to Your Insurance Claim App with .NET
 Sahaya Sweetlin Ponmalar P
TL;DR: You can add eSignatures to an insurance claim app built with .NET (pronounced dot net) in four steps. Create a brand, build a claim form template, prefill it from your app’s form, and load the signing page in an iframe. Our embedded signing page shows what else you can embed.
A customer files a claim after a car accident. Your app collects the policy number, the claim type and their contact details. Then the customer still has to print a form, sign it and send it back.
Signing inside your app removes that last step. This guide builds a claim app for Cubeflakes, a made-up insurer, with .NET and the BoldSign API.
What do you need before you start?
You need a BoldSign account and an API key. Create a free API sandbox account to build and test without paying.
Your key lives on the API Key page of the web app. Our API key guide explains how to generate one.
How do you set up the insurer’s brand?
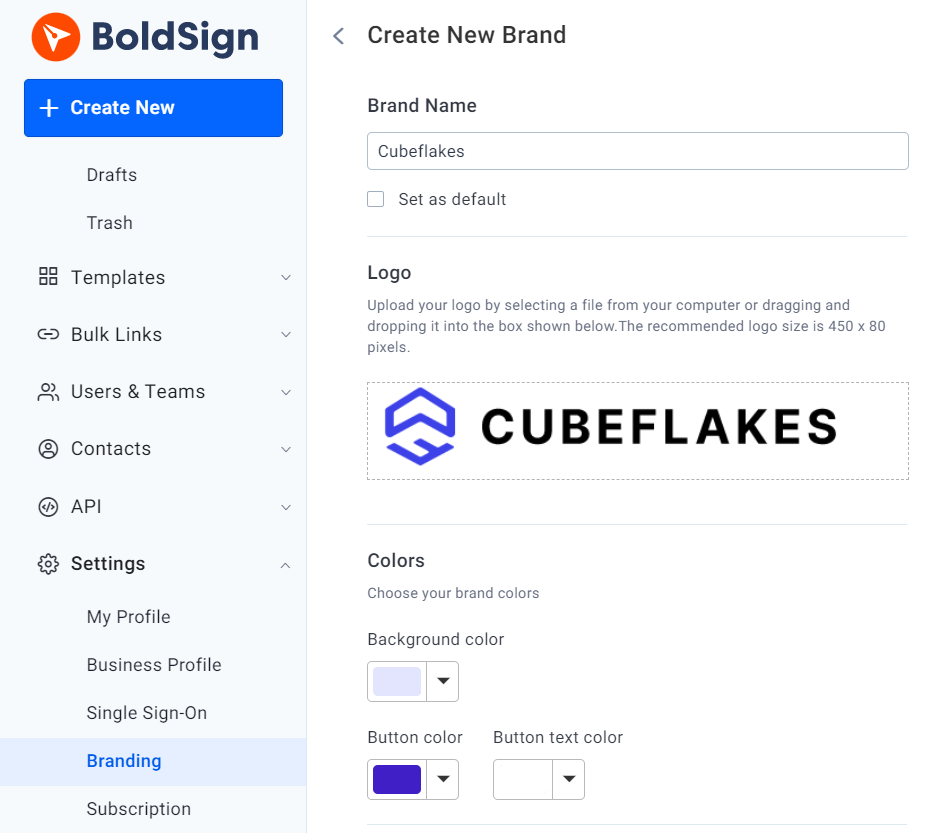
A brand gives each signing email and page the insurer’s own name, logo and colors. Customers then see Cubeflakes, not us, while they sign.
Create the brand with the API or in the BoldSign web app. Copy the brand ID when you finish, because the template needs it.
How do you build the claim form template?
A template is the claim form saved once, with its fields already placed. Think of a blank paper form at the front desk: you copy it for each customer instead of drawing it again.
Create the template with the API or in the web app.
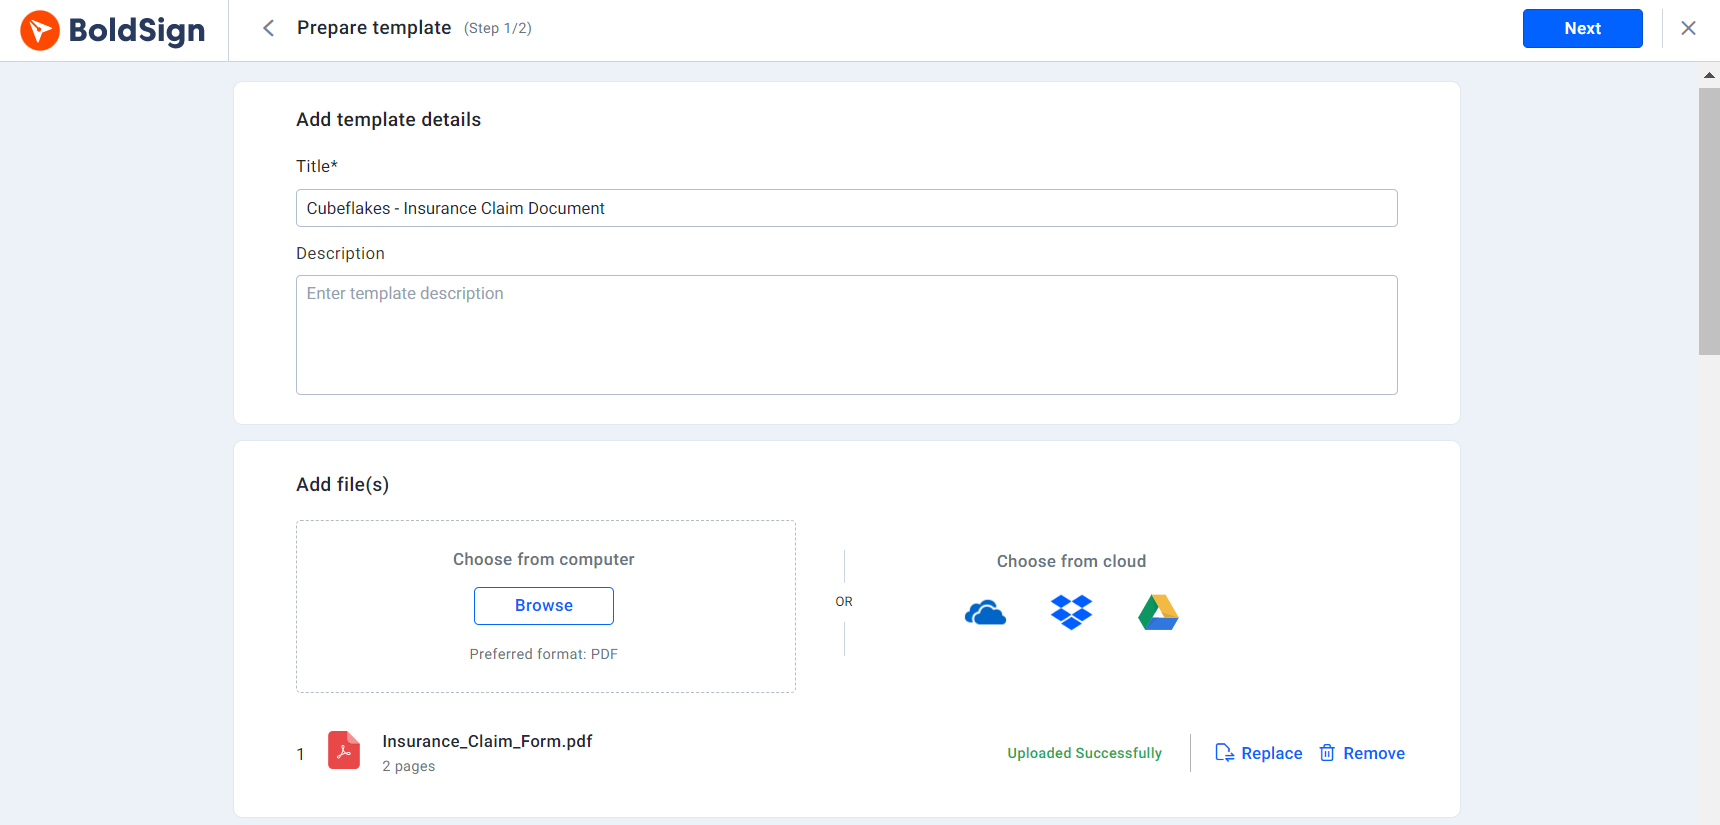
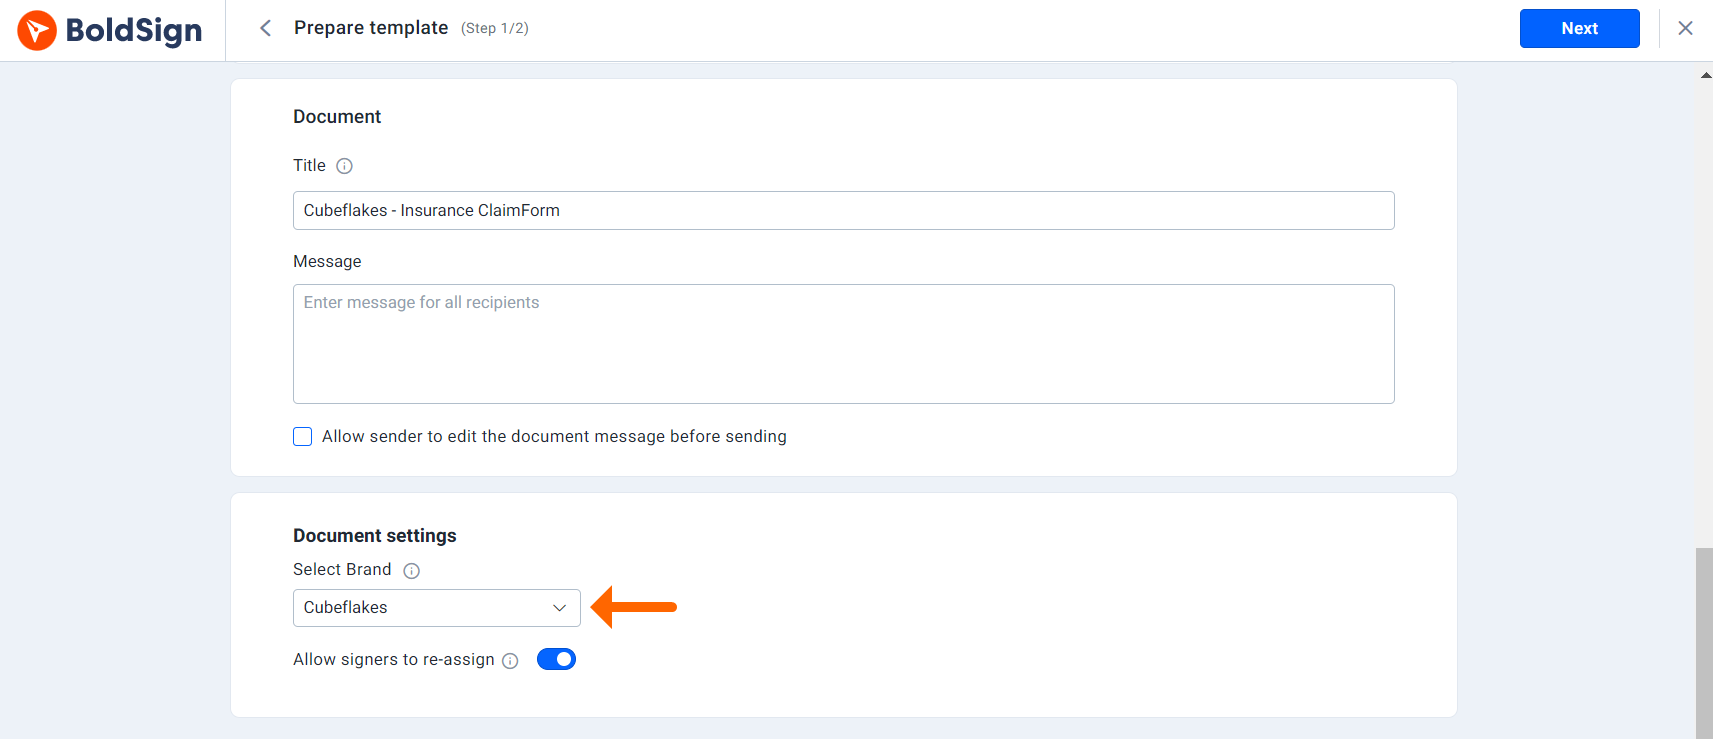
Pick the Cubeflakes brand as you set up the template. Pass the brand ID from the last step when you create it through the API.
Which fields does the claim form need?
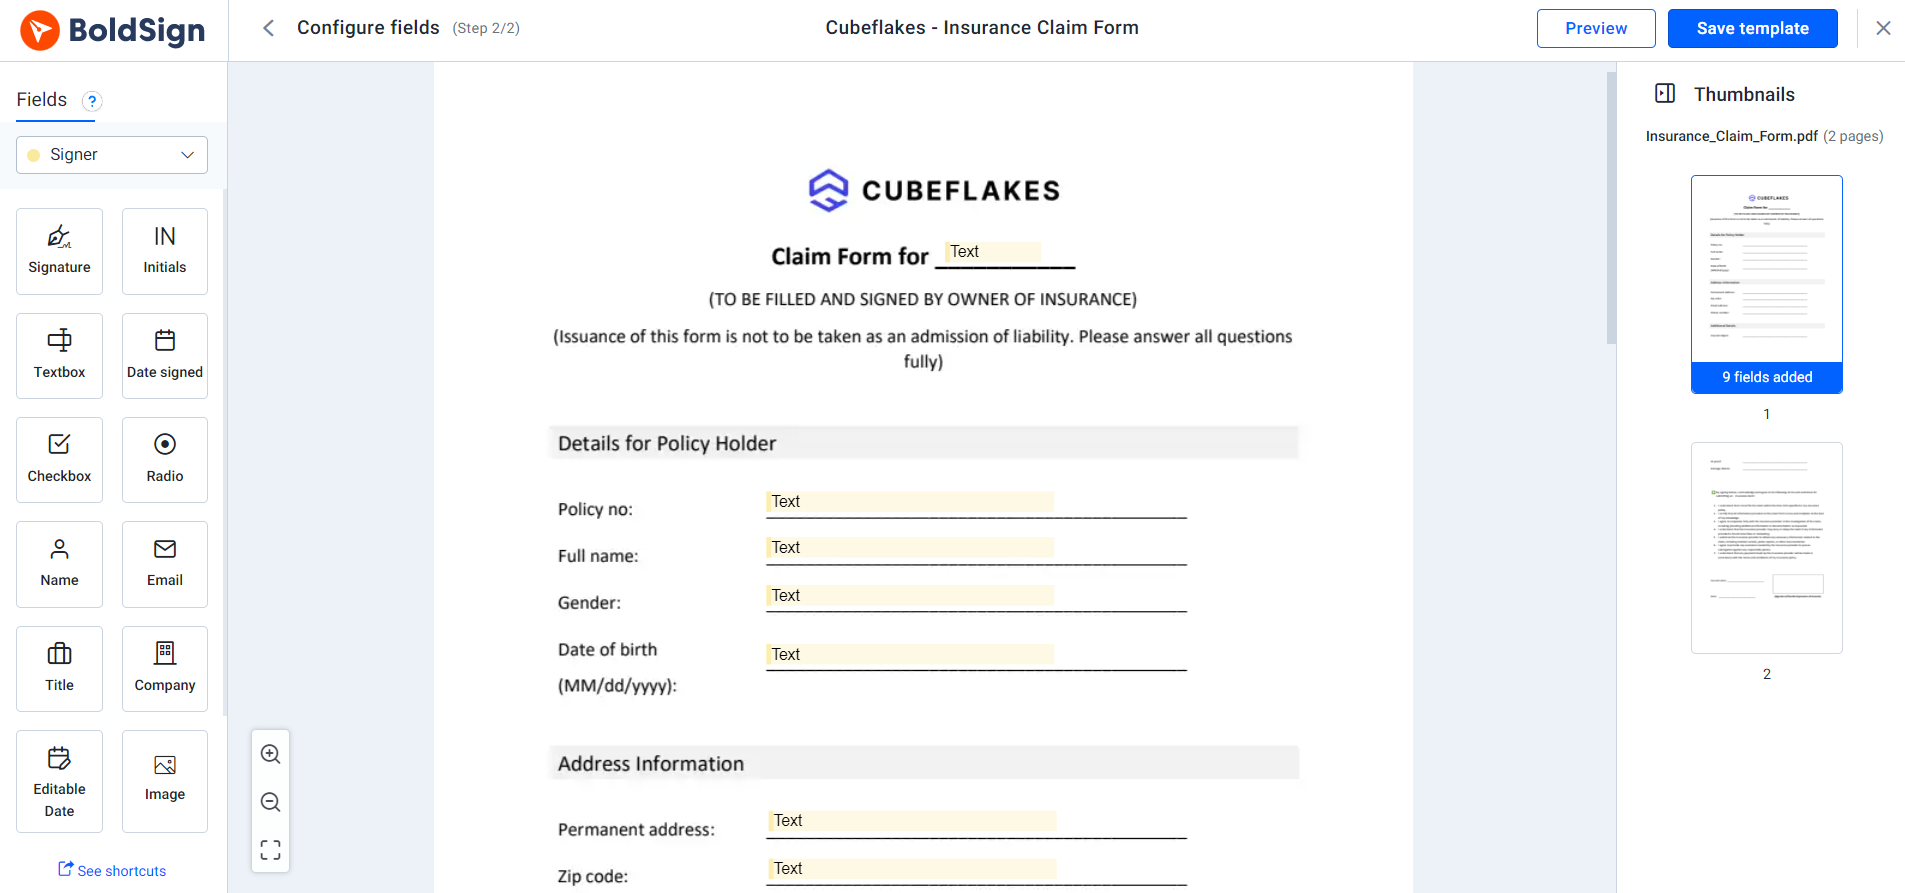
Add these fields in the template’s configure fields step:
- Text fields for the customer’s basic details and address
- An attachment field where the customer uploads proof of identity
- A checkbox field where the customer accepts the policy terms
- A signature field where the customer signs the claim
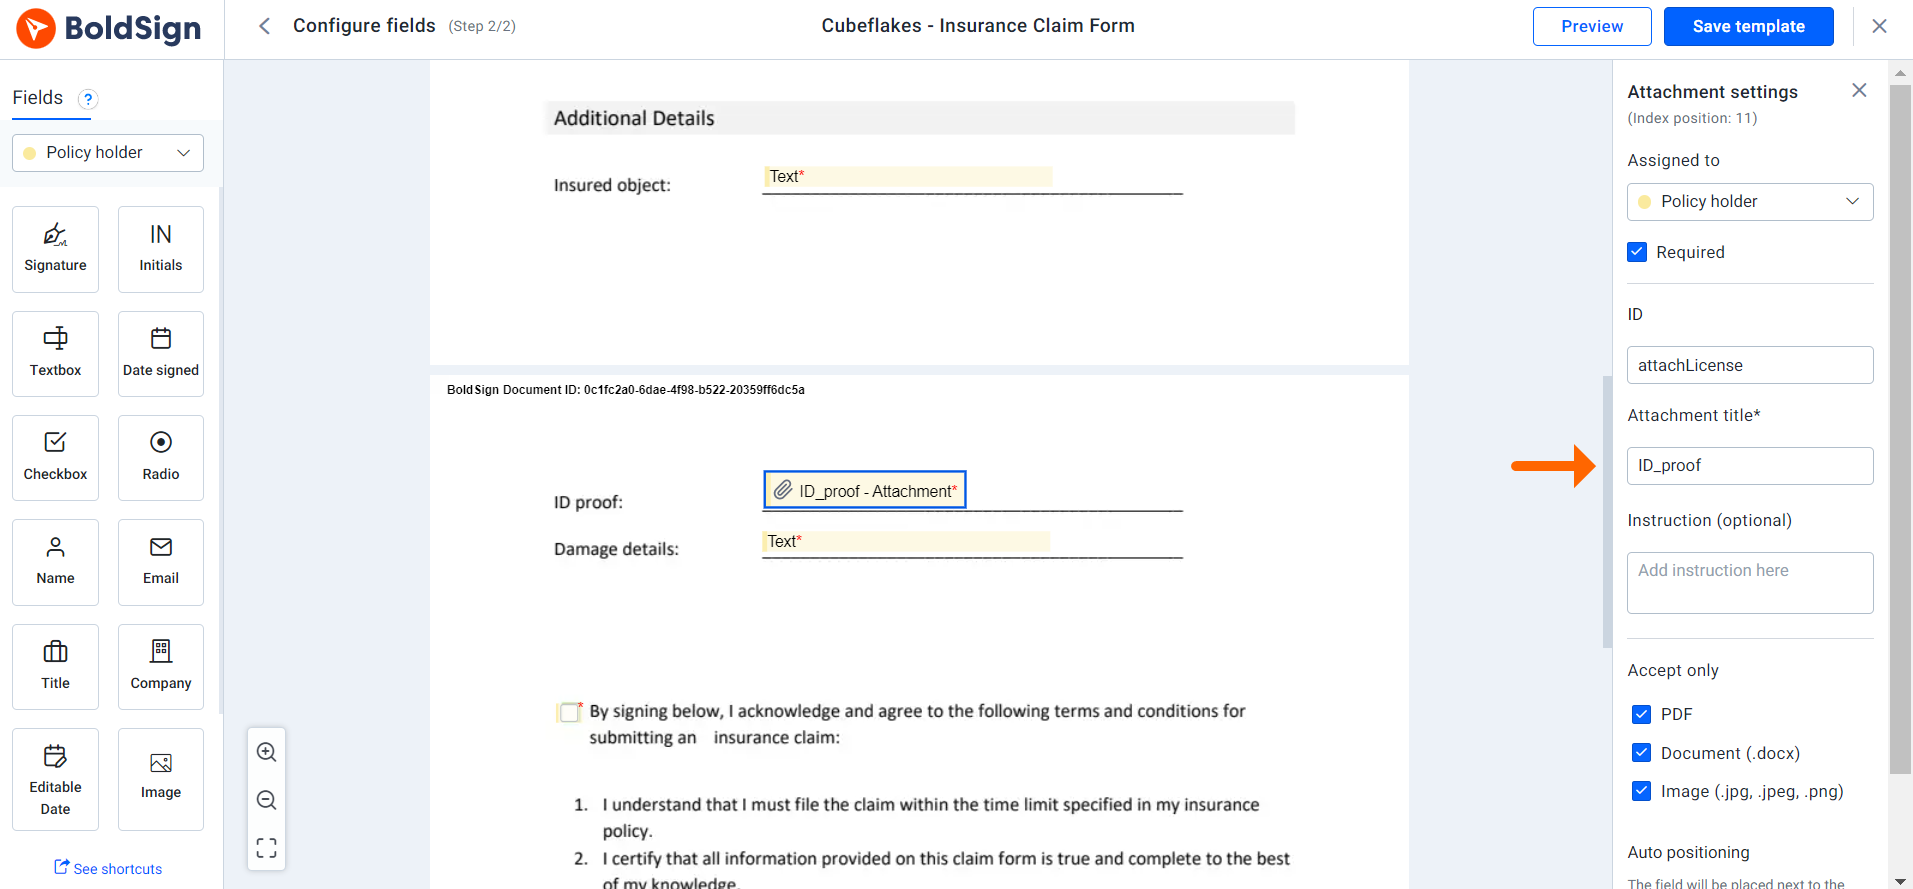
Mark the attachment, checkbox and signature fields as required, since the customer fills them while signing. Give every field an ID. Your app uses these IDs to fill the text fields from what the customer typed.
How do you set up the .NET app?
We build the demo with Microsoft’s web framework, named after Active Server Pages (ASP). ASP.NET Core apps can follow the Model-View-Controller (MVC) pattern, as ours does.
You can pick another language or framework instead, since the API works over plain web requests.
- Create an ASP.NET Core MVC web app with this command.
dotnet new mvc --framework "net6.0" -o InsuranceClaimApp- Install the BoldSign API NuGet package with this command.
dotnet add package BoldSign.Api- Register the API client with the base address and your API key.
public void ConfigureServices(IServiceCollection services)
{
    var apiClient = new ApiClient("https://api.boldsign.com", "***Your API Key here***");
    services.AddSingleton(apiClient);
    services.AddSingleton(new DocumentClient(apiClient));
    services.AddSingleton(new TemplateClient(apiClient));
    services.AddSingleton(new BrandingClient(apiClient));
    services.AddControllersWithViews();
}- Build the page layout for the claim app.
How do you prefill the claim form from your app?
Your app sends a document from the template and passes the customer’s answers as field values. The customer then sees a claim form with their details already filled in.
Our Cubeflakes page asks for everything the claim needs, such as the policy type, policy number and full name.
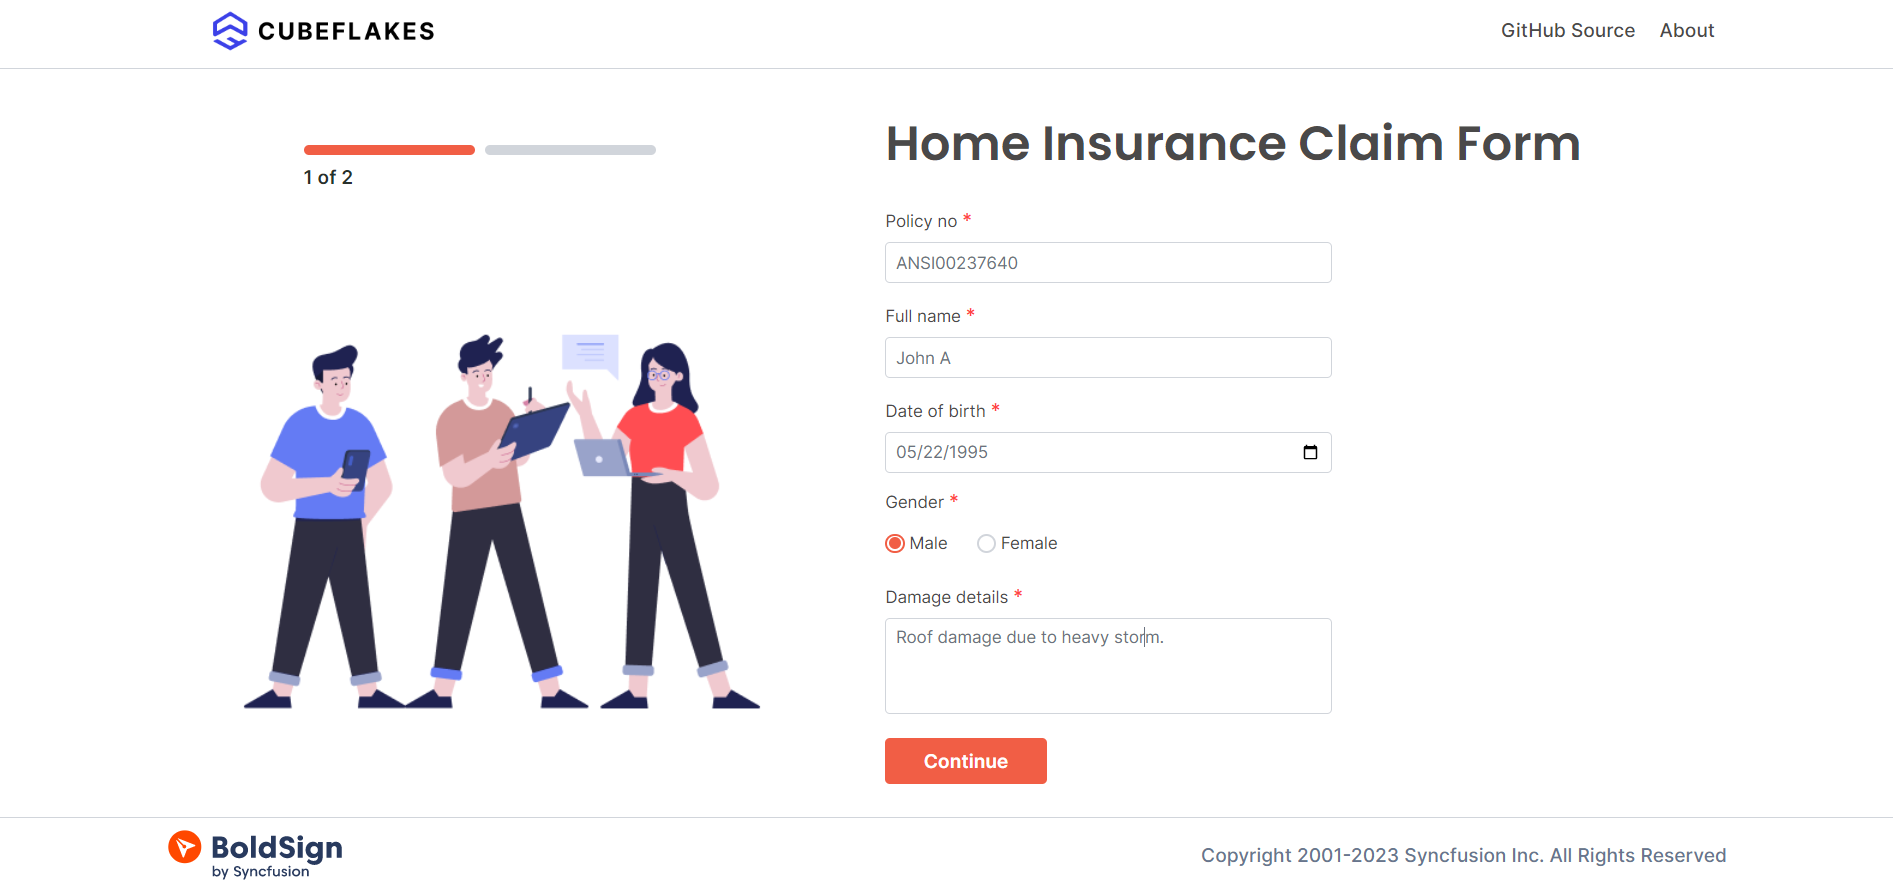
The customer selects submit after filling in the required fields. Your app then creates a document from the template, with each field filled from the matching answer.
[HttpPost]
public async Task SignDocument(TemplateDetails templateDetails)
{
    templateDetails.TemplateId = "*** Template Id ***";
    var documentDetails = new SendForSignFromTemplate()
    {
        Title = "Cubeflakes - Insurance Claim Form",
        TemplateId = templateDetails.TemplateId,
        DisableEmails = true,
        Roles = new List<Roles>()
        {
            new Roles
            {
                SignerName = templateDetails.FullName,
                SignerEmail = templateDetails.EmailAddress,
                RoleIndex = 1,
                SignerType = SignerType.Signer,
                ExistingFormFields = new List<ExistingFormField>()
                {
                    new ExistingFormField()
                    {
                        Id = "txtClaimType",
                        Value = templateDetails.PolicyType,
                    },
                    new ExistingFormField()
                    {
                        Id = "txtPolicyNumber",
                        Value = templateDetails.PolicyNumber,
                    },
                    new ExistingFormField()
                    {
                        Id = "txtFullName",
                        Value = templateDetails.FullName,
                    },
                    new ExistingFormField()
                    {
                        Id = "rbnMale",
                        Value = templateDetails.Gender,
                    },
                    // Repeat the same for other required form fields with the respective ID and value…
                }
            }
        }
    };

    // Create document from template with the new form fields.
    DocumentCreated documentCreated = await this.templateClient
        .SendUsingTemplateAsync(sendForSignFromTemplate: documentDetails).ConfigureAwait(false);
    templateDetails.DocumentId = documentCreated.DocumentId;
}
Note: Each ID in ExistingFormFields must match the field ID you set in the template.
How do you embed signing in the claim app?
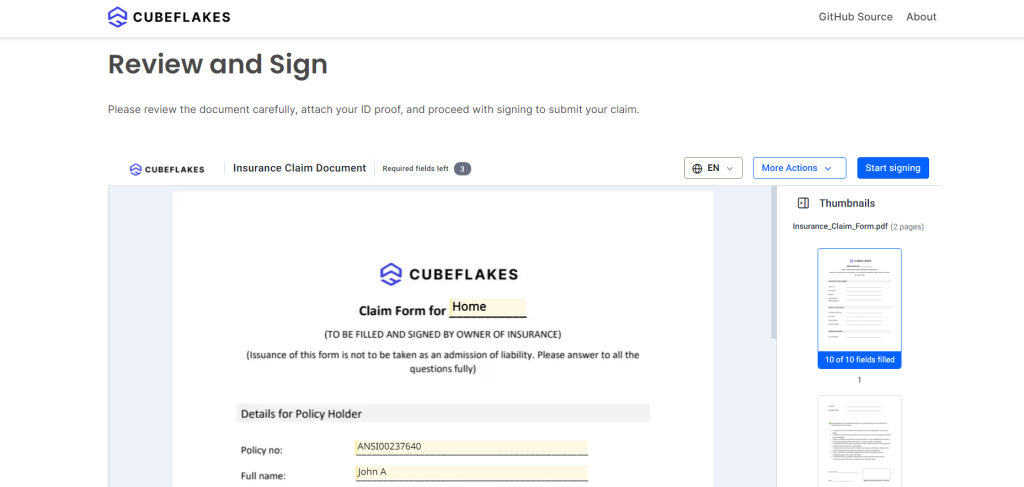
Ask for an embedded signing link for the new document, then load that link in an iframe. The customer signs right there, without leaving your app.
templateDetails.DocumentId = documentCreated.DocumentId; // created in the previous step.

//Create embedded Sign URL from the document created.
EmbeddedSigningLink embeddedSignUrl = this.documentClient.GetEmbeddedSignLink(
    documentId: templateDetails.DocumentId,
    signerEmail: templateDetails.EmailAddress,
    DateTime.Now.AddDays(30),
    redirectUrl:$"https://{this.Request.Host}/Home/Responses");

templateDetails.SignLink = embeddedSignUrl.SignLink;
// This SignLink will be loaded into the iframe.
The third value sets how long the link stays valid, here 30 days. Our guide on embedded link expiration explains the 180-day default.
We send the customer to the redirectUrl page once they finish signing.
How do you download the signed claim form?
Call the download method with the document ID to save a copy of the signed PDF. Store it with the claim record.
// Download the document using DocumentId.
[HttpGet]
public async Task<IActionResult> DownloadDocument(string id)
{
    var document =await documentClient.DownloadDocumentAsync(id).ConfigureAwait(false);
    var contentType = "application/pdf"; // Set the content type of the file.
    var fileName = "Copy_InsuranceClaimForm.pdf"; // Set the file name.
    Response.Headers.Add("Content-Disposition", "Attachment; filename=" + fileName);
    return File(document, contentType, fileName);
}
Signing can finish minutes or days after you send the form. Listen for the completed event with a webhook, then run the download. Our webhooks documentation covers the setup.
Where can you see the finished insurance claim app?
We host the Cubeflakes demo application so you can try the full flow. The complete source code is available on GitHub.
Our eSignature API page lists the other calls you can add to the same app. The live API demos show more scenarios, and our GitHub page holds sample code in popular languages.
Which BoldSign plan do you need for the API, and what does it cost?
Live API access, webhooks and embedded signing come with the Enterprise API plan. It starts at $30 a month with 40 envelopes, and extra envelopes cost $0.75 each.
The plan also includes unlimited templates and brands. You can build and test first in our free sandbox, with no credit card. Prices are in USD, as listed on the BoldSign pricing page in November 2026.
What should you do after reading this guide?
Pick the step that fits where you are:
- Open a free API sandbox account and run the demo code.
- See how we help insurers on our insurance eSignature page.
- Read the API getting started guide, or ask a question through our support portal.
Frequently asked questions
Can customers sign an insurance claim form inside my own app?
Yes. Embedded signing loads the signing page in an iframe in your app. The customer reviews and signs the claim form without leaving your site.
Do customers need a BoldSign account to sign a claim?
No. The customer signs through the link your app loads. They sign without an account or a paid seat.
How do I fill the claim template with the customer's details?
Send the document from the template and pass each value in ExistingFormFields. Each field ID in your code must match the field ID set in the template.
How long does an embedded signing link stay valid?
An embedded link expires 180 days after it is created by default. You can set a shorter life, from 1 to 180 days, when you create the link.
How does my app know when a claim form is signed?
Listen for the completed event with a webhook. When the event arrives, your app can download the signed PDF and save it with the claim.
Is an eSignature on an insurance claim form legally binding?
Yes, when the signer agrees to sign electronically and the signed record is kept. Each document gets an audit trail. Check the rules for your claim type and country.
Can I use another language instead of C#?
Yes. The BoldSign API works over plain web requests. Our developer docs show each call in several languages, including Python, Java and Node.js.
Can I try the BoldSign API for free?
Yes. Our free sandbox needs no credit card. Sandbox documents carry a test watermark and are deleted after 14 days.

Sahaya Sweetlin Ponmalar P
Sahaya Sweetlin Ponmalar is a Product Manager at BoldSign who enjoys building websites with WordPress and Elementor. Her previous experience includes developing Hybrid Mobile Apps and JavaScript UI components. She is also exploring on SEO improvements, analytics, and performance tracking.
More posts by Sahaya Sweetlin Ponmalar P