How to Send eSignature Documents from Bubble.io with BoldSign
 Jayaprakash Kamaraj
TL;DR: You can send eSignature documents from a Bubble.io app with Bubble’s API Connector plugin and the BoldSign API. Add your API key as a header, point the call at our send endpoint with the file, title and signer, and initialize it. Our eSignature API page explains what else the API can do.
You built an app in Bubble.io, and now your users need to sign a contract, a form or an agreement inside it. Sending each file by email and waiting for scans back slows everyone down.
This guide connects your app to BoldSign with very little code. You will get an API key, install one plugin, set up a single call and check the response.
What do you need before you start?
You need a BoldSign account with API access, an API key and a Bubble.io app. The three steps below cover each one.
- Create a free API sandbox account with us, or use a paid account.
- Open the API Key page, select Generate API Key, then Generate Token, and copy the key.
- Log in to Bubble.io, then open a new app or the app that needs signatures.
Keep the key private, as it gives access to your account. Our developer guide on the API key explains sandbox keys, live keys and expiry dates.
How do you install the API Connector plugin in Bubble.io?
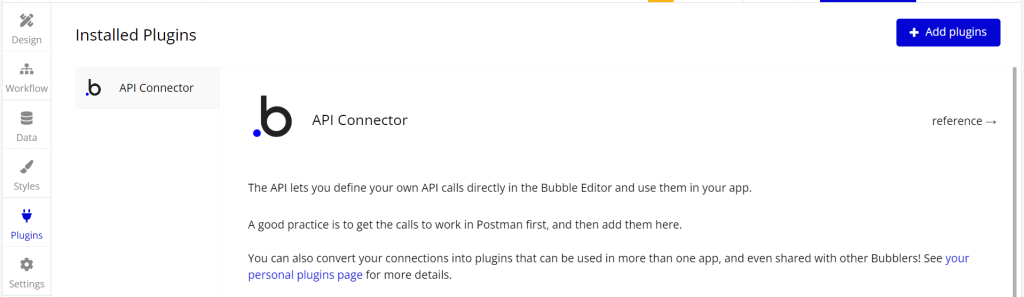
The API Connector is a Bubble.io plugin that sends requests to outside services such as BoldSign. Install it once per app from the plugin library.
- Open your Bubble.io app and go to the plugin library.
- Click the Add Plugin button.
- Search for the API Connector plugin and select it.
- Click the Install button to add it to your app.
How do you set up the API Connector to send a document for signing?
Add a new API in the connector, then add one call that sends the document. Think of the call as a saved form: you fill it in once, and the app reuses it.
Which settings and headers does the call need?
- Open the Plugins section of your app and select the API Connector.
- Add a new API and give it a clear name, such as BoldSign API.
- Add a call that posts to https://api.boldsign.com/v1/document/send.
- Set Data type to JavaScript Object Notation (JSON).
Then add these headers to the call:
| Key | Value |
|---|---|
| accept | application/json |
| X-API-KEY | Your API key |
| Content-Type | multipart/form-data |
Which fields go in the body?
Set Body type to Form-Data, then fill in the fields our send endpoint expects.
- Add the file to send to the signer.
- Set the title and the message the signer will see.
- Add the signer’s name and email address.
- Add a signature field with its page number and position.
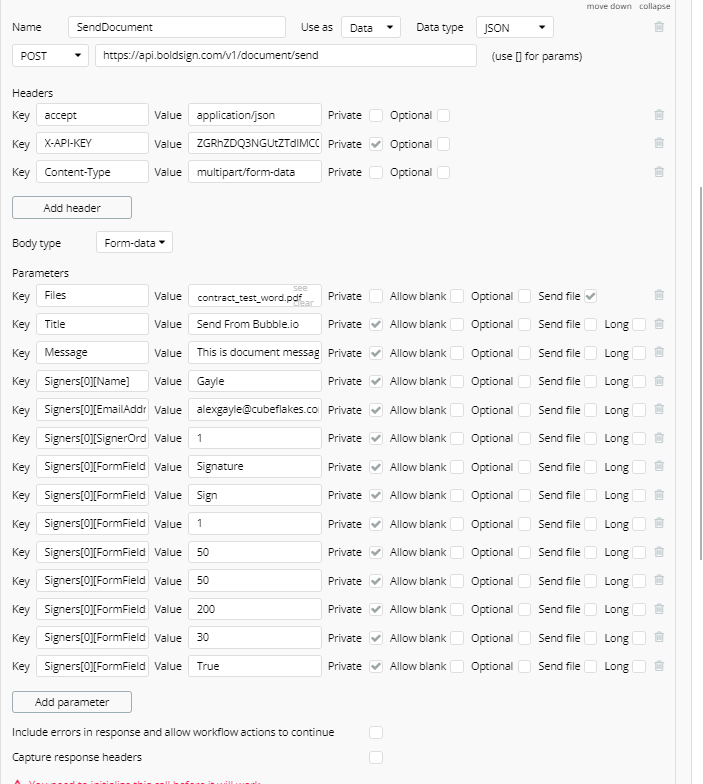
Our send document reference lists every field, including the size and position of a signature field.
How do you check the API response?
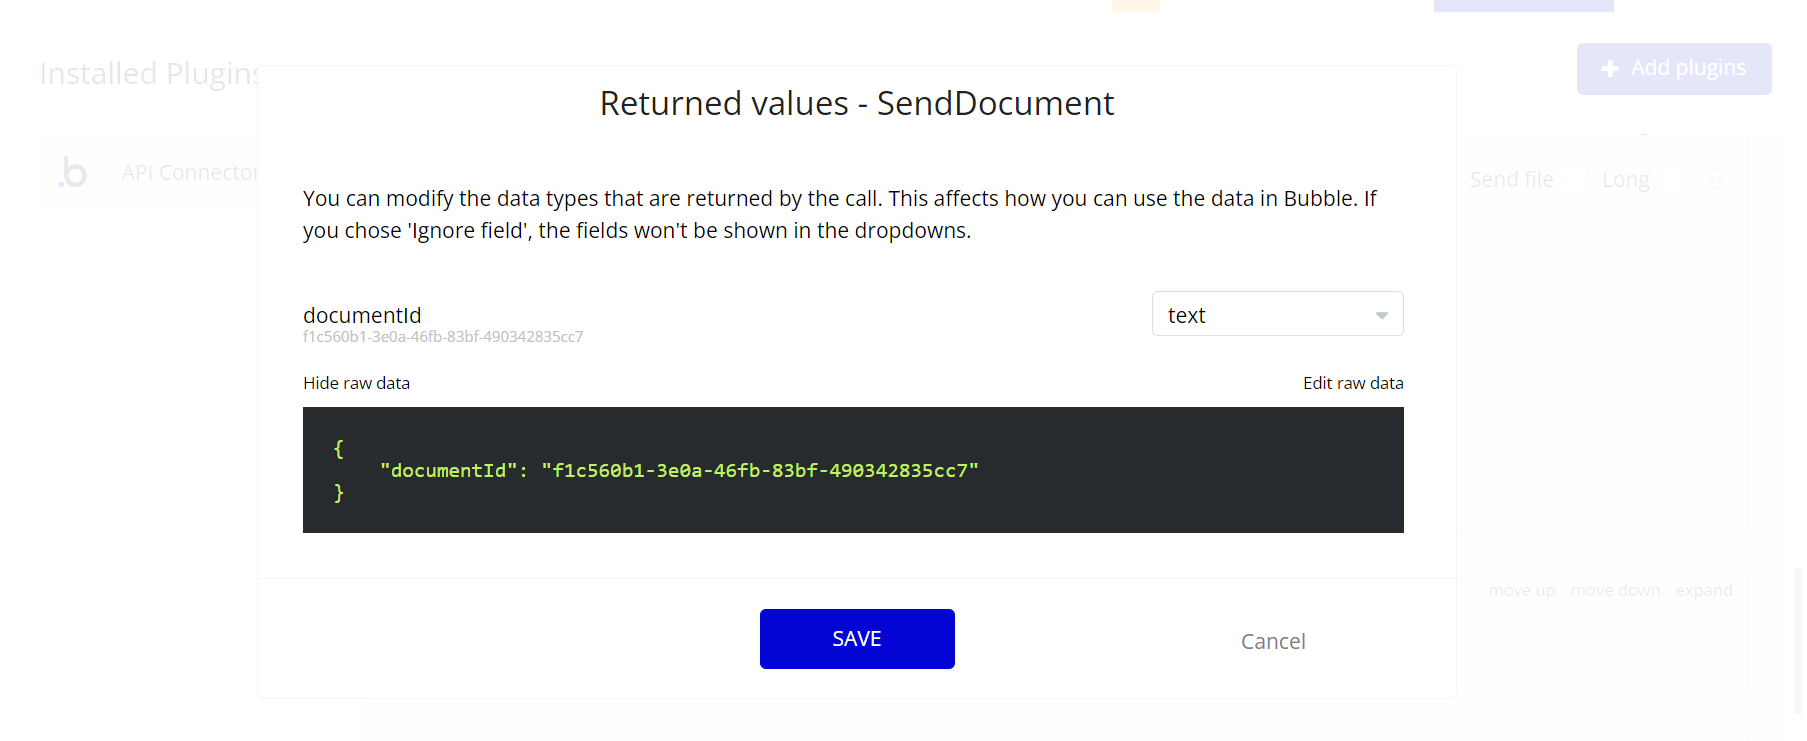
Click the Reinitialize call button to run the call once. A document ID in the response means the request reached us.
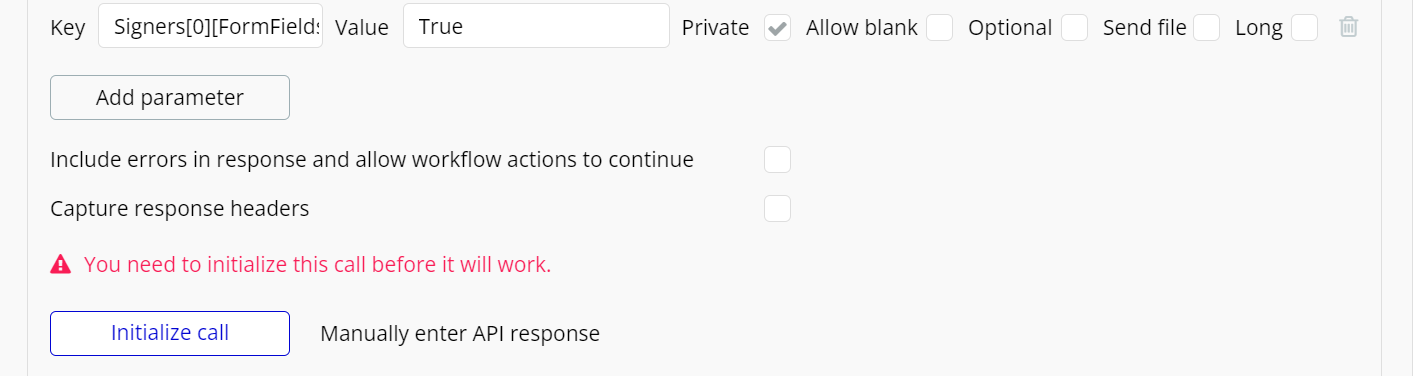
The signer then gets an email with a link to sign the document. We process the file after we return the ID, so give it a moment to appear in your account.
Where can you learn more about BoldSign and Bubble.io?
Our developer documentation goes deeper than this guide. Start with the pages below.
- Getting started with the BoldSign API, for a full first request
- eSignature API with a free developer sandbox, for what else you can build
- All eSignature features you can offer once the first call works
Which BoldSign API plan do you need, and what does it cost?
Live API requests need the Enterprise API plan, from $30 a month with 40 envelopes, as listed on the BoldSign pricing page in November 2026. Each extra envelope costs $0.75, and prices are in USD.
To build and test first, use the free sandbox. It needs no credit card, and its documents carry a test watermark and are deleted after 14 days.
How do you start sending documents from your Bubble.io app?
Set up the call in a sandbox, send a test document to yourself, then switch to a live key.
- Create a free API sandbox account and send your first test document.
- Book a demo to see the API set up for your app.
- Contact our support team with a question about your Bubble.io setup.
Frequently asked questions
Can I add eSignatures to a Bubble.io app without writing code?
Yes. Bubble's API Connector plugin sends the request for you. You fill in the address, headers and fields in its settings, so no code is needed.
Which BoldSign endpoint sends a document from Bubble.io?
Send a post request to https://api.boldsign.com/v1/document/send. It accepts multipart form data, which suits a file upload from the API Connector.
Where do I find my BoldSign API key?
Open the API menu in the BoldSign web app and select API Key. Select Generate API Key, then Generate Token, and copy the key.
How many BoldSign API keys can I have?
You can hold up to 4 keys at once. Each key is for the sandbox or for live use, with no more than 2 in the same one.
What does a successful send return?
A successful send returns a document ID. We process the file after that, so the ID can come back before the document is ready.
Do signers need a Bubble.io or BoldSign account?
No. Signers get an email with a link and sign from there. They do not need an account with either service.
Is a document signed through a Bubble.io app legally binding?
Yes, when the signer agrees to sign electronically and the signed record is kept. The app only sends the request; the signing itself happens in BoldSign. Check the rules for your document type and country.
Can I test the Bubble.io setup for free?
Yes. A free BoldSign API sandbox account needs no credit card. Sandbox documents carry a test watermark and are deleted after 14 days.

Jayaprakash Kamaraj
Jayaprakash Kamaraj is a Product Manager at Syncfusion. He is passionate about front-end technologies and has been active in web development since 2014. Connect with him on LinkedIn.
More posts by Jayaprakash Kamaraj