6 Ways to Improve Your Branding Experience in eSignature Workflows
 Senthil Kumar
TL;DR: You can make every signature request look like it came from your company. In BoldSign, a brand holds your logo, colors and sender name, and you choose it each time you send. Our custom branding page shows what a brand can change.
A client opens an email asking them to sign a contract. The logo is not yours, the sender address is unfamiliar, and the page asks them to create an account. Some will stop and wonder whether the request is real.
Signers trust what they recognize. This guide walks through six settings that put your brand on every step, from the inbox to the page after signing.
What is eSignature branding?
eSignature branding means a signer sees your company at every step of a signing request. The email, the signing page and the page after signing all carry your look instead of your provider’s.
Think of a printed contract on your letterhead. The letterhead tells the reader who sent it before they read a word. Branding does the same job for a contract sent by email.
Why does branding matter when you send documents for signature?
A branded request tells the signer who is asking and makes the email easier to trust. A plain request from an unknown address is easier to mistake for spam or a phishing attempt.
Branding also keeps the signer inside your own experience. They read your terms, see your colors and land back on your website when they finish.
How do you create a custom brand in BoldSign?
You create a brand on the Branding page in Settings, then pick it when you send a document. Our help article on how to customize branding covers each field.
- Open Settings and select Branding.
- Select Create New Brand and give the brand a name.
- Upload your logo and set your colors, then check the preview on the right.
- Set the “From” name that signers see in the request email.
- Save the brand, then choose it on the send page for each document.
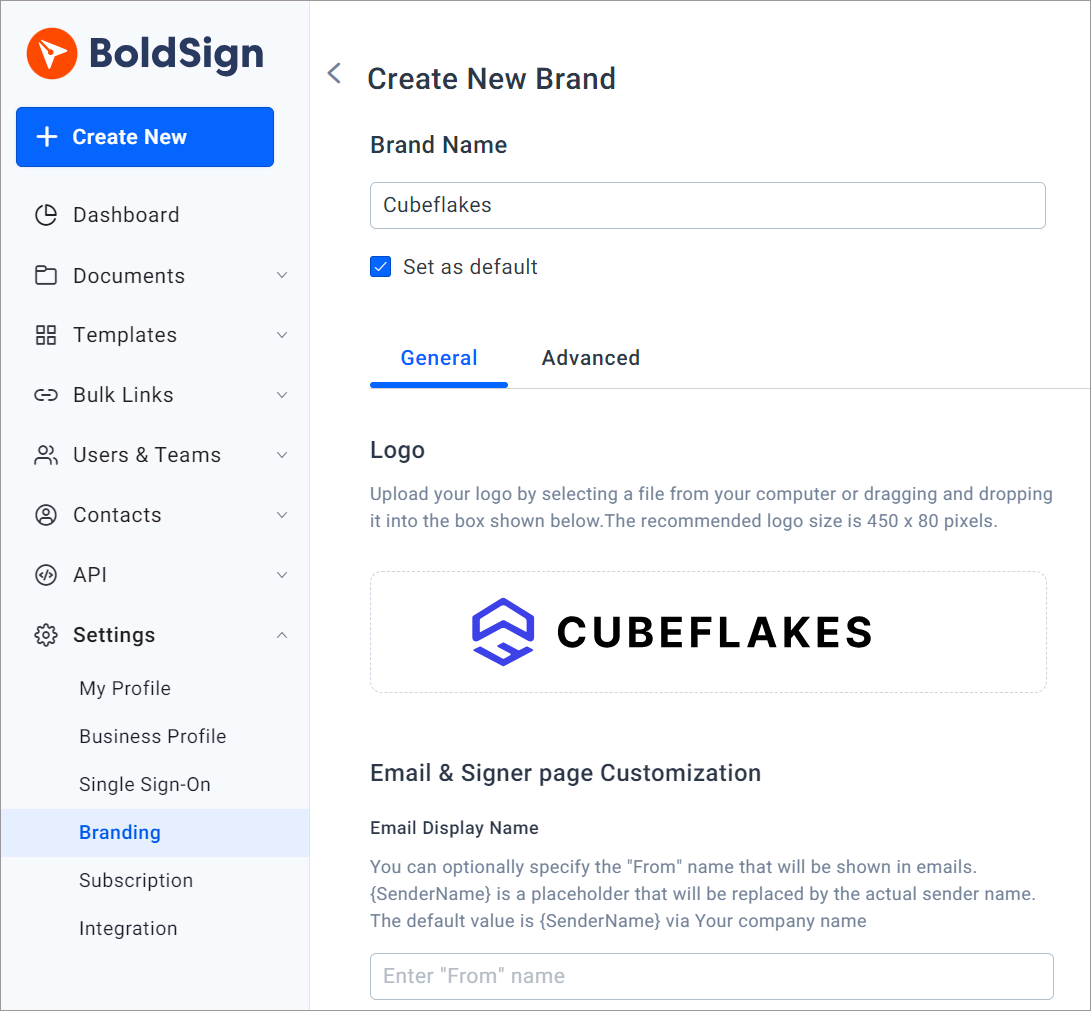
Your logo and colors then appear in the request email and on the signing page.
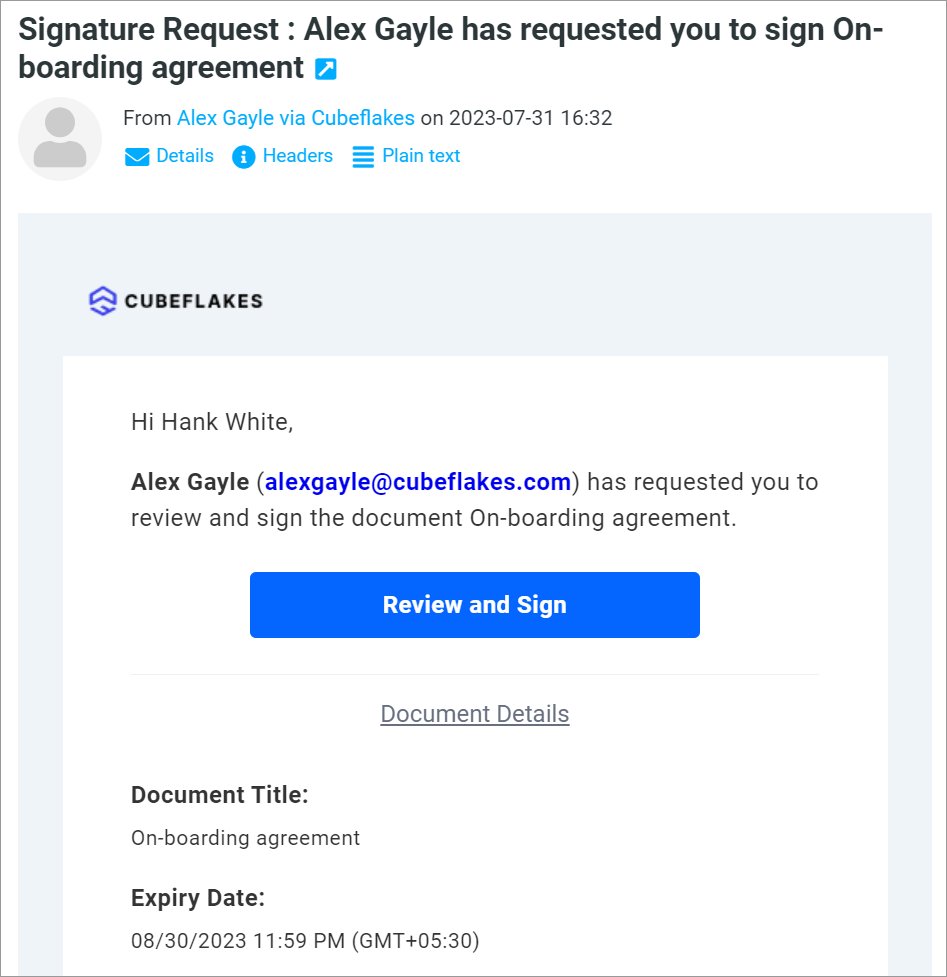
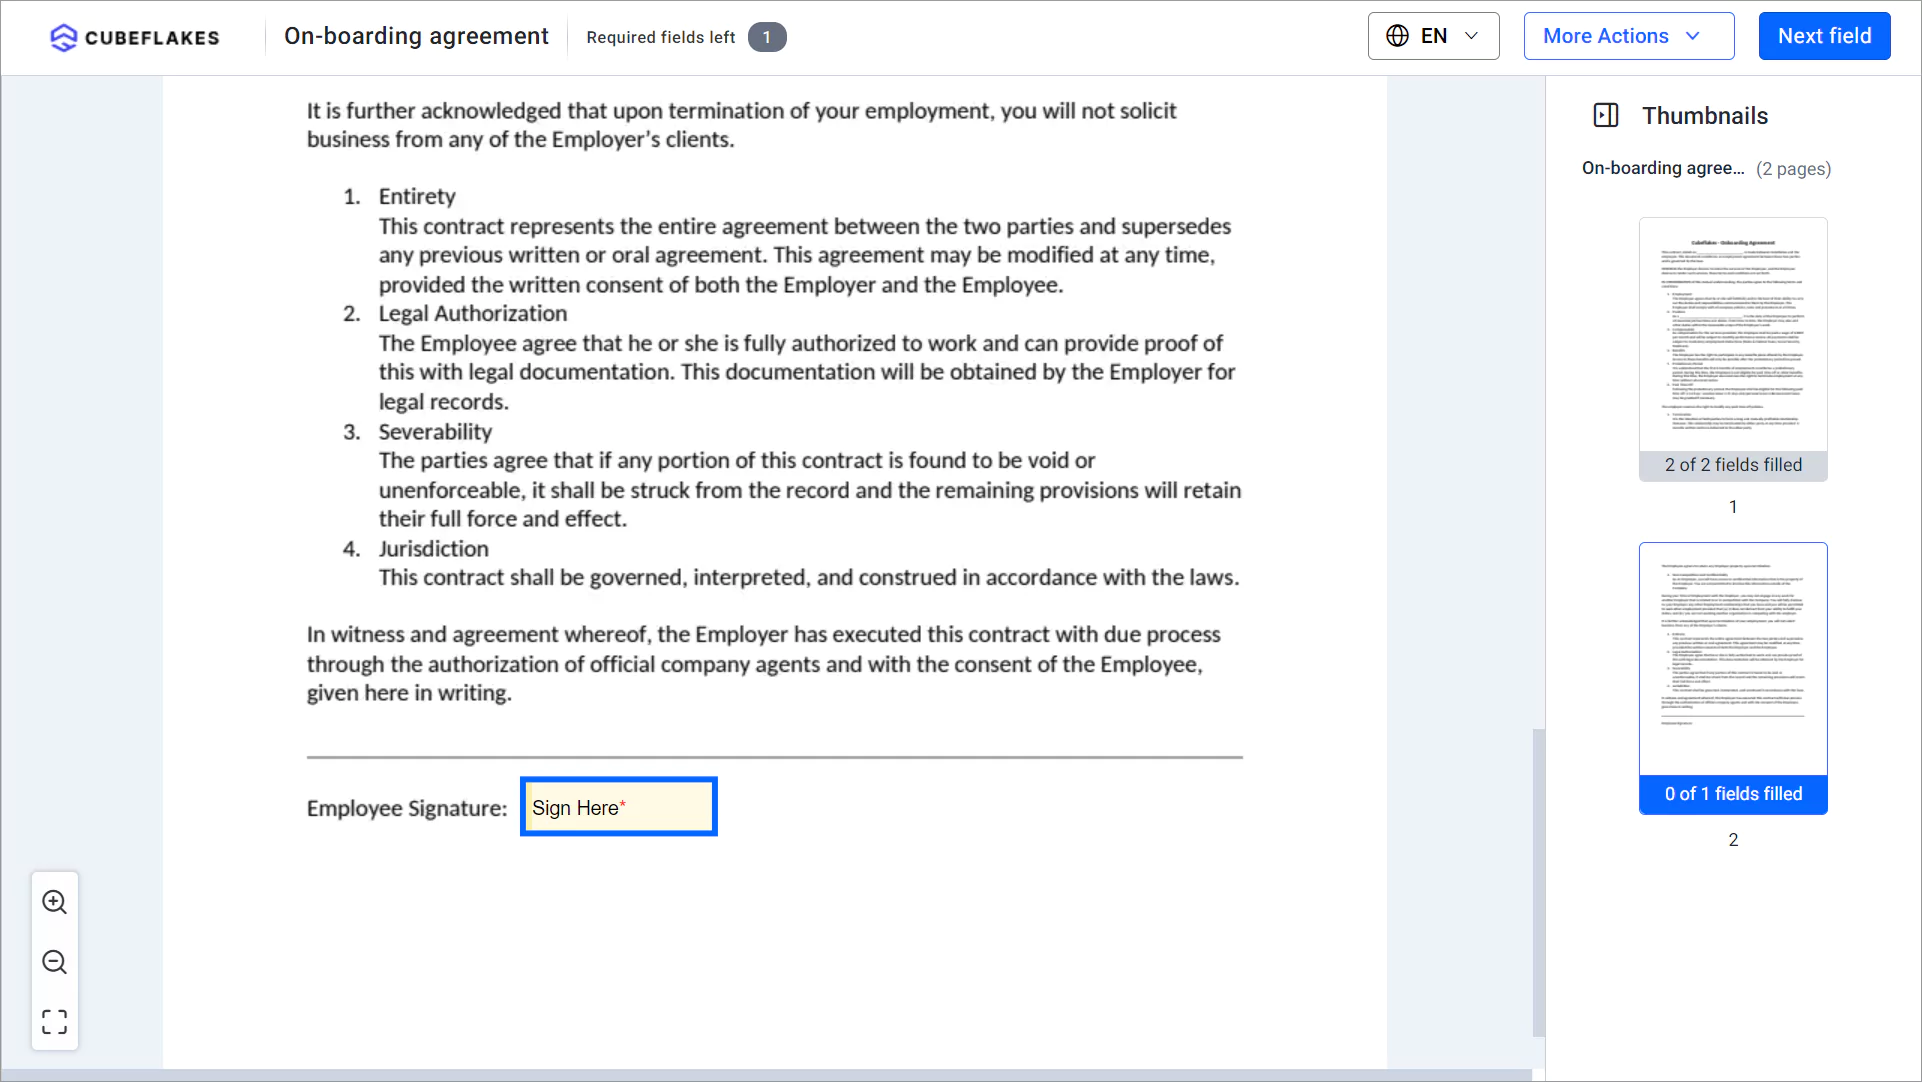
Only account administrators see the Branding page. Each brand also has an Advanced tab, which holds the legal terms and redirect settings covered below.
How do you hide “Powered by BoldSign” in signer emails?
Turn on the hide option inside your brand, and new requests leave our label out of the email. The option needs a paid plan.
- Go to Settings, then Branding.
- Open the menu next to your brand and choose Edit Brand.
- Scroll to BoldSign Branding and turn on the option to hide the “Powered by BoldSign” branding.
- Save your changes.
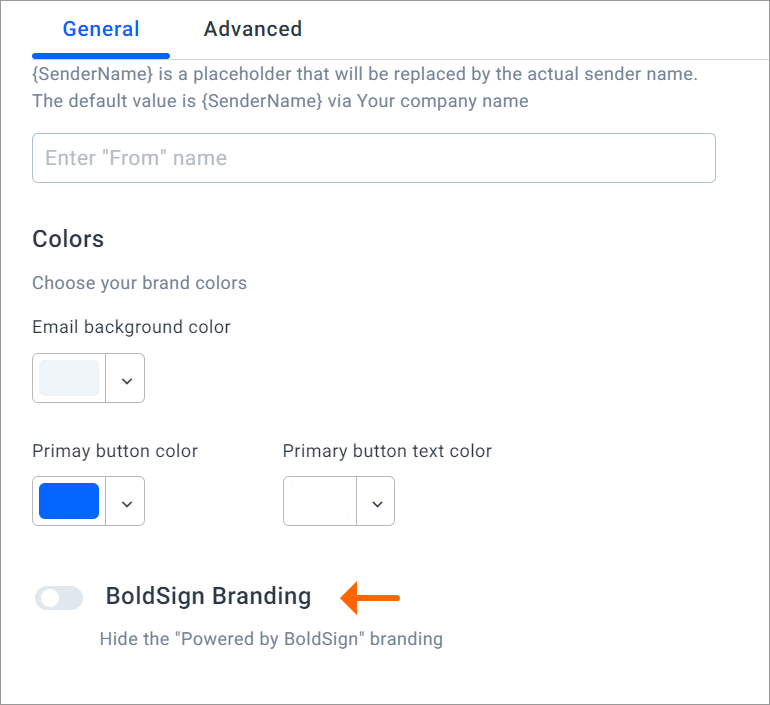
The change applies to documents you send after you save. Some platform, security and document details may still show where the signing service needs them. Our article on how to hide BoldSign branding in emails has the full steps.
How do you send signature requests from your own email domain?
Add your domain in Custom Domain Settings, and we send your requests from that domain once it is verified. Signers then see your company address in their inbox, not ours.
- Open Settings, then Business Profile, and scroll to Custom Domain Settings.
- Enter the From name and the Domain Name, then select Save changes.
- Raise a support ticket from the link below the domain field.
- Add the records our support team sends you to your domain name system (DNS) settings.
- Tell our team, and the status changes from Not Verified to Verified once the records check out.
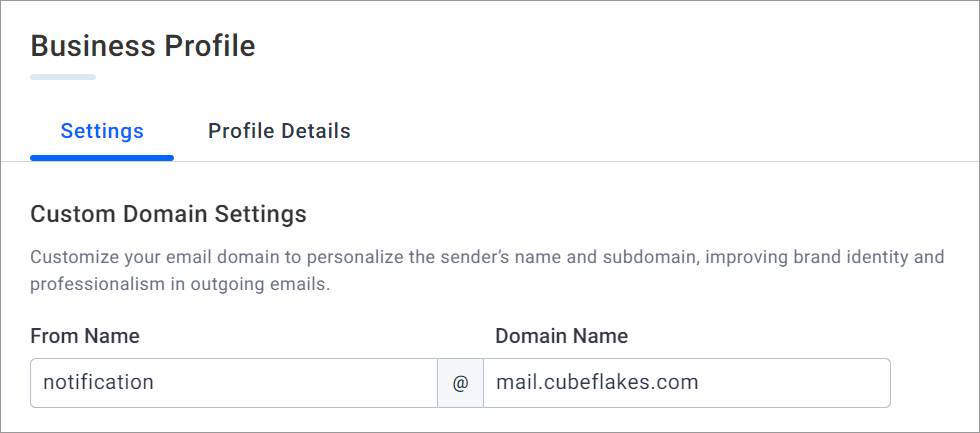
The records include DomainKeys Identified Mail (DKIM) and a Return Path. Our guide to configure custom email domains in BoldSign explains each step.
How do you add custom legal terms for signers?
Turn on Custom Legal Terms in a brand’s Advanced tab, then enter a title and your terms. Signers must accept them, along with our electronic disclosure, before they can sign.
- In Settings, open Branding and create or edit a brand.
- Switch to the Advanced tab and turn on Custom Legal Terms.
- Enter a title, which signers see as a link on the signing page.
- Write your terms in the text box below the title, then save.
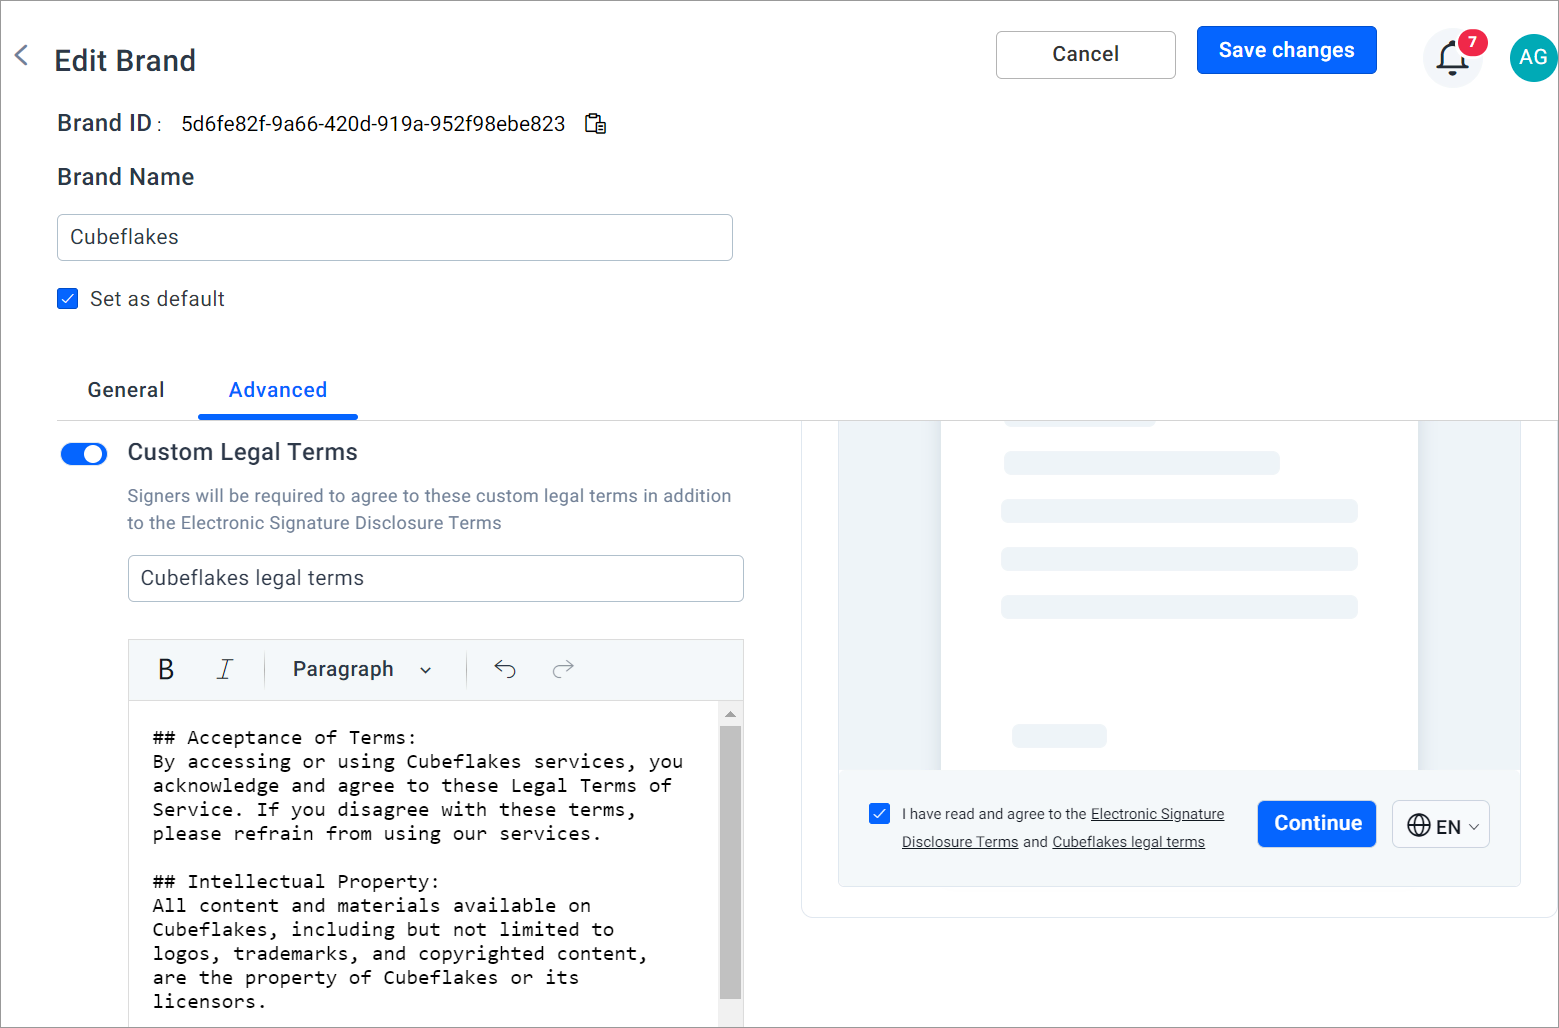
Signers see your terms next to ours and tick a box to agree before they continue.
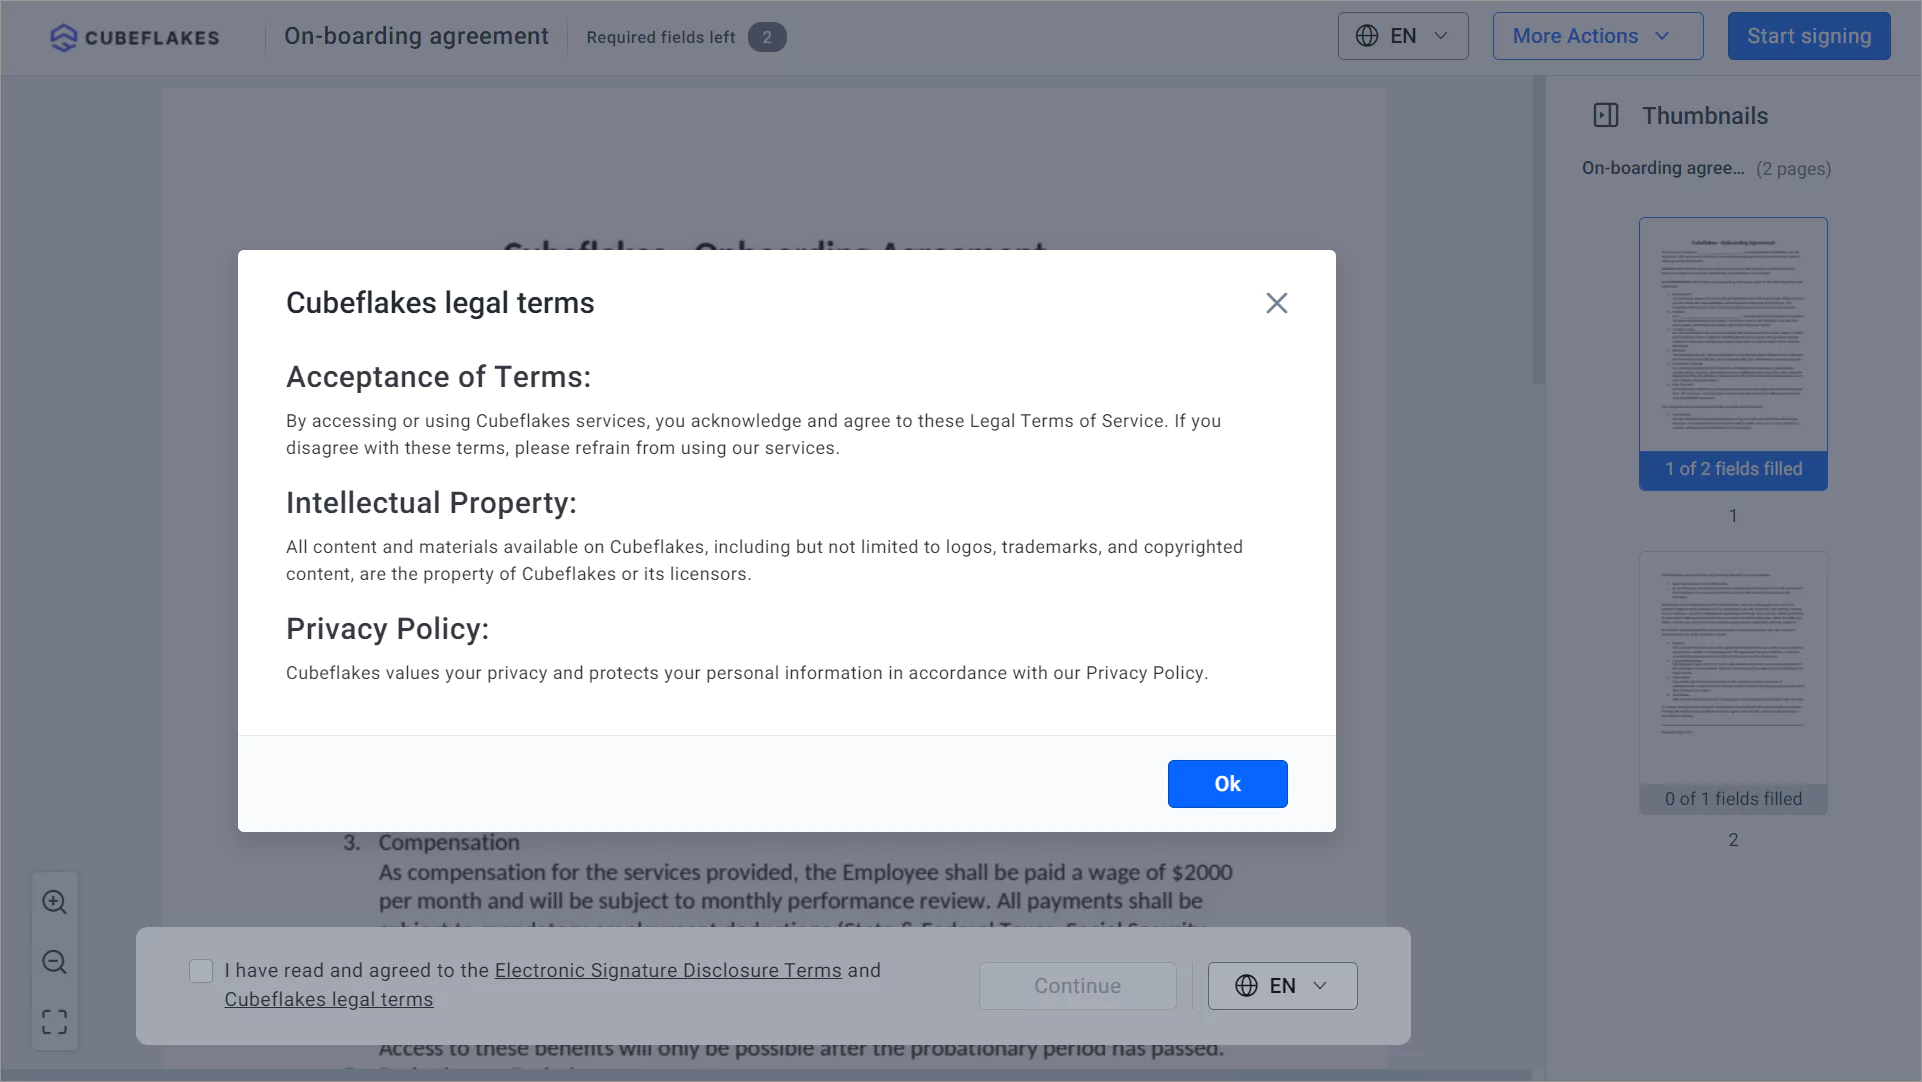
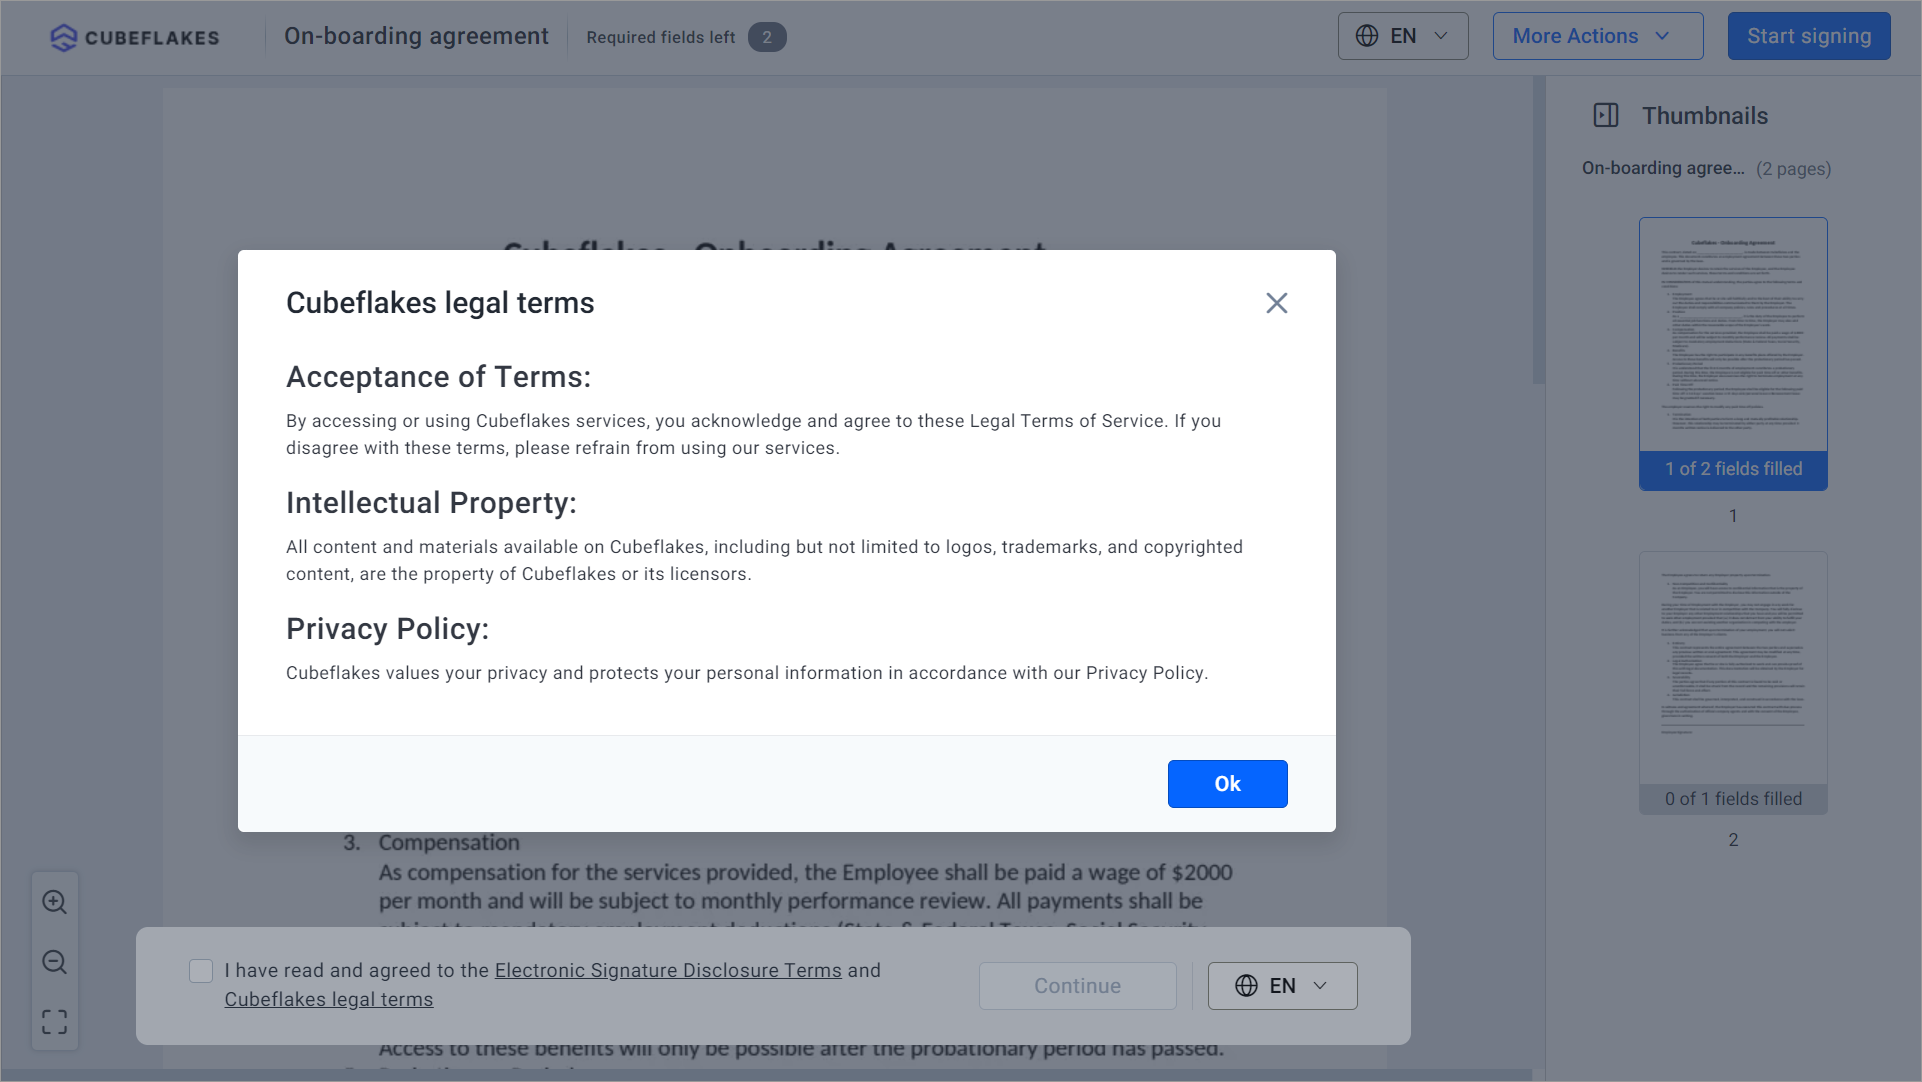
Your terms also appear at the end of the audit trail. Our help article on how to add a custom legal disclosure lists the formatting you can use.
How do you send signers to your own page after signing?
Turn on Redirect to URL on document completion in a brand and enter a web address. Each signer who finishes a document sent with that brand lands on your page.
- In Settings, open Branding and create or edit a brand.
- On the Advanced tab, turn on Redirect to URL on document completion.
- Enter the address in the field that appears, then select Save.
- Choose that brand when you send the document.
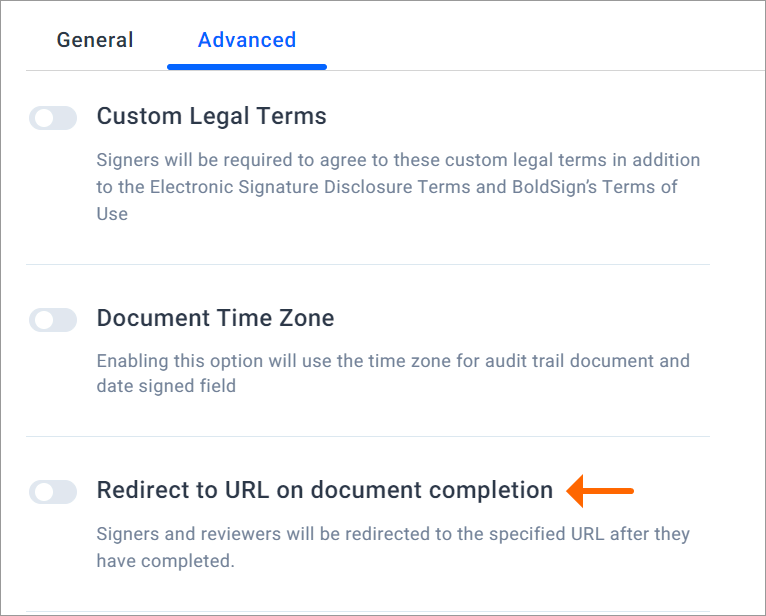
A thank-you page, an onboarding guide or a booking page all work well here. Our article on the redirect URL after signing shows each screen.
How do you hide the BoldSign account prompt after signing?
Turn off the sign-up option in your Business Profile, and signers see a short message instead of an offer to join us. That keeps the last screen about your document, not our product.
- Open Settings and select Business Profile.
- Scroll to Allow recipients to create a free BoldSign account after signing.
- Turn the toggle off, then select Save changes.
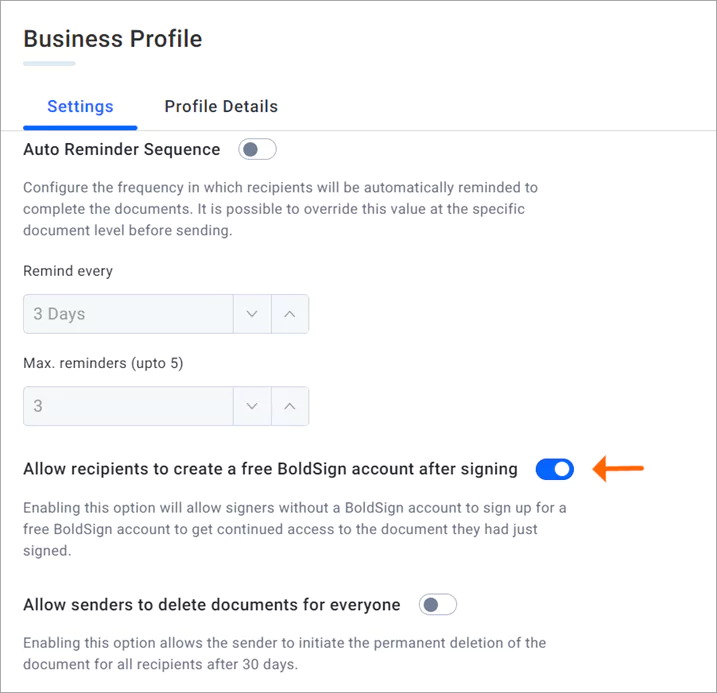
Only an account administrator can change it. Our article on how to show or hide BoldSign sign-up info has more detail.
Which BoldSign plan do you need for custom branding, and what does it cost?
Custom branding comes with every plan, including the free Essential plan. The number of brands and the extra settings grow with each plan, as listed on the BoldSign pricing page in November 2026.
The Essential plan is free and includes 1 brand. The Growth plan costs $5 per user a month and includes 2 brands, and it can hide “Powered by BoldSign” in signer emails.
The Business plan costs $15 per user a month and adds unlimited brands and your own email domain. The Premium plan costs $99 a month for unlimited users and includes both. All prices are in USD and billed yearly.
One custom domain is included, and each extra domain costs $5 a month.
What can you set up next?
Pick one setting from this guide and try it on your next request.
- Start a 30-day free trial and create your first brand.
- Request a demo to see branding set up for your team.
- Read our knowledge base articles on branding, or contact our support team with a question.
Frequently asked questions
What is eSignature branding?
It means signers see your company, not your eSignature provider, in each request. Your logo, colors and sender name appear in the email and on the signing page.
Can I use my own logo in BoldSign signature requests?
Yes. Upload your logo when you create a brand, then choose that brand when you send a document. The logo shows in the request email and on the signing page.
Can I remove Powered by BoldSign from signer emails?
Yes, on a paid plan. Edit your brand and turn on the option to hide the Powered by BoldSign branding, then save. Documents you send after that leave the label out.
Can I send signature requests from my own email domain?
Yes, from the Business plan. You enter the domain under Custom Domain Settings, our support team sends you records to add to your DNS, and the status changes to Verified once it works.
Are custom legal terms legally binding on signers?
Yes, when your terms are written to hold up under the law that applies to you. We show them to every signer, ask each one to accept them before signing and add them to the audit trail. Check the wording with your lawyer.
Can I have more than one brand in one account?
Yes. The Essential plan includes 1 brand and the Growth plan includes 2. The Business and Premium plans include unlimited brands, so each team or client can have its own look.
Where do signers go after they finish signing?
By default they stay on our completion screen. Turn on Redirect to URL on document completion in a brand to send them to a page you choose, such as a thank-you page.
Who can change branding settings in BoldSign?
Account administrators. The Branding page and the Business Profile settings are only visible to them, so senders pick from the brands an administrator has set up.

Senthil Kumar
Senthil Kumar M, who works for Syncfusion as a Product Manager. He has been actively involved in web development since 2012 and has a passion for both front-end and back-end technologies.
More posts by Senthil Kumar