BoldSign Makes Signing Easy: Here's How to Get Started
 Jeba Emerenshia
TL;DR: To get started with BoldSign, create a free account and save your signature. Then upload a file, add signers, place fields and select Send, and track it on the My Documents page. Our electronic signature features page shows what you can add later.
You have a contract to sign and a new BoldSign account. The dashboard has a lot of options, and you only need a few of them today.
This guide walks you through the first steps in order. You set up your profile, send one document, and watch it come back signed. After that, we show the tools that save time once you send more.
How do you create a BoldSign account?
You sign up with a work email or with an existing Google, Microsoft or Apple account. It takes a few screens, as our help article on how to create a new BoldSign account shows.
- Go to the sign-in page and choose Sign Up.
- Enter your Work Email and select Create Account.
- Type the code we email you, create a password and select Continue.
- Add your name and company, then select Proceed.
- Choose a plan on the Select Plan page to reach your dashboard.
How do you set up your profile and signature?
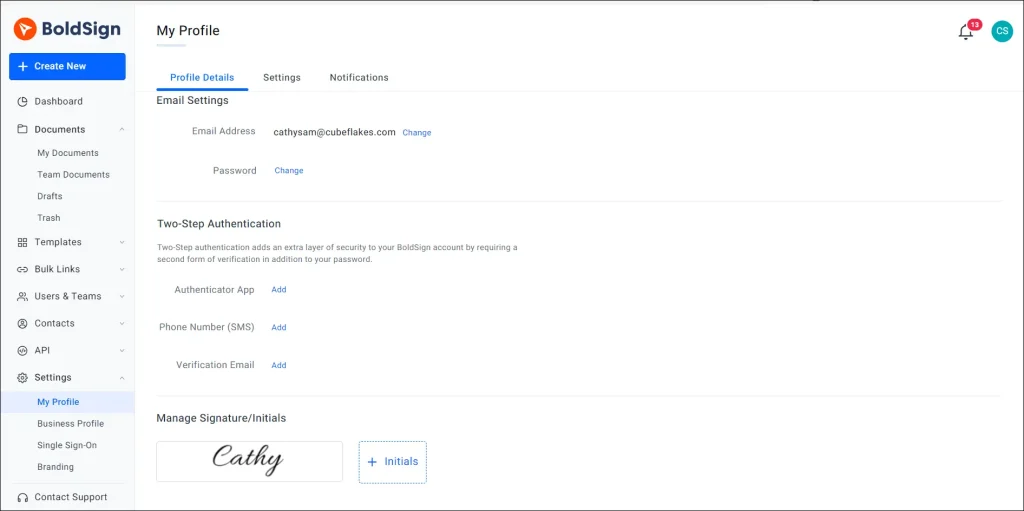
Your profile holds your details, your saved signature and your sign-in security. Open the Settings menu and select My Profile.
On the Profile Details tab, you can change your name and contact details. Scroll down to Two-Step Authentication to add a second sign-in step, such as an authenticator app or your phone number. Our guide to set up 2FA for your BoldSign account covers each method.
On the Settings tab, the Signature Settings section saves your signature and initials. You can draw, type or upload them once and reuse them on every document.
How do you choose which emails you get?
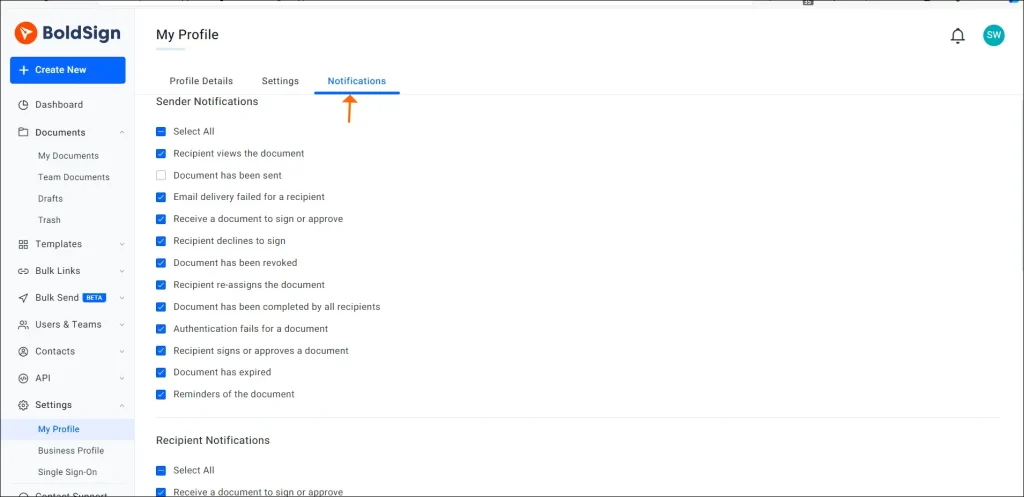
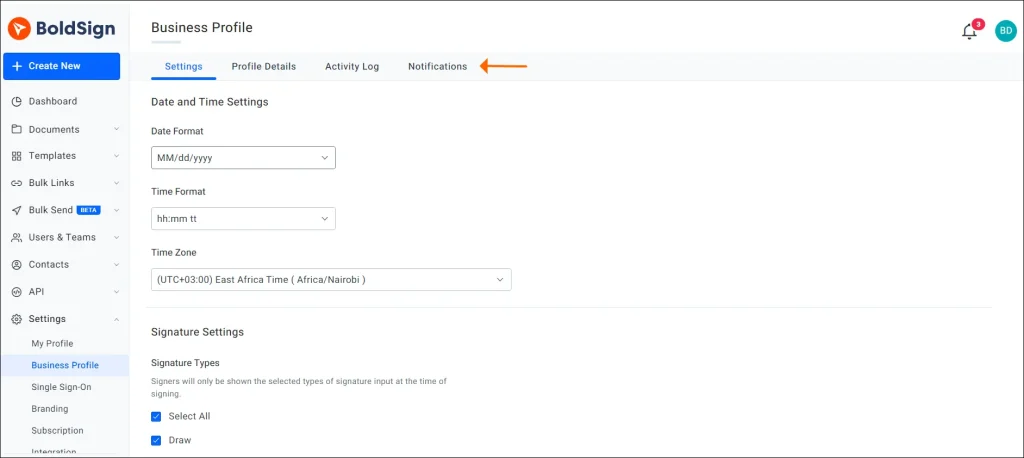
The Notifications tab in My Profile controls the emails we send you. You turn each alert on or off, so you only hear about the events you care about.
The tab splits alerts into four groups:
- Sender notifications, for documents you send
- Recipient notifications, for documents sent to you
- CC (carbon copy) notifications, for documents you are copied on
- Template notifications, for templates shared with your team
How do you add your brand to signature requests?
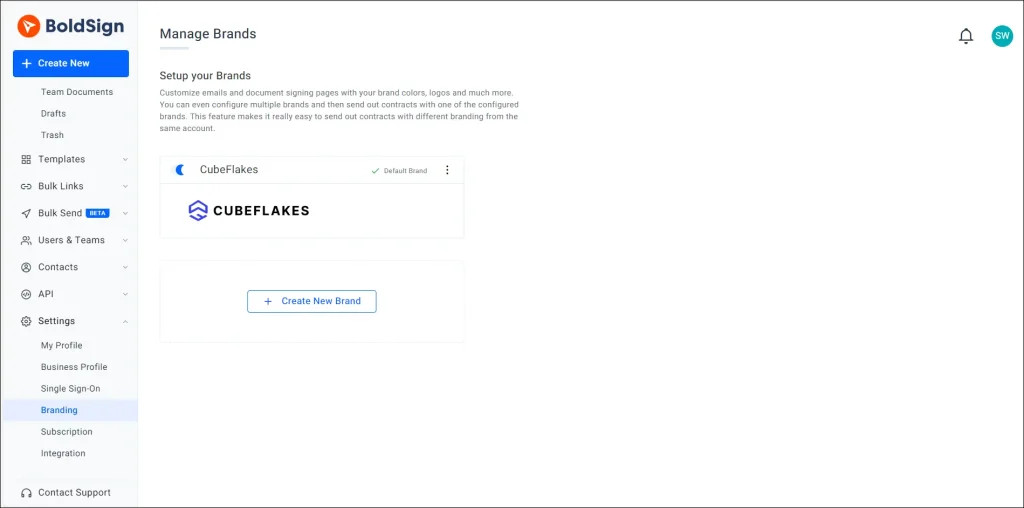
A brand puts your logo, colors and sender name on the emails and signing page your signers see. Signers then know the request comes from you.
Account admins find Branding under the Settings menu.
- On the Manage Brands page, select Create New Brand.
- Add a brand name and upload your logo.
- Pick your brand colors and save.
You can set one brand as the default and pick another on any document. Our branding feature page shows a branded request.
How do you send your first document for eSignature?
Select Create New, then Create New Document, and work through two short screens. The first screen sets the file and the people, and the second places the fields.
Add the file and the recipients
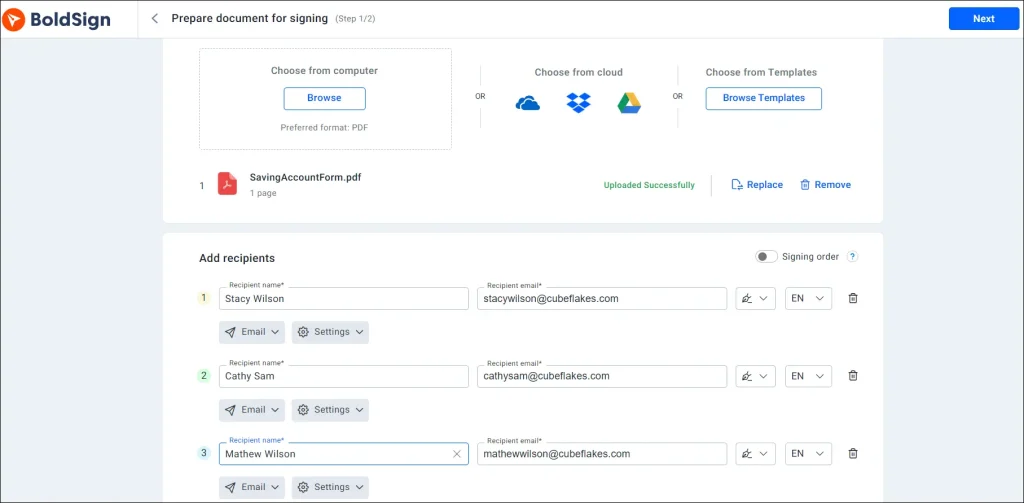
- Upload a file from your computer or cloud storage, or drag it onto the page.
- Enter each recipient’s name and email, or select Add me to sign yourself.
- Set the signing order when several people sign, and add any CC recipients.
- Give the document a title, and set an expiry date and automatic reminders.
- Select Next.
You can upload PDF, Word, Excel and PowerPoint files, as well as images. Our help article prefers PDF, since it keeps the layout as you made it.
Place the fields and send
Drag fields from the list onto the page and give each one to a signer. Common fields are signature, initials, text box, checkbox and date signed.
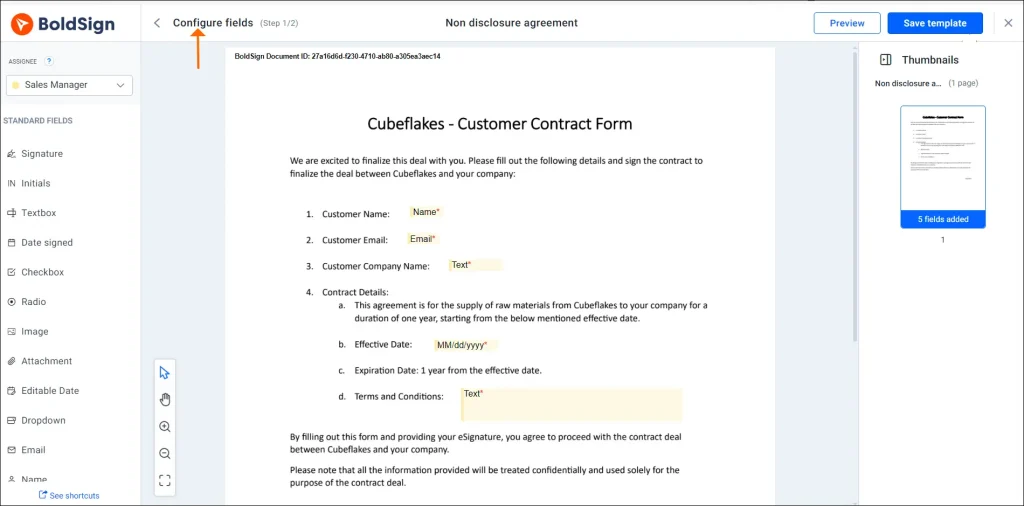
When the fields are in place, select Send at the top right. Select Preview first to check the document as your signers will see it.
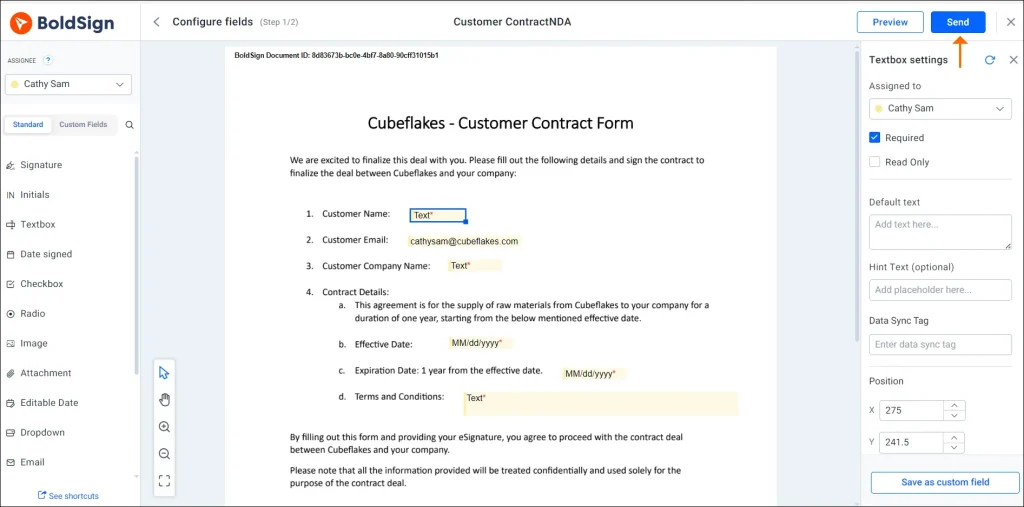
Our help article on how to send your first document for signature covers every option on these screens.
How do you confirm who is signing?
By default, signers open the document from the link in their email. Add a check on the recipient step when the document needs more proof of who signed.
- An email code, or an access code that you share with the signer
- SMS authentication, which texts a one-time code to the signer’s phone
- Knowledge-based authentication (KBA) questions, or a photo ID check
Each method suits a different level of risk. Our guide to electronic signature authentication methods explains when to use each one.
How do you track a document after you send it?
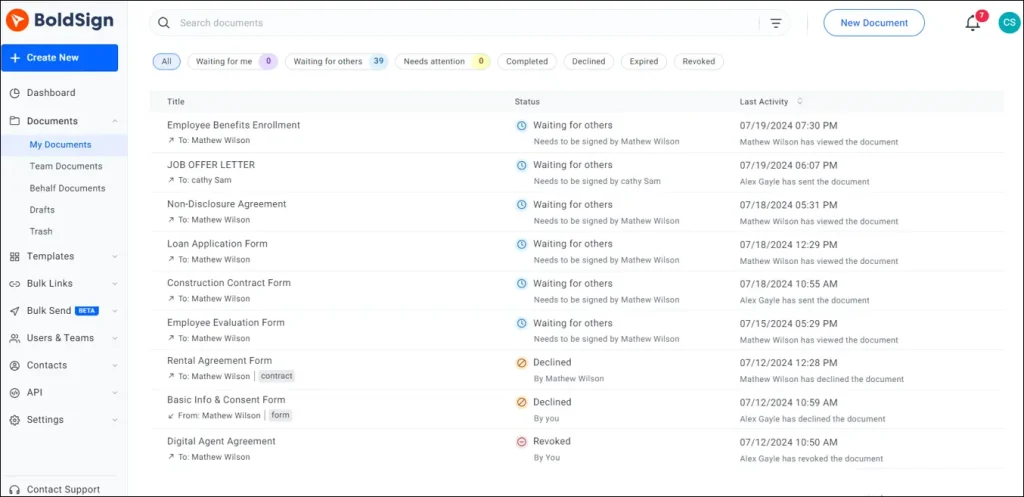
The Status column on the My Documents page shows where each document stands. Admins also see their team’s documents on the Team Documents page.
Three statuses mean the document is still moving:
- Waiting for me means someone sent it to you, and you still need to sign.
- Waiting for others means at least one recipient has not signed yet.
- Needs attention means we could not deliver it, often because of a wrong email address.
Four statuses mean the document is finished:
- Completed means every recipient has signed.
- Declined means a recipient refused to sign.
- Revoked means the sender recalled or canceled it.
- Expired means the deadline passed before everyone signed.
How do you send the same document many times?
Set a document up once and reuse it when you send it every week or more. We offer three tools for this, and each one fits a different job.
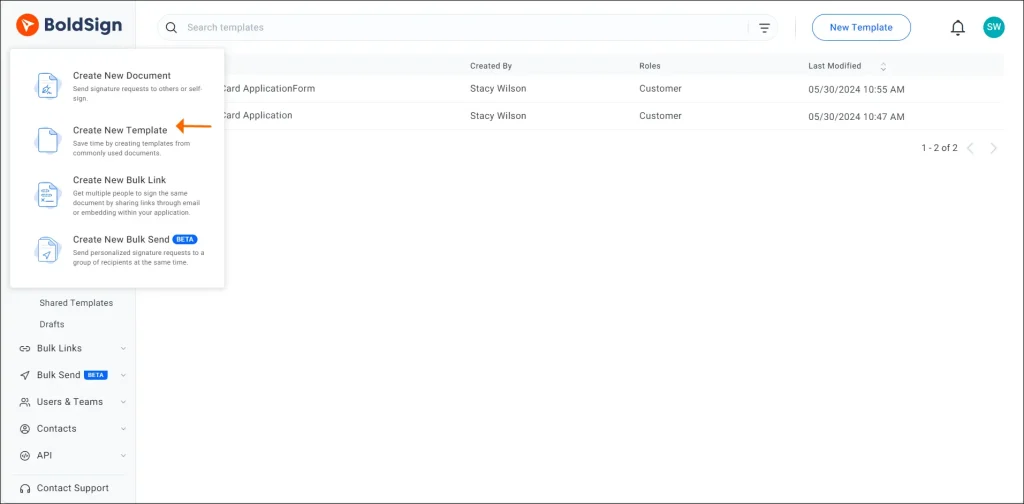
Templates
A template is a document with its fields already placed, ready to send again. You add the real signers each time. Our guide on how to save time with eSignature templates walks through it, and our templates page shows the feature.
Bulk links
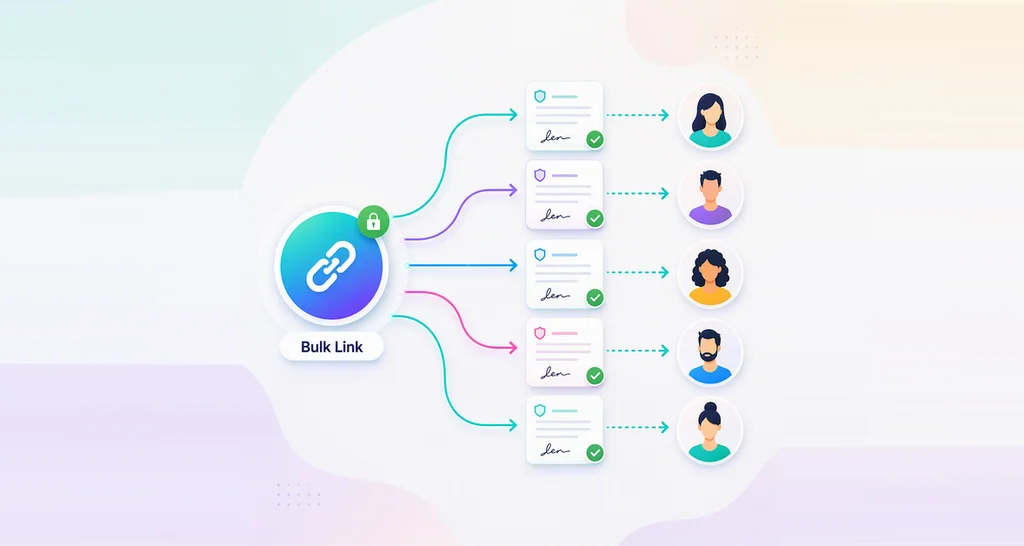
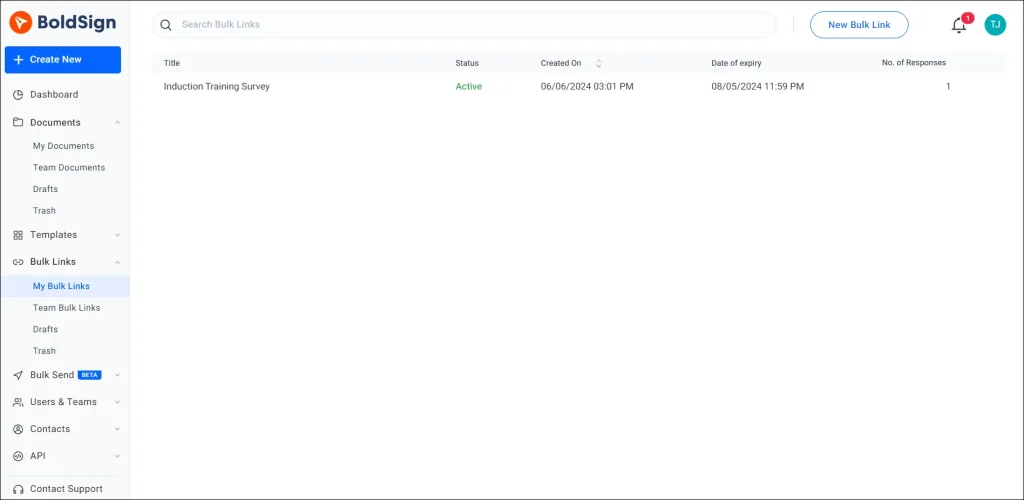
A bulk link is one signing link that many people can open and sign on their own. Each signer gets a separate signed copy. You copy the link and share it on a website or in an email, which suits public forms such as waivers.
Bulk send
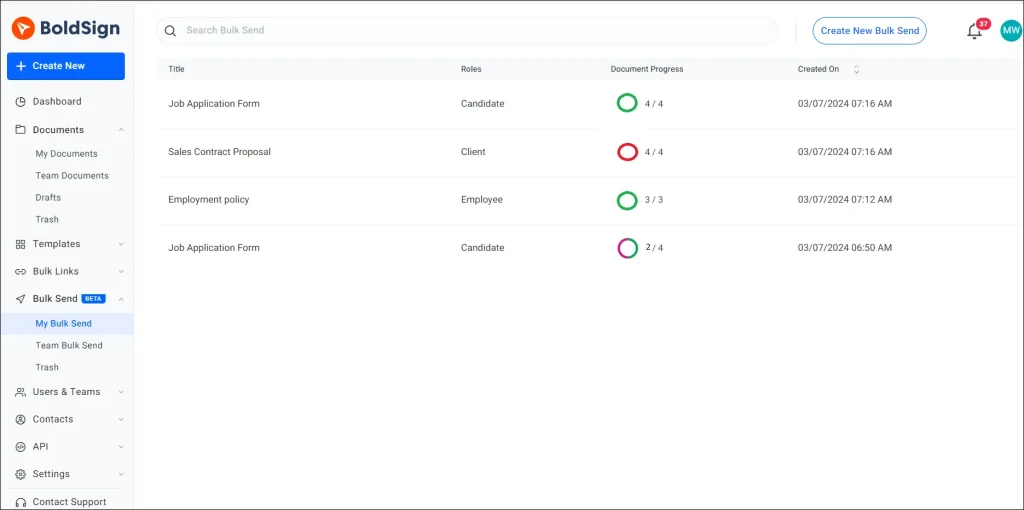
Bulk send sends one document to a list of named recipients at once. Each person gets a personal copy, and you track every copy from one place.
How do signers read requests in their own language?
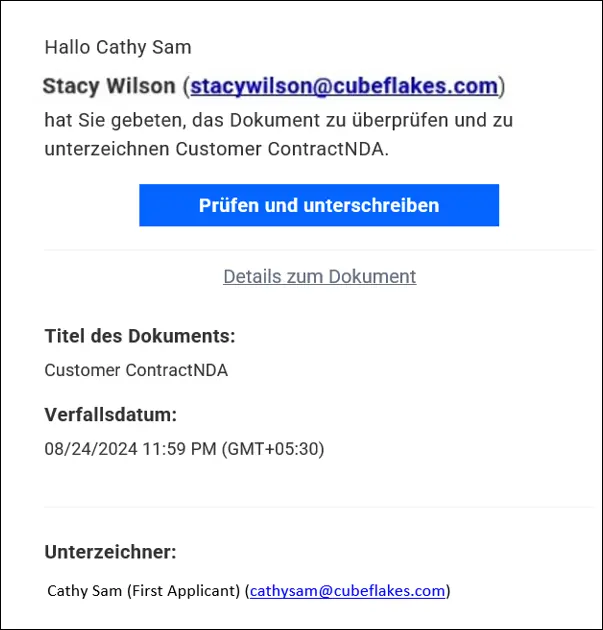
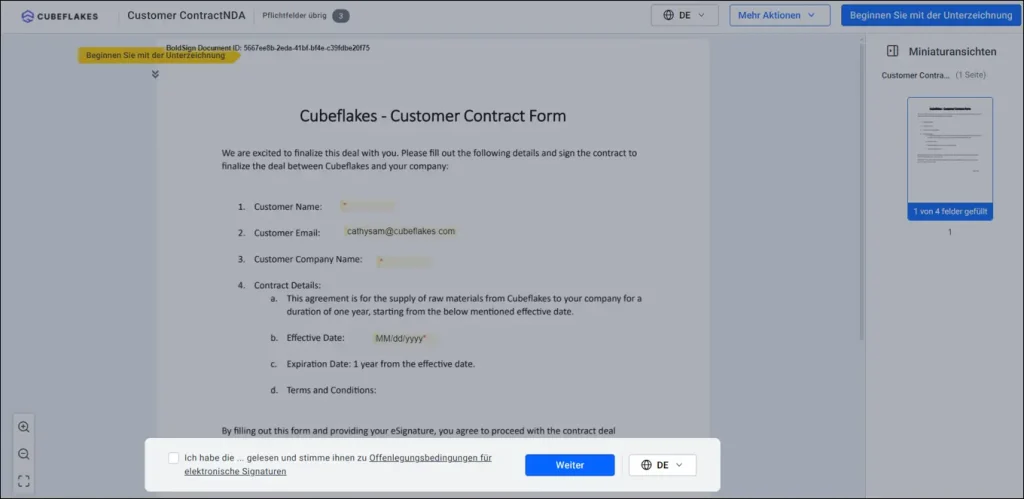
Pick a language for each recipient before you send. Their request email and signing steps then appear in that language.
On the recipient step, open the language list next to the recipient’s details. Signer emails come in 15 languages, including German, Spanish, French and Italian. A signer who reads German, for example, sees the email and signing page in German.
How do you add your team to BoldSign?
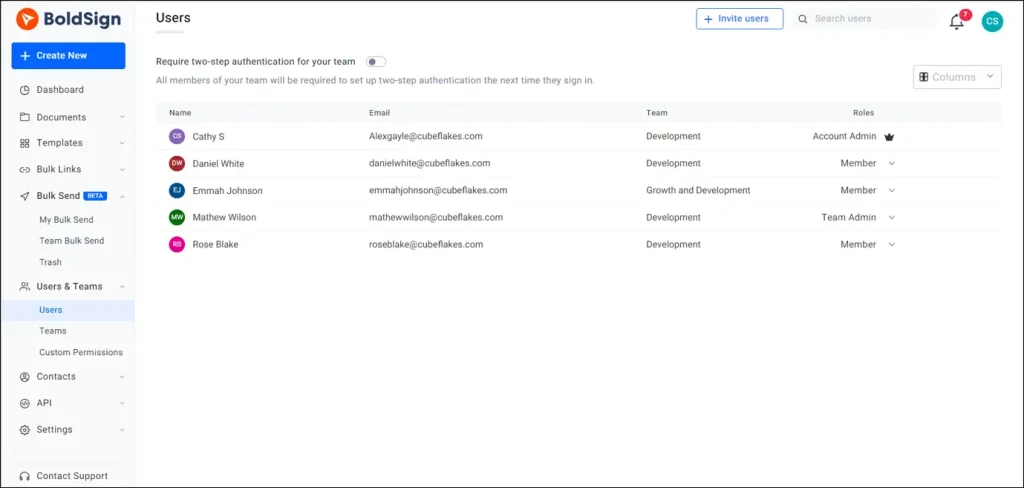
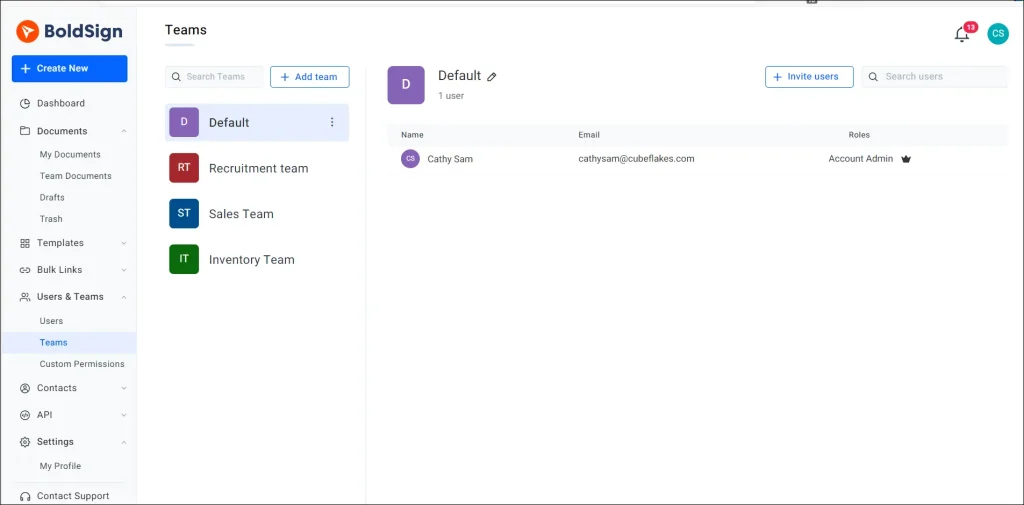
Admins invite colleagues from the Users page with the Invite Users button. An account admin can add people to any team, and a team admin can invite people to their own team.
You cannot invite someone who already belongs to another organization. Our help article on how to invite new users to a team lists each step.
Teams and the Business Profile
Teams group people who send the same kind of work, such as sales or HR. The account admin creates, renames, deletes and searches for teams across the organization. A team admin manages only their own team.
The Business Profile holds settings for the whole organization, and only account admins can open it. Here an admin decides which emails signers and CC recipients get for documents your organization sends.
Which BoldSign plan do you need to get started?
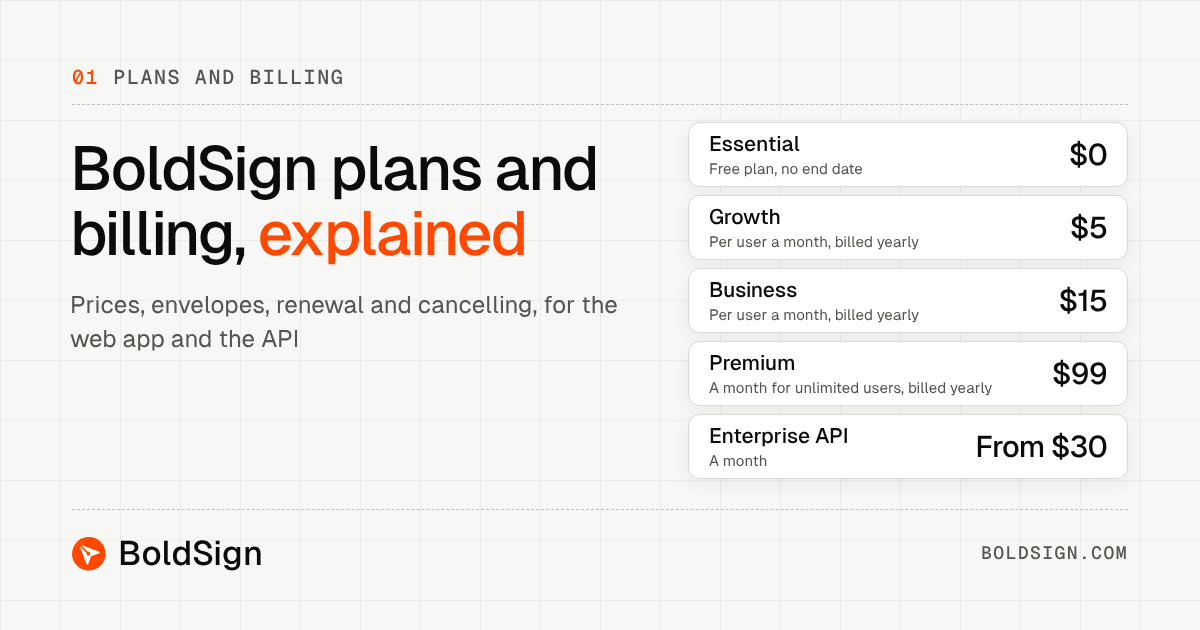
You can start free and move up when you need more. The BoldSign pricing page listed these plans in November 2026, all billed yearly in USD.
The Essential plan is free for one user, with 25 envelopes a month, 2 templates and one brand. The Growth plan costs $5 per user a month and adds 10 templates and two brands.
The Business plan costs $15 per user a month. It adds bulk send, bulk links, SMS authentication, ID verification, team collaboration and unlimited templates and brands.
The Premium plan costs $99 a month for unlimited users who share 250 envelopes. You can test the paid features with a 30-day free trial.
Where do you go after your first document?
You now know enough to send, sign and track documents on your own. Pick the next step that fits you.
- Start a 30-day free trial and send your first document today.
- Book a demo to see BoldSign set up for your team’s documents.
- Visit our support portal when you get stuck on a step.
Frequently asked questions
Do signers need a BoldSign account to sign?
No. Signers open the link in the email we send them and sign in the browser. After signing, they see an offer to create an account, which an admin can turn off.
Can I sign up for BoldSign with Google or Microsoft?
Yes. On the sign-in page you can choose Google, Microsoft or Apple instead of a work email and password.
What file types can I send for eSignature in BoldSign?
You can upload PDF, Word, Excel and PowerPoint files, as well as images. PDF keeps the layout most reliably, so use it when you can.
Which e-signature platforms work well for small businesses needing reusable forms and signing reminders?
Look for one that saves a document as a reusable template and sends automatic reminders. BoldSign does both, and the free Essential plan includes 2 templates and automatic reminders.
Which e-signature platforms offer unlimited users instead of charging per seat?
BoldSign does with its Premium plan. It costs $99 a month, billed yearly, for unlimited users who share 250 envelopes a month.
What do e-signature tools with SMS verification do?
They text a one-time code to the signer's phone, and the signer types it in before the document opens. In BoldSign, SMS authentication is on the Business, Premium and Enterprise API plans.
What should I look for in e-signature platforms with custom branding?
Check that you can add your logo, colors and a sender name to emails and the signing page. Every BoldSign plan includes custom branding, and the number of brands grows with the plan.
How do I know when a document has been signed?
Open My Documents and look at the Status column. A document shows Completed once every recipient has signed.

Jeba Emerenshia
As a Product Manager in Syncfusion, Jeba is instrumental in providing assistance and guidance to users, ensuring they make the most out of BoldSign’s features and capabilities.She plays a pivotal role in developing comprehensive documentation and user-friendly content. Her commitment to quality and efficiency guarantees that users receive clear, helpful information, ensuring a seamless and informative experience with BoldSign. Connect with her on LinkedIn.
More posts by Jeba Emerenshia