How to Highlight Fault Locations in Service Reports Before Sign-Off
 Preethi Loganathan
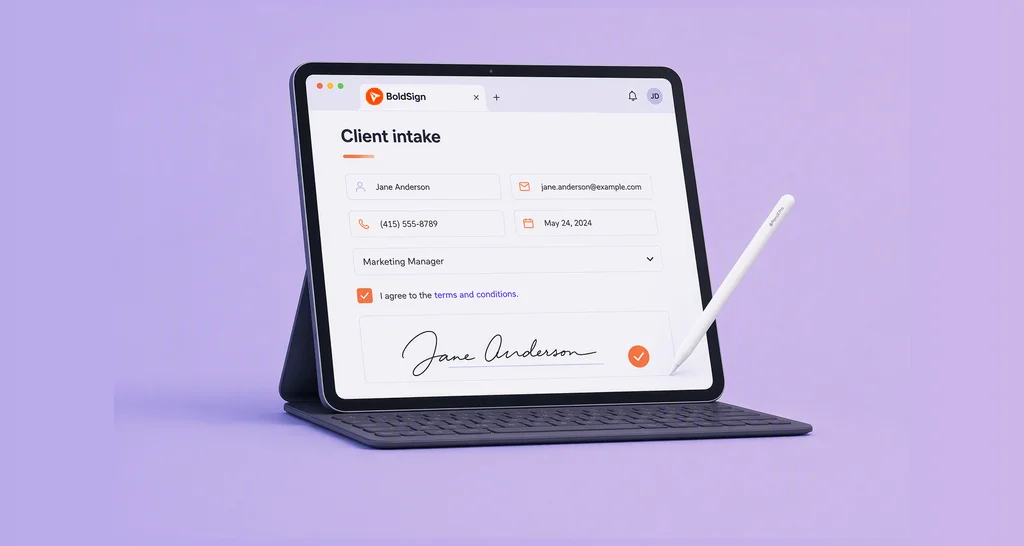
TL;DR: Add a drawing area over the equipment photo or diagram in your service report, and let the signer circle the fault before signing. Our Drawing Field does this inside the signing flow. The mark stays in the signed report, next to the signatures.
A technician finds a crack and writes “crack near pipe joint” on the service report. The note is clear to the technician on site. The customer reading it later sees three pipe joints in the photo and asks which one.
That one question can hold up the sign-off and the invoice behind it. This guide shows how to mark the fault on the report itself, so the reviewer sees the same spot the technician saw.
What does it mean to highlight a fault location in a service report?
Highlighting a fault location means drawing on the report to show where the problem is. A circle or arrow on a photo, diagram or floor plan does the job that words struggle with.
Think of a map with a pin in it. “Near the station” could mean several streets, but a pin points to one. A circle on an equipment photo works the same way for a fault.
The written note still matters. The mark shows where the fault is, and the note says what it is.
Why do text-only fault notes slow down sign-off?
Words like “left side” or “near the panel” mean different things to different people. Reviewers who were not on site have to ask, and the report waits for the answer.
A vague note can cause trouble at several points:
- The customer asks for more detail before signing.
- The manager calls the technician or asks for extra photos.
- Invoicing waits because the report is not complete.
- Months later, people disagree about what the report described.
A marked report lets the customer, the manager and the technician look at the same spot before anyone signs.
How does the BoldSign Drawing Field work?
The Drawing Field is an area you place on a document where the signer can draw. The signer opens it, marks the area and saves the drawing before signing.
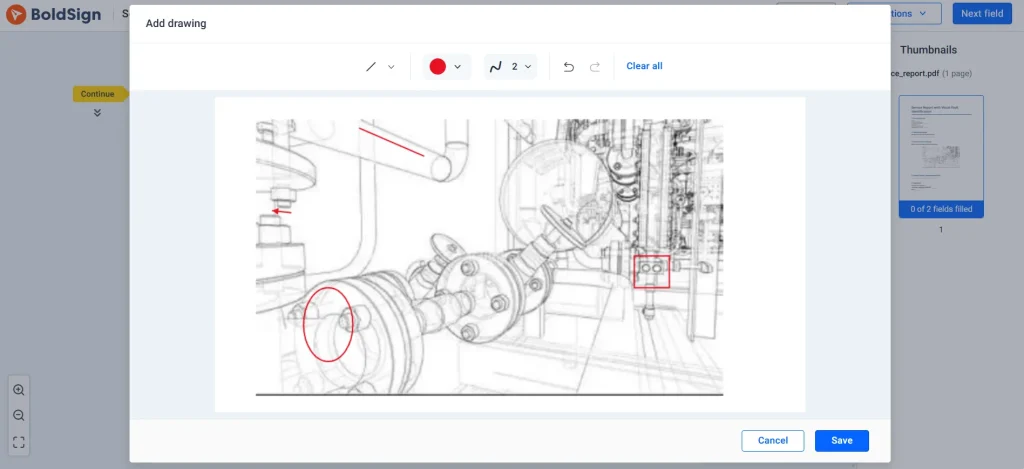
Our help article on the Drawing Field lists the tools the signer gets:
- Pencil for freehand marks, plus Circle, Line, Rectangle and Pointer (an arrow).
- A pen color, chosen from preset colors or a color picker.
- A stroke width from 1 to 20, set with a slider.
- Undo, Redo and Clear All. Clear All cannot be undone.
The field works with a mouse or with touch, so a technician can mark a fault on a tablet at the site.
How do you add a Drawing Field to a service report?
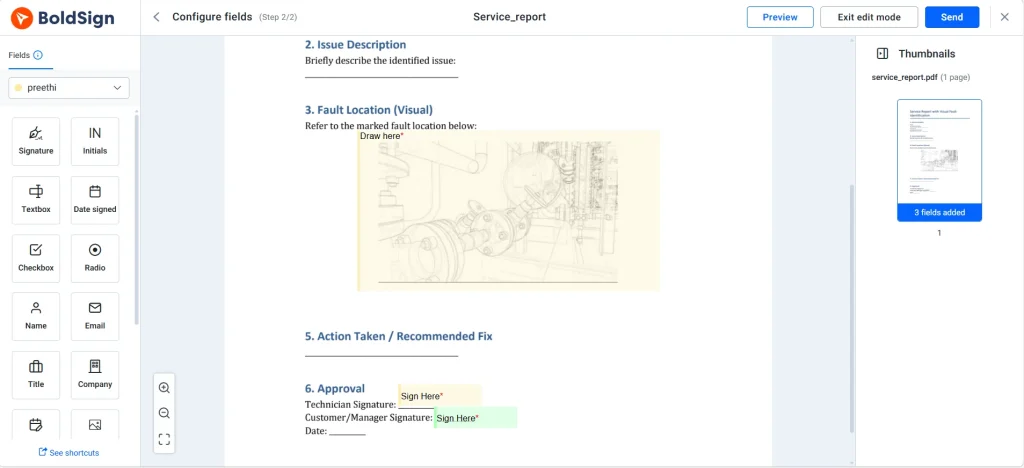
You add the Drawing Field while you prepare the document, the same way you add a signature field. Place it over the part of the report where the fault should be marked.
- Select Create New Document.
- Fill in the details on the prepare document page and select Next.
- On the configure fields page, find Drawing Field in the Fields panel.
- Drag it onto the equipment photo, diagram or floor plan, then resize it to cover that area.
- Add a text field next to it for a short written note, then select Send.
Add a short instruction near the field, such as “Circle the fault and add a note.” The signer then knows what the field is for.
How does the signer mark the fault before signing?
The signer opens the Drawing Field and sees a cropped view of that part of the report. They mark the fault there, then save and sign.
- Open the Drawing Field on the report.
- Pick a tool, such as Circle or Pointer, and a pen color that stands out on the photo.
- Mark the fault. Use Undo to remove a stray line.
- Select Save to keep the drawing, or Cancel to drop the changes.
- Type a short note in the text field and sign the report.
The saved drawing becomes part of the signed document. Anyone who opens the completed report later sees the mark next to the signatures.
What does a marked service report look like in practice?
A marked report shows the fault on the photo, so nobody has to guess. Picture a technician checking a heating, ventilation and air conditioning (HVAC) unit at an office.
The technician finds worn insulation on a wire near the wiring panel.
A text-only report would say “damage found near wiring panel.” The customer might ask where, and the manager might ask for another photo.
The technician circles the worn wire in a Drawing Field over the unit’s photo. The note beside it reads “damaged insulation near wiring panel.” The customer and the manager see the circle and sign the same document.
How do you keep fault markings clear?
Keep each mark small and simple, and pair it with a short note. A few clear marks are easier to read than a page covered in lines.
- Use a circle or arrow for each fault, and skip shading large areas.
- Choose a pen color that contrasts with the photo, such as red on a grey unit.
- Make the field large enough to mark detail, but cover only the area that matters.
- Write one short note per mark, such as “loose wiring behind panel.”
Before you send, check that a reviewer can tell where the fault is, what it is and what they are approving. When any of those is unclear, fix it before the report goes out.
Which teams mark fault locations on service reports?
Any team whose reports include a photo, diagram or layout can use a Drawing Field. The fault changes from one trade to the next, but the method stays the same.
- Field service teams circle worn parts or loose wiring before the customer signs.
- Construction and facilities teams mark punch list items on a floor plan.
- Utility and telecom crews point to damaged cables or meters for remote review.
- Quality teams mark product defects before corrective action starts.
Our construction eSignature page covers more site documents. Our guides show other uses of the same field: marking car dents in a vehicle inspection form and showing accident damage on claim forms. Property managers can read about marking up a property inspection report.
How do you start marking fault locations in your own reports?
Try the Drawing Field on one of your current service report forms. Pick the next step that suits your team.
- Start a 30-day free trial and add a Drawing Field to your service report.
- Book a demo to see a marked service report set up for your team.
- Read how we handle package damage on proof of delivery forms, or ask our support team a question.
Frequently asked questions
What is a Drawing Field in an eSignature document?
A Drawing Field is a set area on a document where the signer can draw. In BoldSign, the signer marks that area with a pencil, circles, lines, rectangles or arrows before signing.
How can technicians mark fault locations in service reports?
Place a Drawing Field over the equipment photo or diagram in the report. The technician or customer then circles the fault or points an arrow at it and signs.
Why is visual fault marking important in service reports?
A mark shows the reviewer the exact spot that a written note can only describe. The reviewer needs fewer calls and extra photos before signing.
Can signed service reports include drawings or annotations?
Yes. Marks saved in a Drawing Field become part of the signed document. The completed report shows the fault in the same file as the signatures.
Which drawing tools can a signer use in BoldSign?
The signer can draw freehand with the pencil or add a circle, line, rectangle or pointer arrow. They can also pick a pen color and a stroke width from 1 to 20.
Can a signer undo a mark in the Drawing Field?
Yes. Undo and Redo step back and forward through recent changes. Clear All removes the whole drawing at once and cannot be undone.
Does the Drawing Field work on a tablet?
Yes. The field takes touch input as well as a mouse. A technician can mark a fault on a tablet while still standing next to the equipment.
Should I add a written note next to the drawing?
Yes. The mark shows where the fault is, and a short note says what it is. A note such as "cracked pipe joint" helps a reader who was not on site.

Preethi Loganathan
Preethi is a Digital Marketing Executive at BoldSign who develops precise, research-driven content on eSignatures, compliance, and digital signing workflows. She works closely with product and engineering teams to ensure every article is accurate, validated, and aligned with industry best practices. Connect with her on LinkedIn.
More posts by Preethi Loganathan