How to Choose a Signer Authentication Method in BoldSign
 Rayronald Ochola Otieno
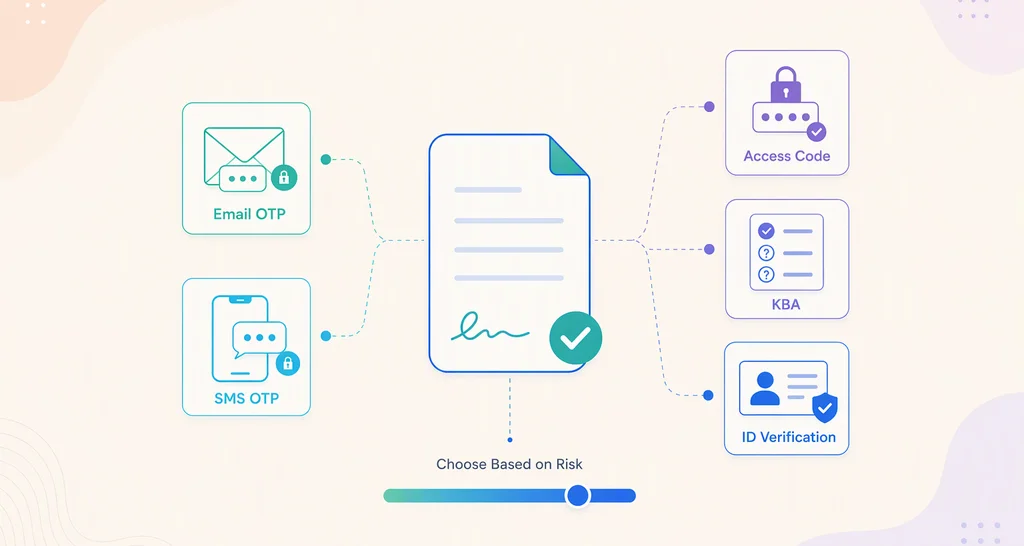
TL;DR: Pick the lightest signer check that still fits the risk of the document. Use email codes for routine forms and SMS codes or access codes for external agreements. Save knowledge-based authentication (KBA) or ID verification for high-value or regulated documents. Our signer authentication page shows all five checks.
You send three documents on the same day: a leave request, a vendor contract and a loan agreement. A check that suits the loan would slow the leave request for no reason. A check that suits the leave request would leave the loan open to anyone holding the link.
This guide helps you choose a check for each document in the BoldSign web app. For a full tour of every method, read our guide to signer authentication methods. Developers can read how to require signer authentication through the API.
What is signer authentication?
Signer authentication is a check the signer passes before the document opens. The check shows that the person holding the signing link is the person you meant to sign.
Think of a hotel front desk. A guest picking up a spare towel just gives a room number, but a guest checking in shows a photo ID. Signer checks work the same way, with a light check for small requests and a strong one for big ones.
What problem does signer authentication solve?
Without a check, anyone who opens the signing link can see the document. That link can travel in ways you do not plan for.
- The signer forwards the email to a colleague.
- Several people share the inbox the link went to.
- Someone else gets into the signer’s email account.
- The signer later says, “It was not me.”
A check before the document opens closes each of those gaps. The audit trail then records each check with a time stamp.
Which authentication methods can you choose from in BoldSign?
We offer five checks: three one-time or shared codes, a knowledge check and an ID check. The codes show the signer can open an inbox, receive a text or knows a shared code.
The knowledge check and the ID check confirm who the person is.
Email one-time passcode (OTP) for routine documents
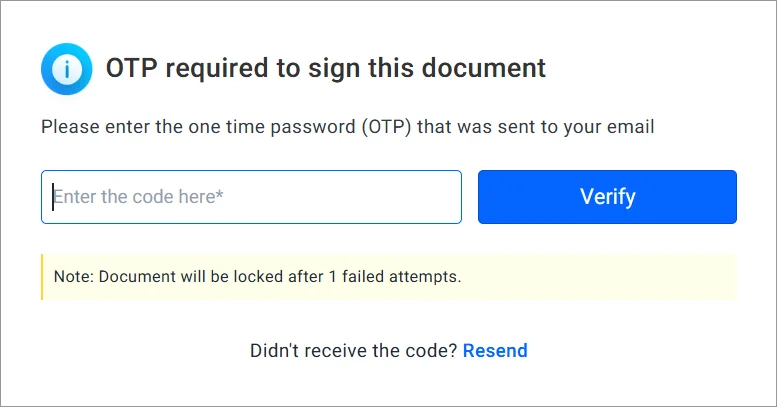
Email OTP proves the signer controls the email address you entered. We email a code, and the document opens once they type it in.
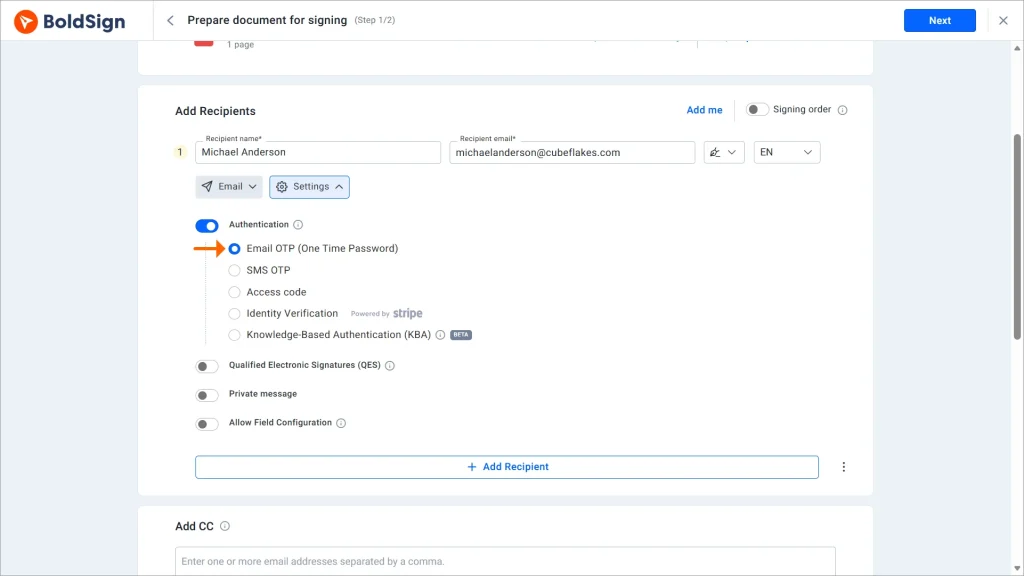
Choose email OTP for internal approvals, policy sign-offs and routine forms sent to people you know. The code adds a few seconds for the signer, and a forwarded link alone no longer opens the document.
SMS OTP for external agreements
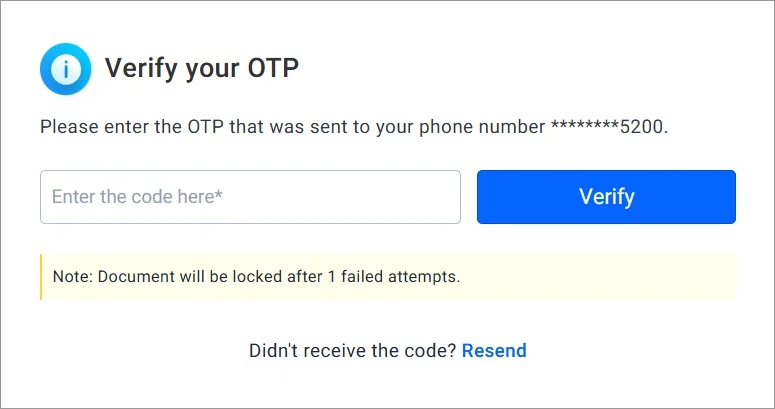
SMS OTP texts the code to the signer’s mobile number. Someone who reaches the inbox that holds the link also needs the phone to open the document.
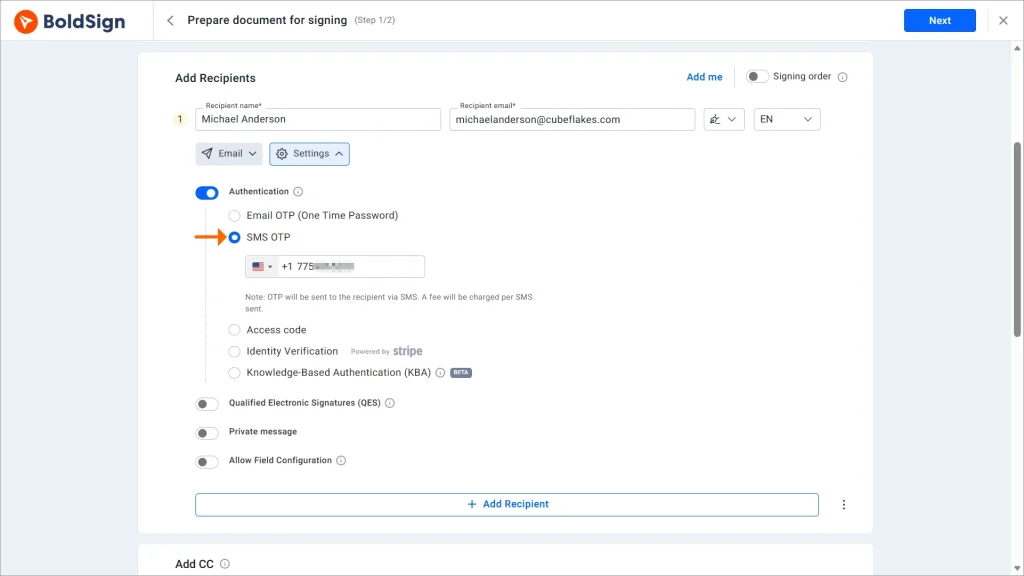
Choose SMS OTP for customer contracts and other agreements with people outside your company. Our help article on how to add SMS authentication to a signer shows each screen.
Access code when you already talk to the signer
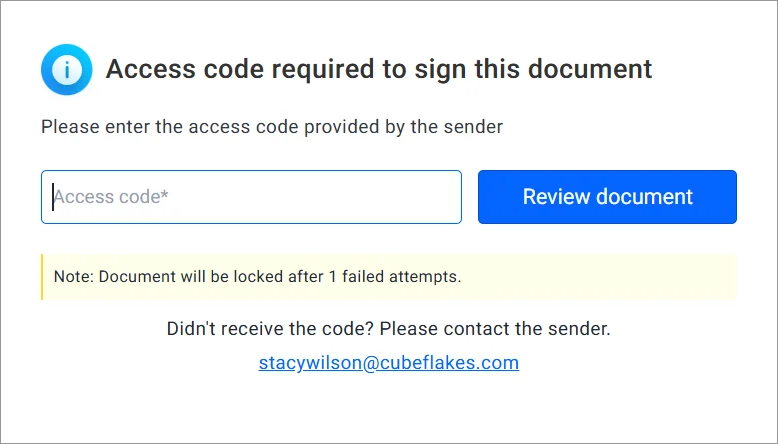
An access code is a code you create and give to the signer outside BoldSign, for example on a phone call. The document opens only after they type it in.
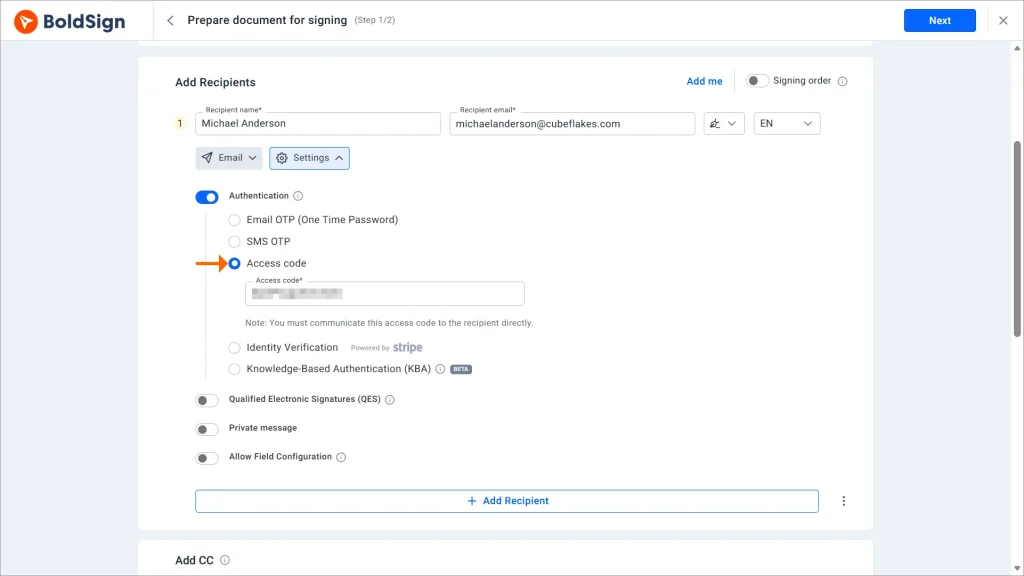
Choose an access code when you speak to the signer anyway, or when the signer has trouble getting emails or texts. Never send the code in the same email as the link. You can change an access code after sending.
KBA for US signers on sensitive documents
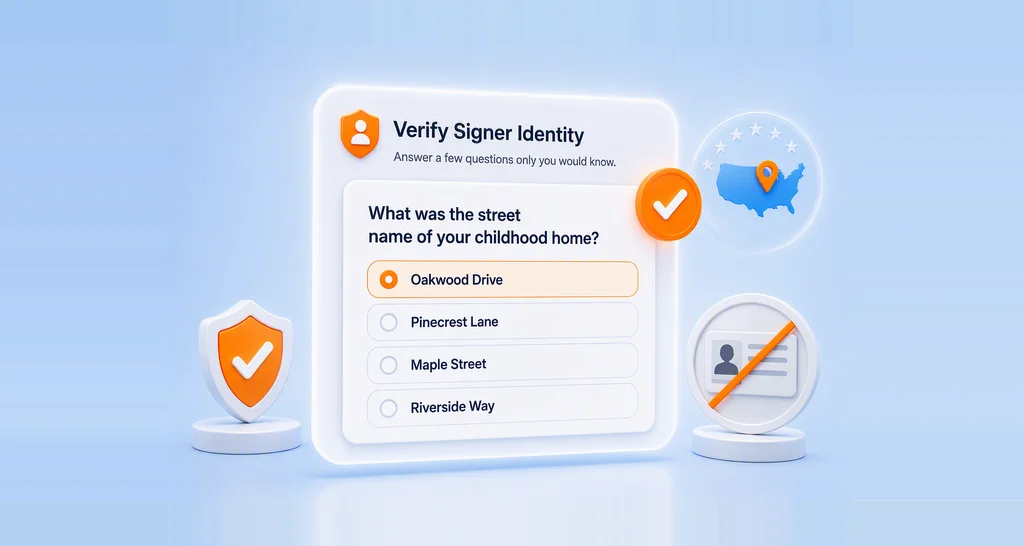
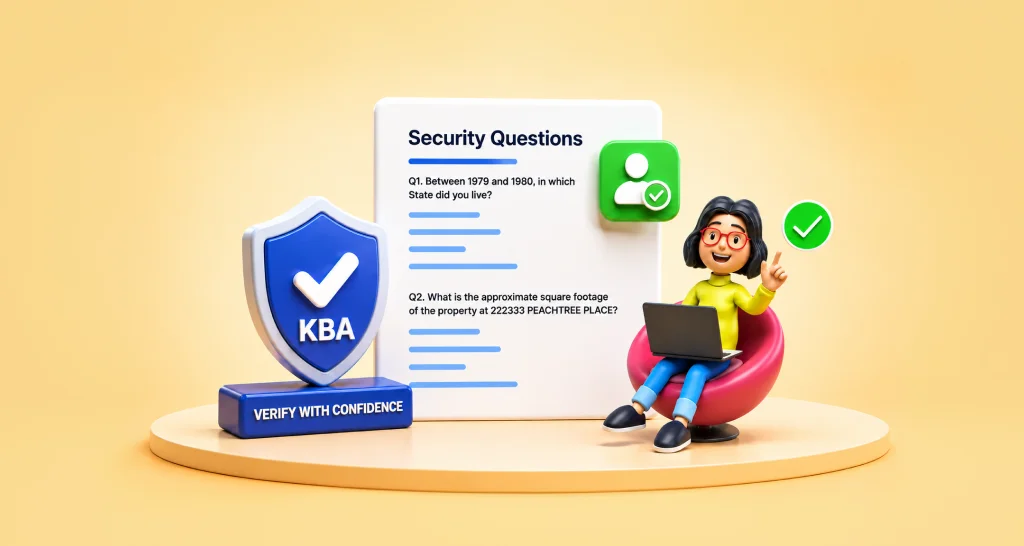
KBA checks who the signer is without an ID upload. The signer enters their legal name, address and the last four digits of their Social Security number, then answers questions drawn from public records.
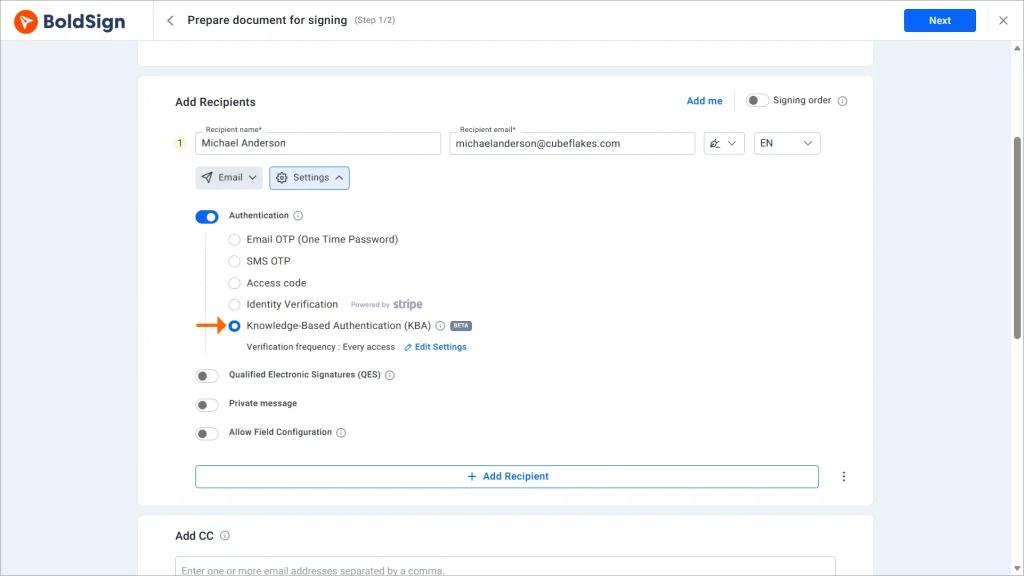
Choose KBA for financial, insurance or HR documents sent to US signers, especially those who would rather not upload an ID. Enter the signer’s legal name exactly, since KBA checks it. Our knowledge-based authentication page covers the full flow.
ID verification for the highest-risk documents
ID verification matches a government ID to the signer’s face. The signer photographs a passport or driver’s license and takes a live selfie, and we match the two through Stripe Identity.
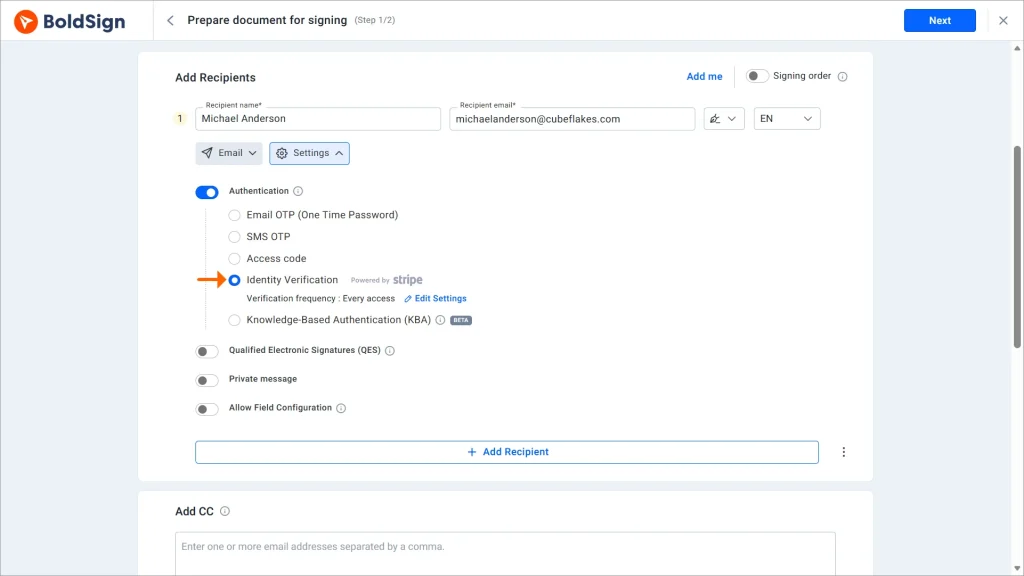
Choose ID verification for high-value deals, regulated documents and signers outside the US who need a strong check. It takes the signer longer than a code. Our signer identity verification page lists its settings.
Which authentication method fits which document?
Start from what a wrong signer would cost you, then pick the lightest check that covers that risk. This table gives a starting point for common documents.
| Document | Example | Suggested check |
|---|---|---|
| Internal, low risk | Leave request, policy sign-off | Email OTP |
| Routine, known signer | Renewal, order form | Email OTP or access code |
| External agreement | Customer contract, vendor NDA | SMS OTP |
| Sensitive, US signer | Loan, insurance or HR form | KBA |
| High value or regulated | Large deal, signer abroad | ID verification |
You set the check for each signer, so one document can mix them. A client can get an email code while a guarantor on the same loan gets KBA.
How do you weigh security against signer effort?
Each stronger check gives more proof but asks more of the signer. Too much effort on a routine form can slow it down, while too little on a loan leaves it exposed.
| Method | What it proves | Signer effort |
|---|---|---|
| Email OTP | Control of the inbox | Low |
| Access code | They got your separate message | Low |
| SMS OTP | Control of the phone | Low to medium |
| KBA | Knowledge of their public records | Medium |
| ID verification | Their face matches a government ID | Higher |
Code methods prove access, not identity. Move up to KBA or ID verification only when you need to know who the person is.
How do you add authentication to a signer in the web app?
Turn on authentication for the signer while you prepare the document. Our help article on how to add authentication to a signer shows the same steps.
- Select Create New, then Create New Document, and upload your file.
- Enter the recipient’s name and email address.
- Open the Show settings dropdown below the recipient and turn on Authentication.
- Choose the check, then add what it asks for, such as a phone number or access code.
- Add the signature fields and send the document.
The signer passes the check when they open the link, and only then sees the document. You can also add a check to a signer after the document is sent.
What should you watch out for when you choose a method?
Each method has limits that can stop a signer at the wrong moment. Check these before your first send.
- Email and SMS codes last 10 minutes, and three resends lock the Resend button for 30 minutes.
- SMS OTP works for mobile numbers in 26 supported countries.
- An access code locks the document after three failed tries.
- KBA allows one to three attempts, and the document locks after the last failed one.
- ID verification cannot read ID details in some scripts, such as Arabic, Chinese or Greek.
A locked document stays locked for that signer until you reset or remove the check. Our signer authentication page lists every script ID verification cannot read.
Which BoldSign plan do you need, and what does each check cost?
Email OTP and access codes come with every plan, including the free Essential plan. SMS OTP, KBA and ID verification start on the Business plan, at $15 per user a month billed yearly.
Each use of those three costs extra, as listed on our pricing page in November 2026. An SMS code costs $0.20, and the rate varies by the recipient’s country. A KBA attempt costs $1.50 and an ID verification attempt costs $2, pass or fail.
The Premium plan, at $99 a month for unlimited users billed yearly, includes the same three checks. The Growth plan, at $5 per user a month, includes email OTP and access codes.
Developers who send live documents through the API need the Enterprise API plan, from $30 a month with 40 envelopes. Prices are in USD.
Where do you go next with signer authentication?
Map your documents by risk, then try each check on a test document before you send it to clients.
- Start a 30-day free trial and send yourself a document with an email code.
- Read our guide to signer authentication methods for each check in more detail.
- Book a demo to plan a check for each of your document types.
Frequently asked questions
Which signer authentication method should I use for routine documents?
Use email OTP for routine, low-risk documents such as internal approvals. The signer types a code from their inbox, which adds little effort and stops a forwarded link from opening the document.
When is an access code a good choice?
Choose an access code when you already talk to the signer by phone or in person. You create the code and pass it on yourself, so it does not depend on email or text delivery.
Is SMS OTP safer than email OTP?
SMS OTP adds a second channel, since the code goes to a phone instead of the inbox that holds the link. Someone with access to the inbox alone cannot open the document.
What is the difference between KBA and ID verification?
KBA asks a US signer questions drawn from public records, with no ID upload. ID verification matches a photo of a passport or driver's license to a live selfie.
Can signers outside the US use KBA?
No, KBA works only for signers based in the US. Use ID verification for signers in other countries.
Can each signer on one document get a different check?
Yes. You set authentication for each signer, so a client can get an email code while a guarantor on the same document gets KBA.
Does signer authentication make an eSignature legally binding?
Yes, when the signature already meets the usual rules for electronic signatures, such as the signer agreeing to sign electronically. Authentication adds evidence of who signed. That evidence helps in a dispute.
How much do SMS codes, KBA and ID checks cost in BoldSign?
Each use is charged on top of a Business or higher plan: $0.20 per SMS, $1.50 per KBA attempt and $2 per ID verification attempt. Email OTP and access codes cost nothing extra.

Rayronald Ochola Otieno
Rayronald Ochola Otieno is a content specialist at BoldSign, specializing in video content and help articles within the eSignature domain. As a blog author, he creates well-researched, insightful content that simplifies complex eSignature topics like digital signatures, compliance, and workflow automation for businesses and professionals. With expertise in creating educational videos and articles, Ray helps users understand and adopt secure, efficient signing solutions. Beyond writing and video creation, Ray enjoys exploring new technologies, reading about the latest industry trends, and continually refining his skills.
More posts by Rayronald Ochola Otieno